
The Nissan Z has been a legendary sports car from its introduction in 1969 as a Datsun 240Z. The 240 designation stood for the 2400cc, 150 horsepower engine that was installed. The distinguishing feature of the Z-car is the beautiful GT styling the car has always had and the main selling feature was the car’s low $3,526 price tag. The car also featured fantastic performance and agile handling so racers were quick to respond, and in 1970 Brock Racing captured the SCCA C-Production national championship. In the ‘70s Nissan couldn’t build the cars fast enough to keep up with the demand. Many people wanted them for fun transportation while others wanted to turn them into weekend warriors on the track and at SCCA events.
Similar to many of the cars being built in the ‘70s, the government’s emissions interference started to lower the Z-car’s performance, so the company increased the engine size to 2600cc as the 260Z and in 1975 to 2800cc as the 280Z and on that engine the carburetors were replaced with fuel injection. Throughout this time period the Z remained one of the top SCCA racers. Over the years the Z-car remained a good seller and a competent racer but sports car sales started going down when the truck and SUV market started to expand. When you combine that with the extremely high price of the Z-car in the ‘90s, the sales dropped to around 6,000 cars in 1994 even though the Z-car was a fantastic performer and a very nice looking car. Nissan stopped building the Z-car f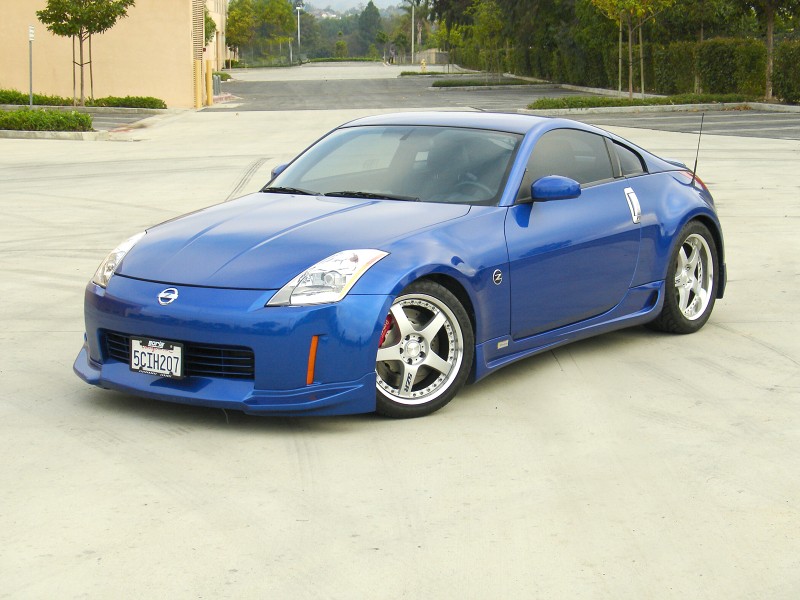 or a few years and management realized the problem was the car went from a nice low priced sports car to a very expensive one.
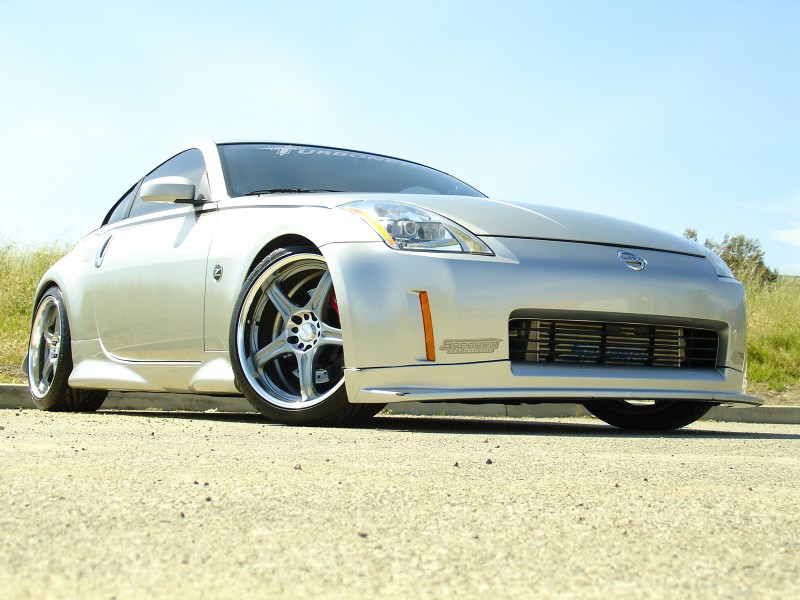
In 2002 the 350Z returned using some of the basic ideas that made the car a good seller in the ‘70s. The price was affordable by today’s standards and the car could be ordered in five configurations: (Base, Enthusiast, Performance, Touring, and Track). A 3500cc engine that develops 287 horsepower powers the current Z and it features a six-speed manual transmission or a five-speed automatic. The car is lighter and more agile than previous Z-cars, and it features fantastic styling and a comfortable interior.
The owner of the 350Z we are working on drives the car for daily transportation, but he also likes to drive it on the track on weekends, so he quickly realized the car needed racing quality brakes. The owner contacted Wilwood Engineering and ordered part number 140-9192 front brakes and 140-9507 rear brakes along with 220-9196 front Flexlines and 220-9197 rear Flexlines. The six-piston front brakes and four-piston rear brakes are a huge improvement over the standard OEM brakes and the Wilwood brakes will certainly work better when the car is driven on the track.
Tony Porto the Wilwood R&D technician did the installation at the company’s R&D facility in Camarillo, California. Wilwood recommends persons experienced in the installation and proper operation of disc brake systems should only perform the installation of this kit. A hobby builder can install this kit if he has good mechanical knowledge and ability, car building experience and a good assortment of tools. You will need a floor jack and jack stands, metric wrenches and sockets, an impact gun, and an inch-pound and foot-pound torque wrench. Other things needed are a bottle of Loctite 271, Teflon tape, and Wilwood Hi-Temp 570 Racing Brake Fluid or Wilwood EXP 600 Plus Super Hi-Temp Racing Brake Fluid. Follow along as Tony does this installation to see if it is something you are capable of doing or if it would be better to have a professional install the kit for you.

The front brake kit for the Nissan 350Z comes in two configurations. This part number 140-9190 kit features the Superlite 6R calipers, caliper brackets, BP-10 Smart Pads, the 13.06-inch rotors and all of the hardware required to complete the installation.
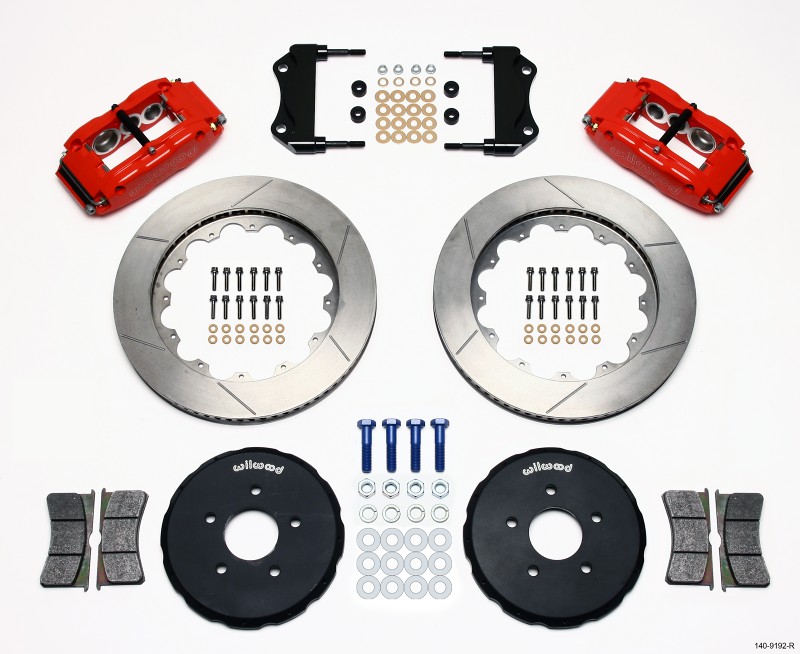
The kit that was selected for this car is the Wilwood part number 140-9192 front brake kit that features the Superlite 6R calipers, caliper brackets, BP-10 Smart Pads, the 14-inch rotors and all of the hardware required to complete the installation. OPTIONAL: The part number 140-9507 rear brake kit features DynaPro calipers, caliper brackets, BP-10 Smart Pads, 12.90-inch rotors, and all of the hardware required to complete the installation. This kit works with the Z-car’s internal parking brake system.

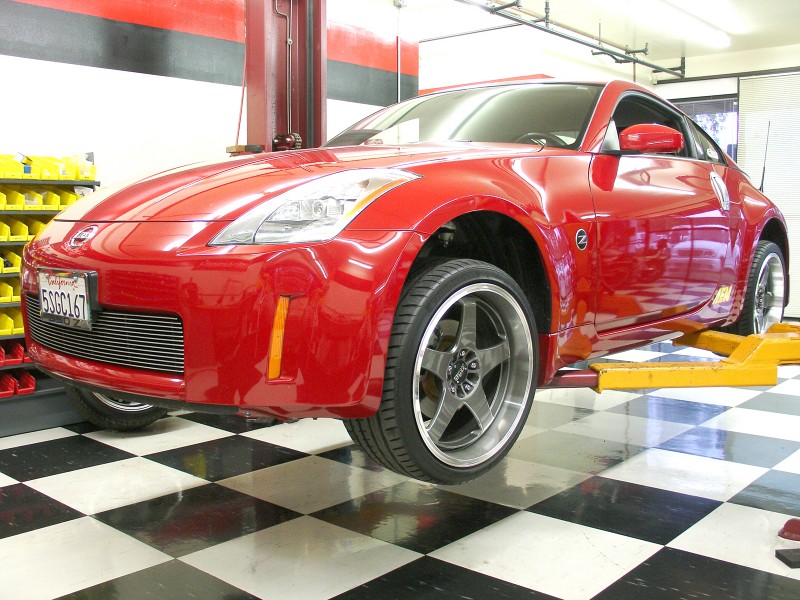
The Z-car was elevated on a lift so that the wheels and tires could be removed. The wheels on the car have large windows so it is very easy to see the brake system. This Wilwood brake upgrade will not only provide better stopping power, it will also improve the appearance of this car.
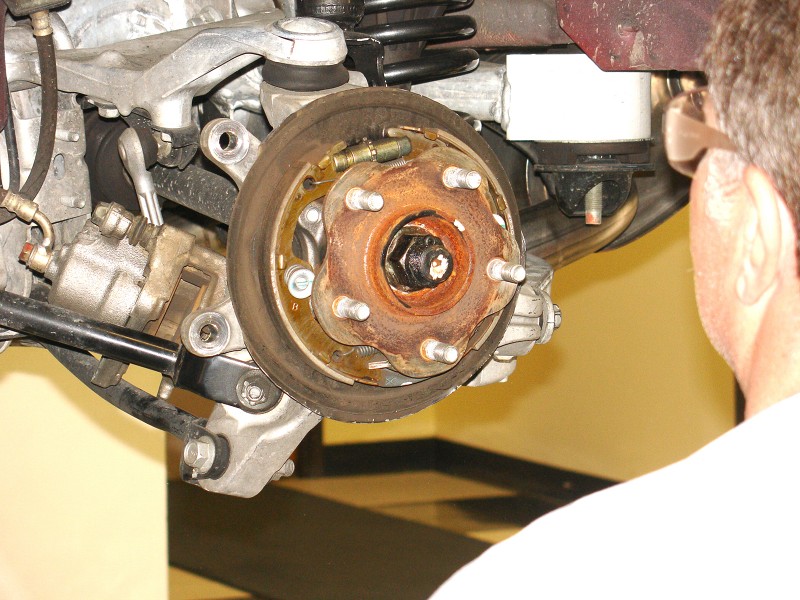
The Z-car was elevated to a comfortable working height followed by the removal of front wheels. The elevation of the car could also be done using a floor jack and jack stands.
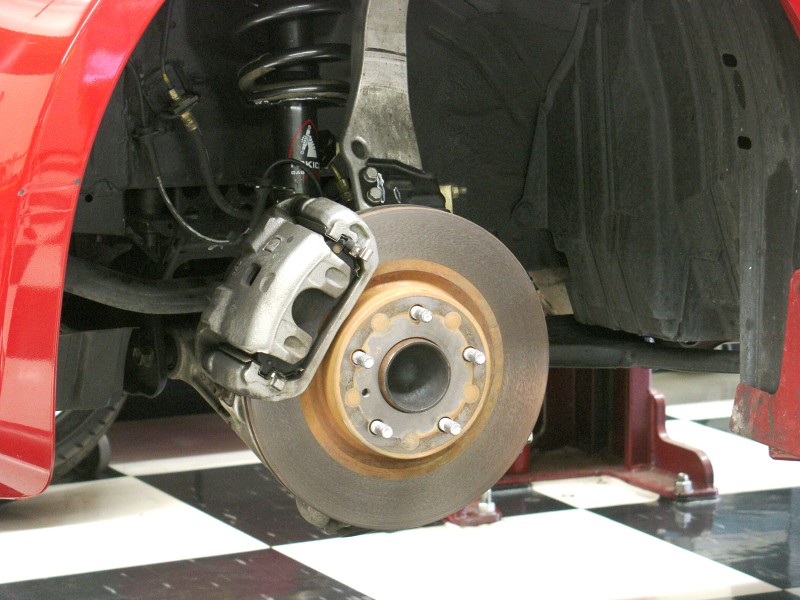
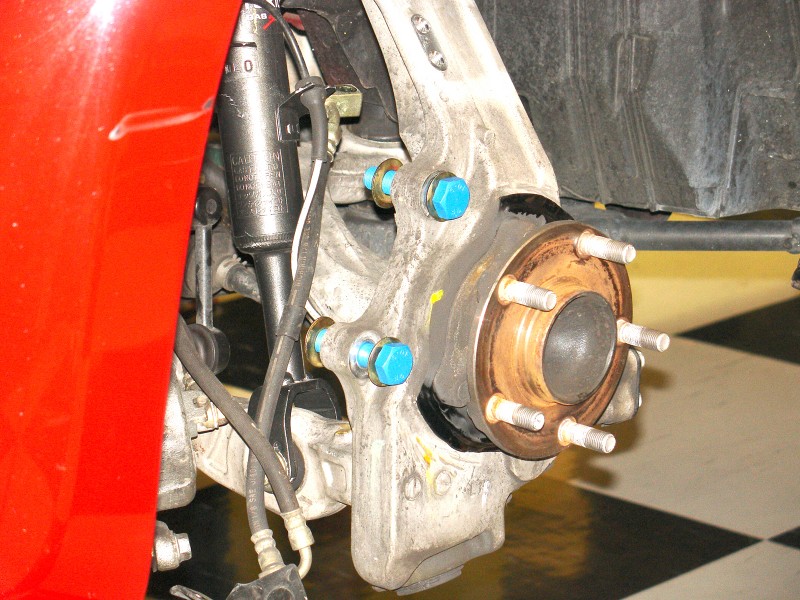
The wheels were removed revealing the original brake system. You can also see the sophisticated front suspension system that features an aluminum upright and hub assembly.

Using a socket wrench and the appropriate size socket, the caliper bolts were disconnected and the caliper was removed.
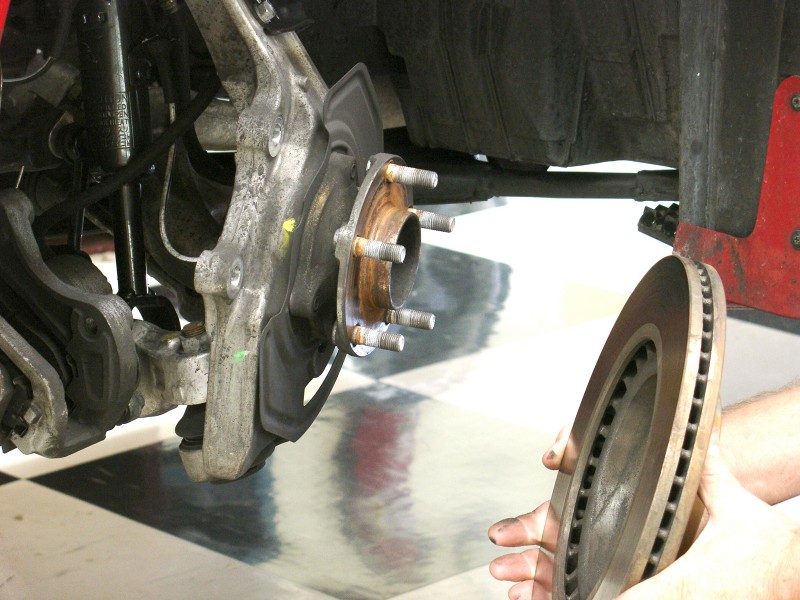
After the caliper was removed, the rotor was pulled off of the hub assembly as seen here.
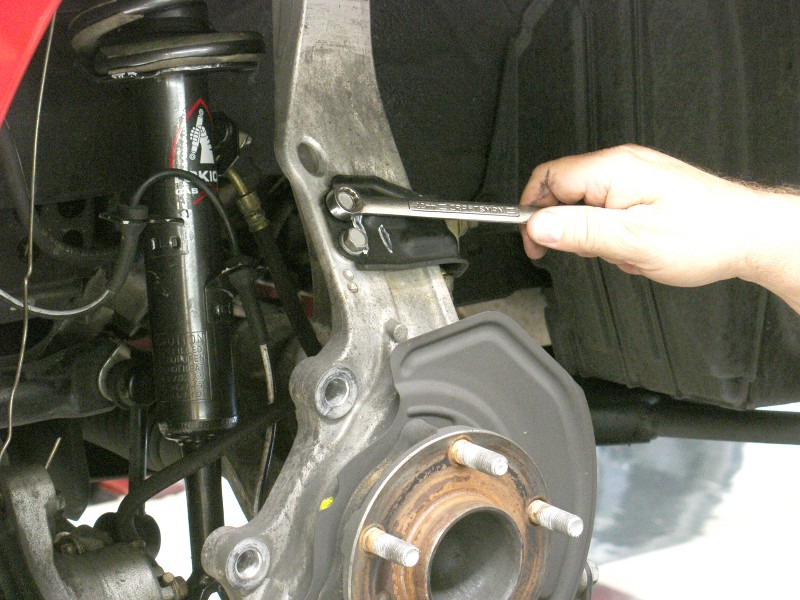
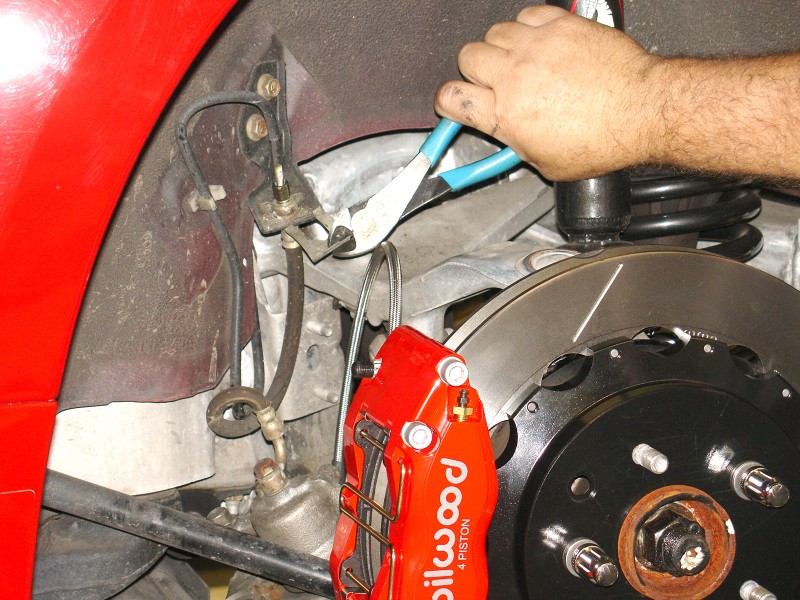
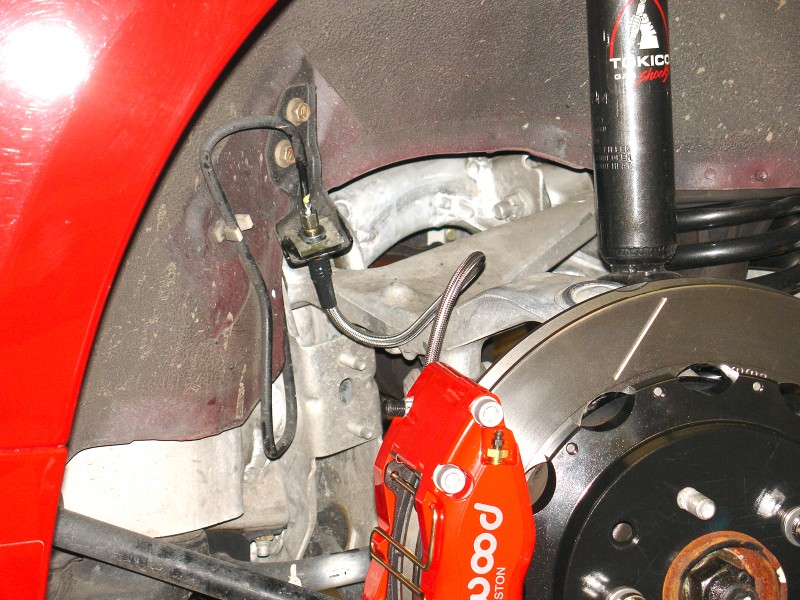
Using a small box-end wrench the two bolts that secure the hose bracket to the upright were disconnected and the bracket was removed.

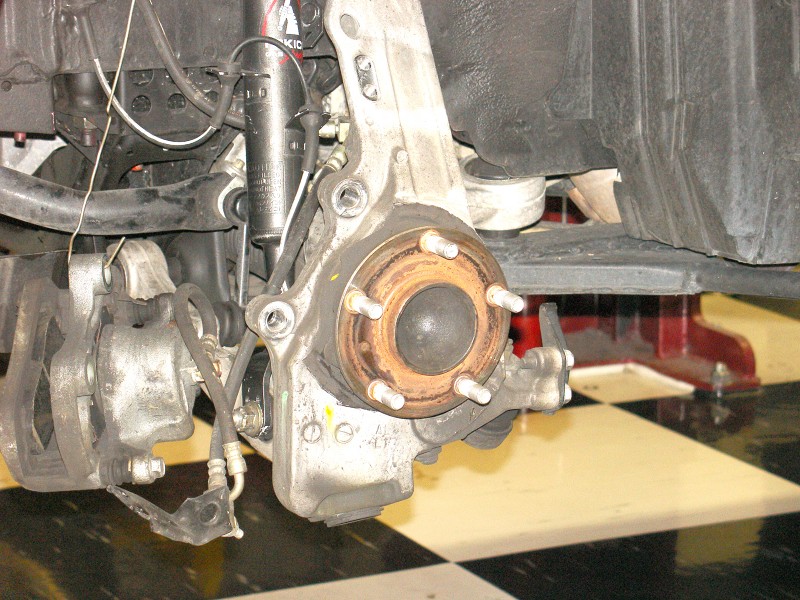
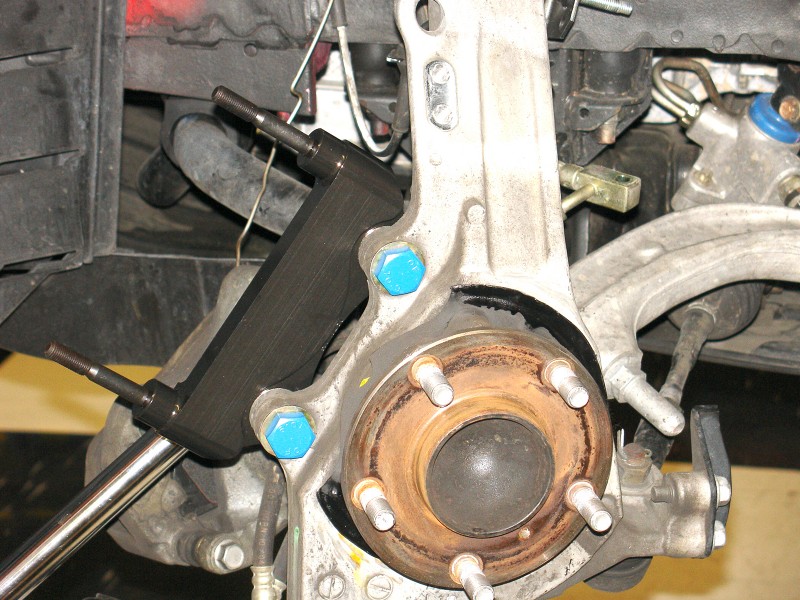
The dust shield will have to be removed, so the easy way to do it was to cut it off with hand shears. This photo also reveals the two caliper mounting ears that will be used to mount the Wilwood caliper bracket.
The dust shield was removed but it was still a little rough around the edges. Some of the dust shield edges can be smoothed out with a small hand sander.

There are some edge areas that can’t be reached with a small hand sander so here Tony is smoothing out one of the areas with a hand file.
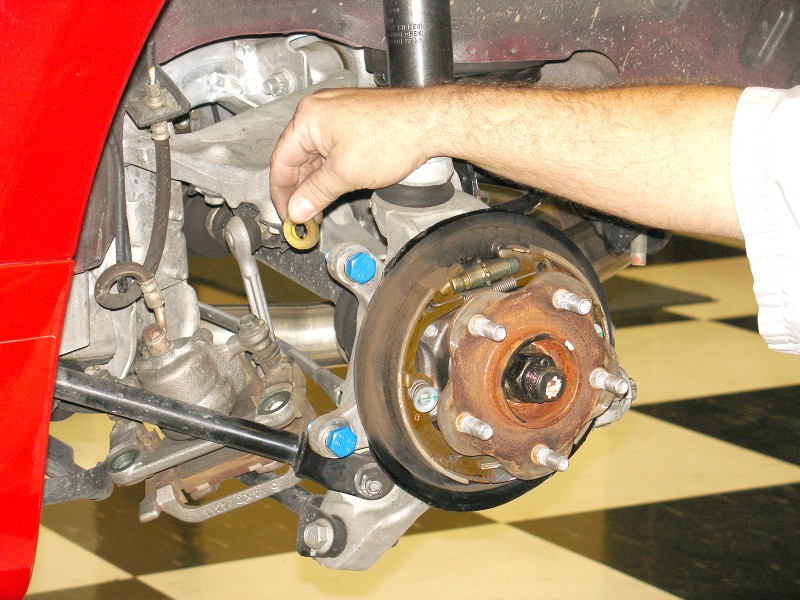
Two of the bolts in the kit were installed though the original caliper mounting holes. There is a lock washer and flat washer directly under the head of the bolt and a washer between the caliper and the mounting ears
Here is the bracket after it was bolted in place. The bracket should be tight, but some shims may be needed to center the caliper over the rotor.

The black hat was connected to the rotor using the small bolts in the kit. The hat to caliper bolts should be coated with Loctite 271 and then they should be tightened in an alternating sequence to 85 in-lbs using an inch-pound torque wrench. After the rotor was assembled, it was attached to the hub and was secured with two lug nuts and washers.

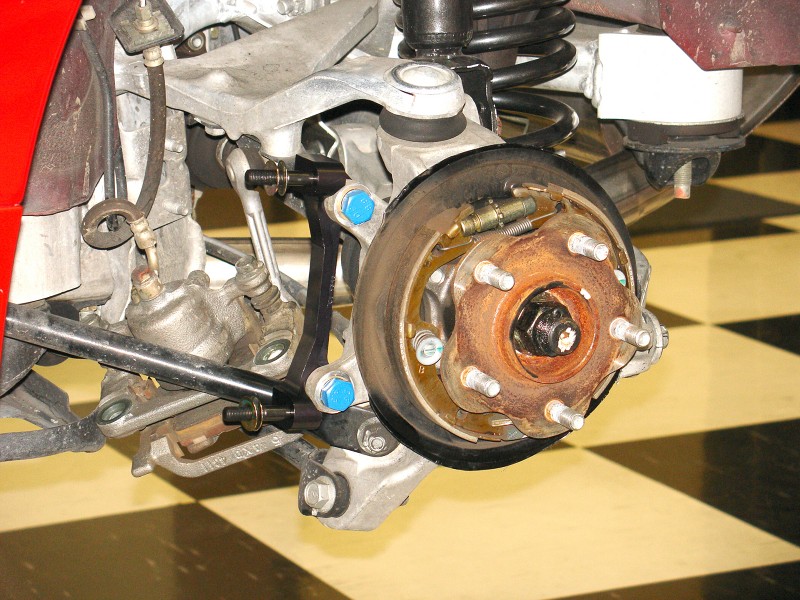
Since this car is using the large 14-inch rotors, the caliper brackets are used with washers and spacers as seen in this photo.
The large Superlite 6R six-piston caliper was mounted on the caliper bracket mounting studs.
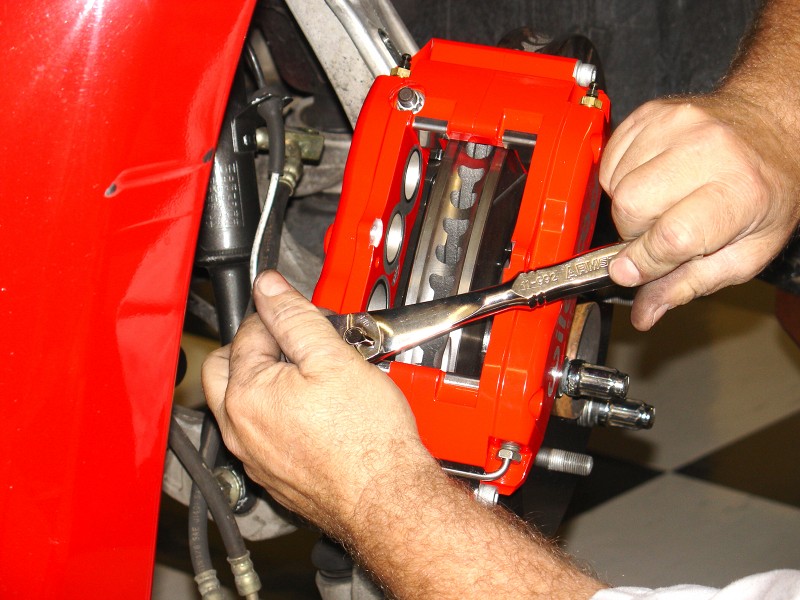
The caliper was secured to the caliper bracket using the washers and self-locking nuts in the kit. The caliper to rotor centering had to be done and then the nuts were tightened to 35 ft-lbs using a torque wrench.

The BP-10 Smart Pads were installed and here you can see the caliper in perfect alignment with the rotor. The radius of the pads should also match the radius of the rotors.
The part number 220-9196 Flexline was hooked to the caliper and then it was routed to the original hard line. It is important to run the line so it doesn’t interfere with any moving parts.

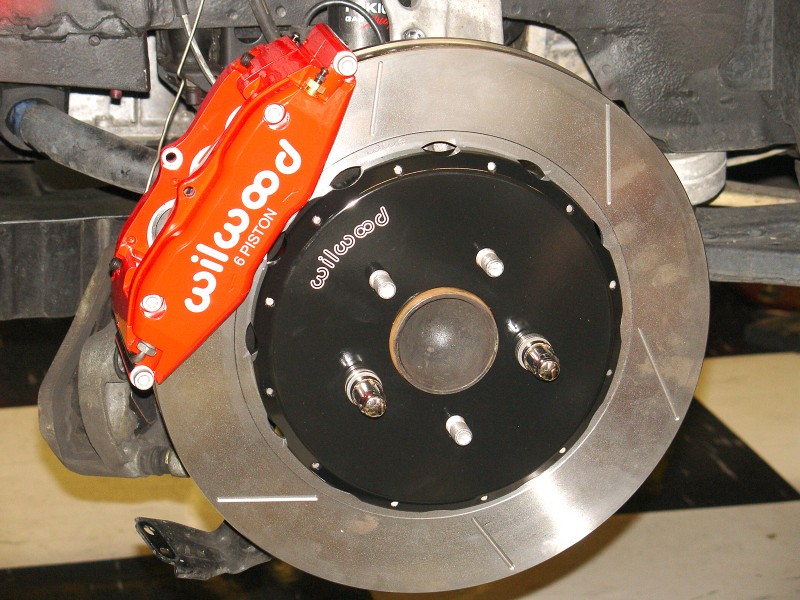
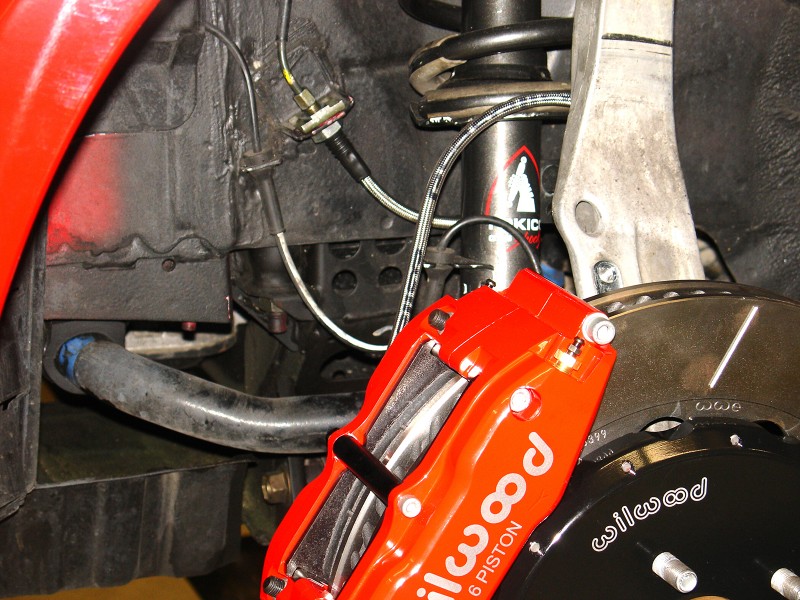
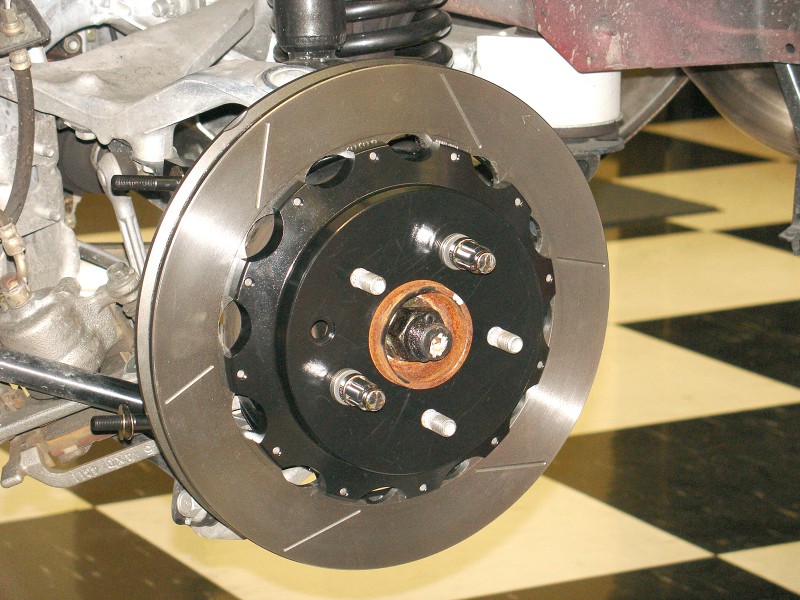
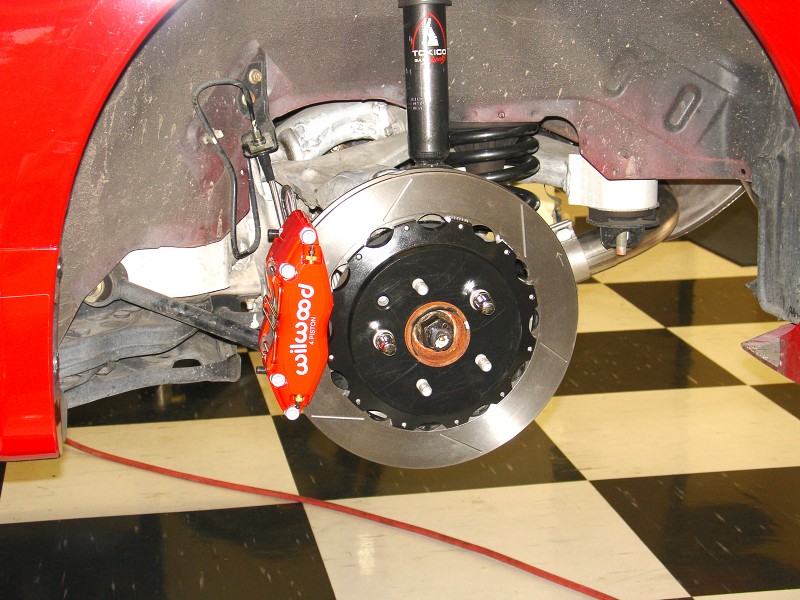
Here is the front brake finished and ready for the installation of the wheels. The large red calipers will look nice and will match the color of the car body
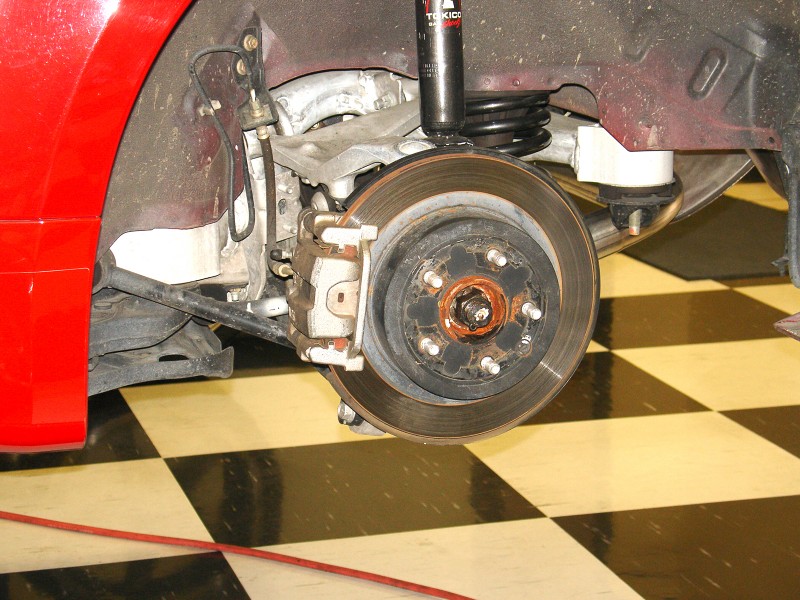
The front wheels and tires were reinstalled and the rear tires and wheels were removed. Here is the original rear brake system.
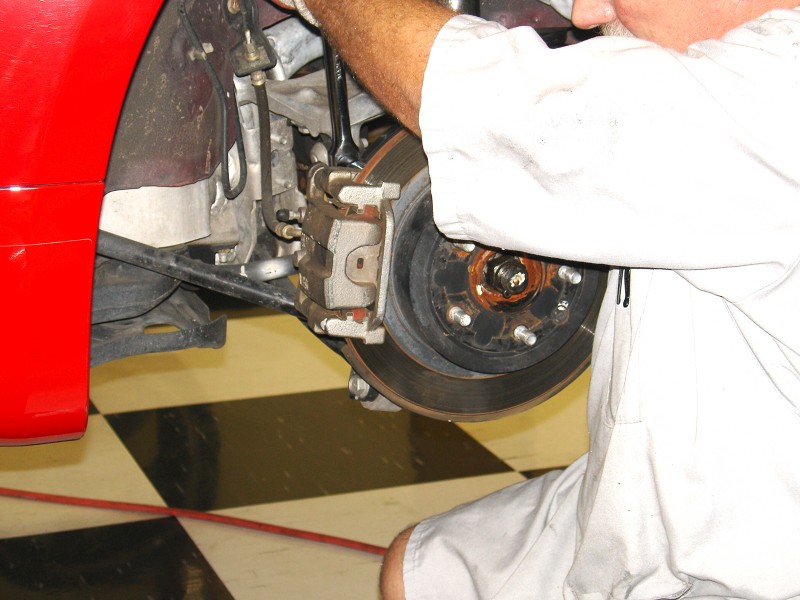
Using a socket wrench and the appropriate size socket, the caliper mounting bolts were disconnected and then the caliper was removed from the car.

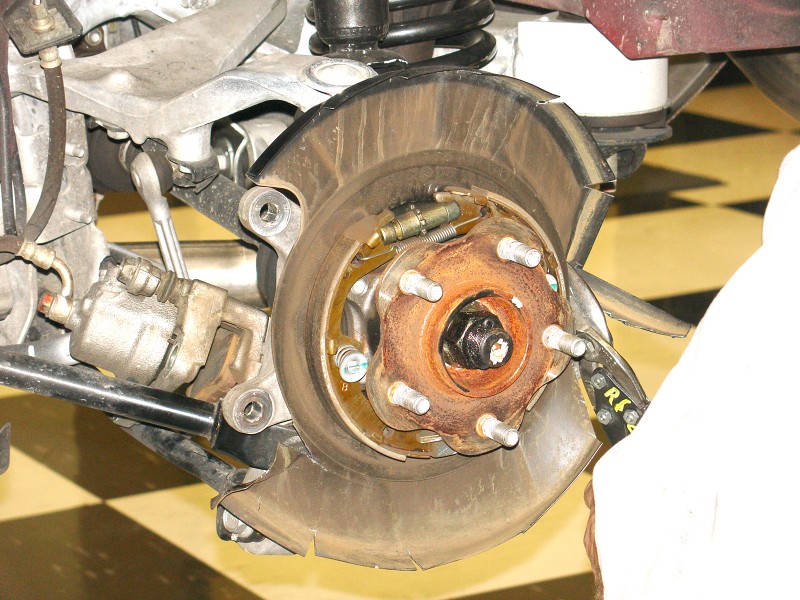
After the caliper was disconnected, the rotor was removed from the hub assembly. Notice that the Z-car uses a small internal parking brake system.
The rear brakes have a heat shield that will have to be eliminated. Here the heat shield is being cut away with hand shears. The sharp edges should be smoothed out with a hand grinder and a small file.
Here is the heat shield after it was cut to size. You can also see the original caliper mounting ears that will be used as the connection point for the new Wilwood caliper bracket.
A bolt outfitted with a lock washer and a flat washer was passed through the original caliper mounting hole and then two shim washers were installed. After the upper and lower bolts meet this configuration, they are attached to the Wilwood caliper mounting bracket.

The two large bolts that secure the caliper mounting bracket were tightened with a large socket wrench. The mount should be tight enough to check the caliper to rotor centering but they may have to be loosened to add or subtract shims to get the rotor perfectly centered.
The caliper mount is secure and the bracket studs are loaded with two washers per stud.
The rotor was assembled using the small bolts in the kit. They should be coated with Loctite 271 and then the rotor should be attached to the hat assembly. The bolts should be tightened in an alternating sequence to 85 in-lbs using an inch-pound torque wrench. After the rotor was assembled, it was installed on the rear hub assembly and it was secured with two lug nuts.

After the proper amount of shims were used to get the caliper centered over the rotor, the caliper mounting bolts could be tightened. First the washers were installed and then the self-locking nuts were tightened to 35 ft-lbs using a foot-pound torque wrench.

The BP-10 Smart Pads were installed and then they were secured with the quick-clip retainer.
The original flexible line was disconnected from the hard line and then the spring clip that secures the flexible line to the frame bracket was removed.
The Wilwood part number 220-9197 Flexline was installed to the caliper and the other side was secured to the original hard line using a small adapter. Here the adapter and hose are secured to the bracket using the original spring clip.
Here is the finished brake assembly outfitted with the bright red four-piston caliper. The hat assembly used here works perfectly with the internal parking brake system.
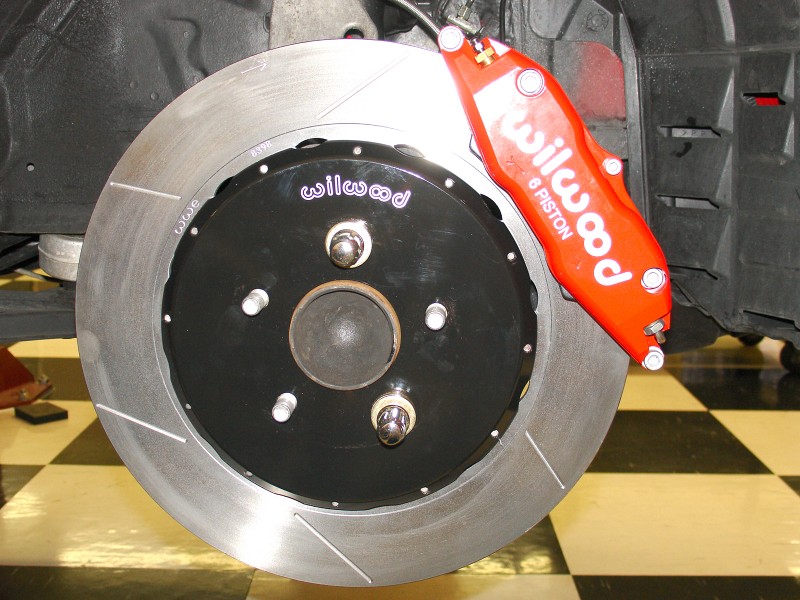
The Wilwood brakes will vastly improve this Z-car’s stopping ability and it also adds to the performance image of the vehicle
Source:
Wilwood Engineering
6-piston / 4-piston 350Z Brakes
www.wilwood.com
Related Articles
 Wildwood Releases Single Pedal Assemblies for Tandem Master Cylinders
 Wilwood Announces Wilwood Corvette Challenge + Speed Ventures Partnership 2024
 Unboxed: R1 Concepts Brake Kits - Performance & OEM Replacement
 Wilwood Superlite Front BBK for BMW E36 M3
 Project Mu XC6 Caliper kit for 6H Truck and SUV
 Project Mu Rear Forged Sport Calipers w/ Side Brake