
It’s no secret the Scion FR-S/Subaru BRZ platform has taken the tuner world by storm. It’s at almost every track day, car show, or autocross across North America, but despite its immense popularity, there’s still one common complaint – it needs more power. Enter Vortech Superchargers, one of the most recognized and reputable names in aftermarket forced induction. The talented team at Vortech has come up with a bolt-on supercharger kit that pumps out nearly 100 more horsepower than stock! Vortech offers both complete bolt-on and “tuner” kits designed for someone looking for a more customized setup. How easy is it to install their bolt-on kit? Let’s have Jordan Innovations walk you through it on this beautiful Scion FR-S!
Vortech makes installations as simple as possible for an aftermarket forced induction kit, but it is still a lengthy job requiring some mechanical ability and a stocked toolbox. With that in mind, make sure you have enough workspace, proper tools and ample time. Your Vortech Supercharger kit will come with detailed installation instructions and it is highly recommended that you also have a factory service manual on hand. A friend who is willing to help is never a bad thing either! Also check to make sure your kit comes with all the required parts.
The first step on the installation begins inside your house. You will need a laptop computer and internet access because your supercharger kit comes with EcuTek ECU re-flashing software which needs to be installed on your computer. Once installed, double check to make sure your software is completely up to date by checking on EcuTek’s website (www.ecutek.com). Once you’ve got the latest software, follow the step-by-step instructions to re-flash your cars factory ECU in preparation for the new supercharger. This will require connecting the computer to the vehicles OBD-II port.
Now it’s time to start prepping the car for the installation. Start by safely getting the car off the ground with a hydraulic lift or floor jack and properly placed jack stands. Once safely in the air, remove the front wheels, prop open the hood, remove the front bumper and un-pack the new accessory drive belt included in the kit. Set the new drive belt in a warm room to let the bends relax for future installation. Next, remove the air resonator assembly and disconnect the crankcase breather hose. Disconnect the MAF from the factory air box as well. Finally, remove the plastic belt covers from both the alternator and A/C compressor, loosen the belt tensioner and remove the accessory belt. 
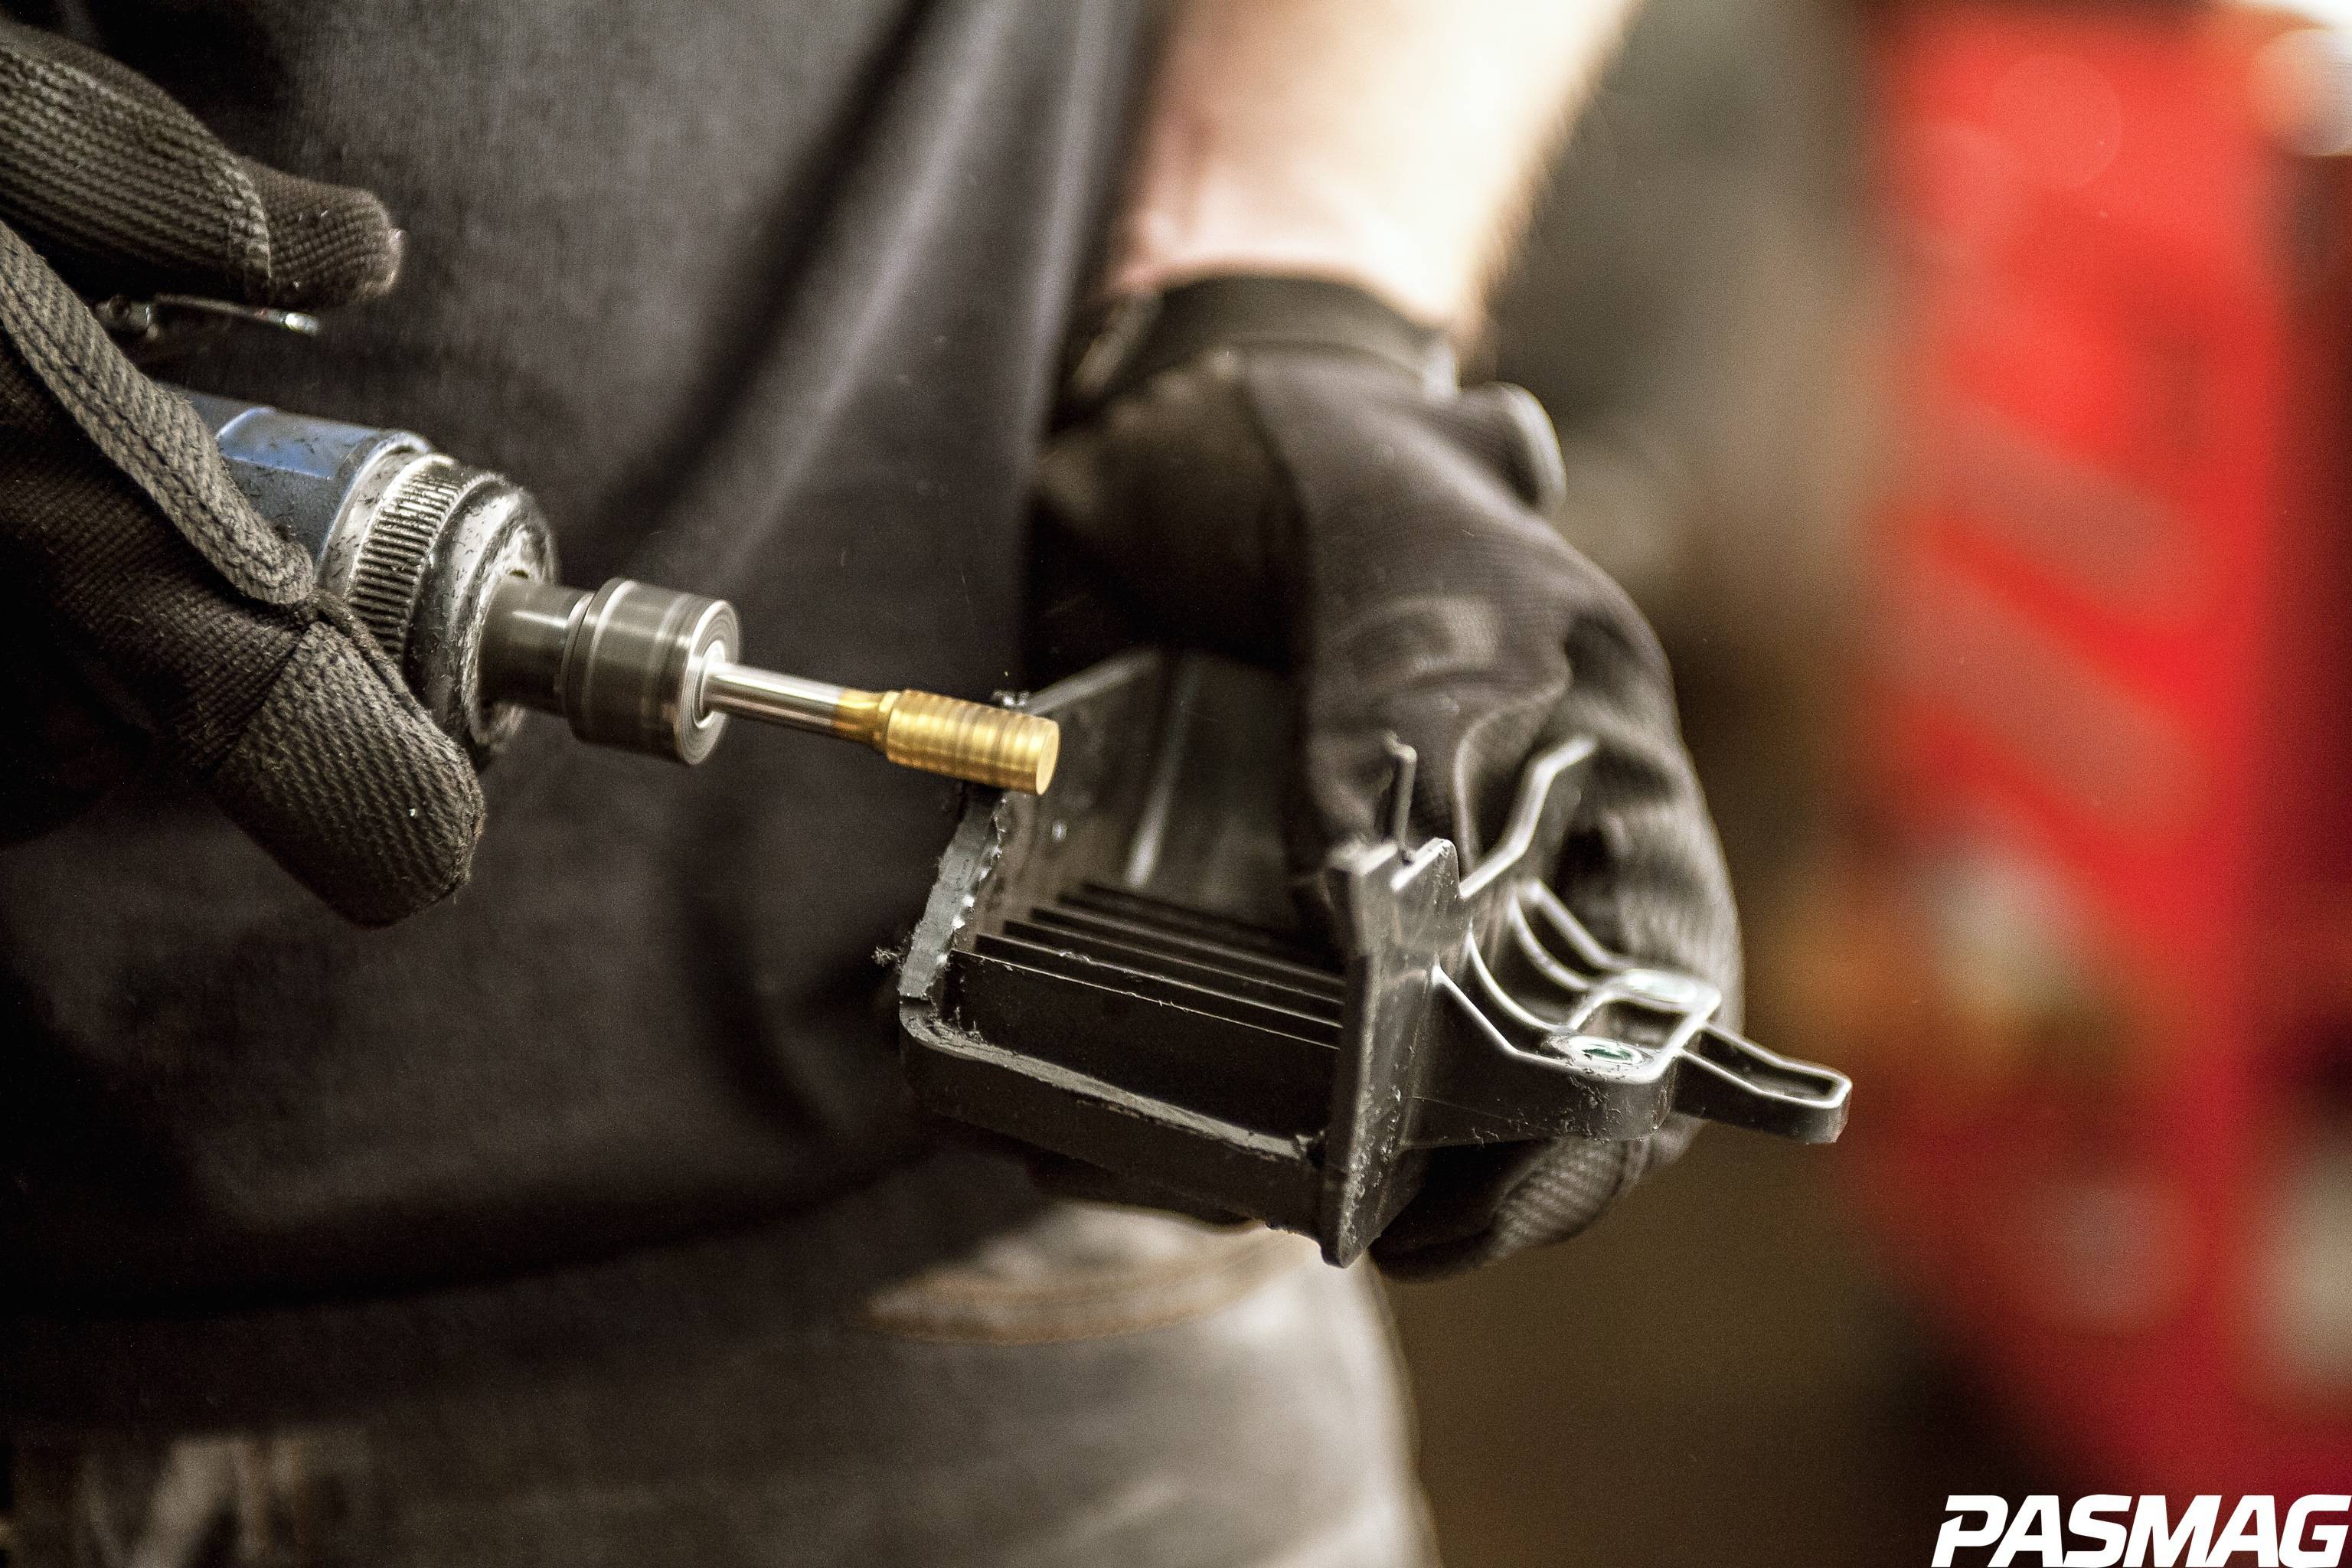
With everything prepped and ready, it’s time for the fun stuff. The first thing we’re going to install is the supplied alternator tilt bracket. To do that, loosen the alternator and grind a bit of the stock bracket boss before installing the new bracket.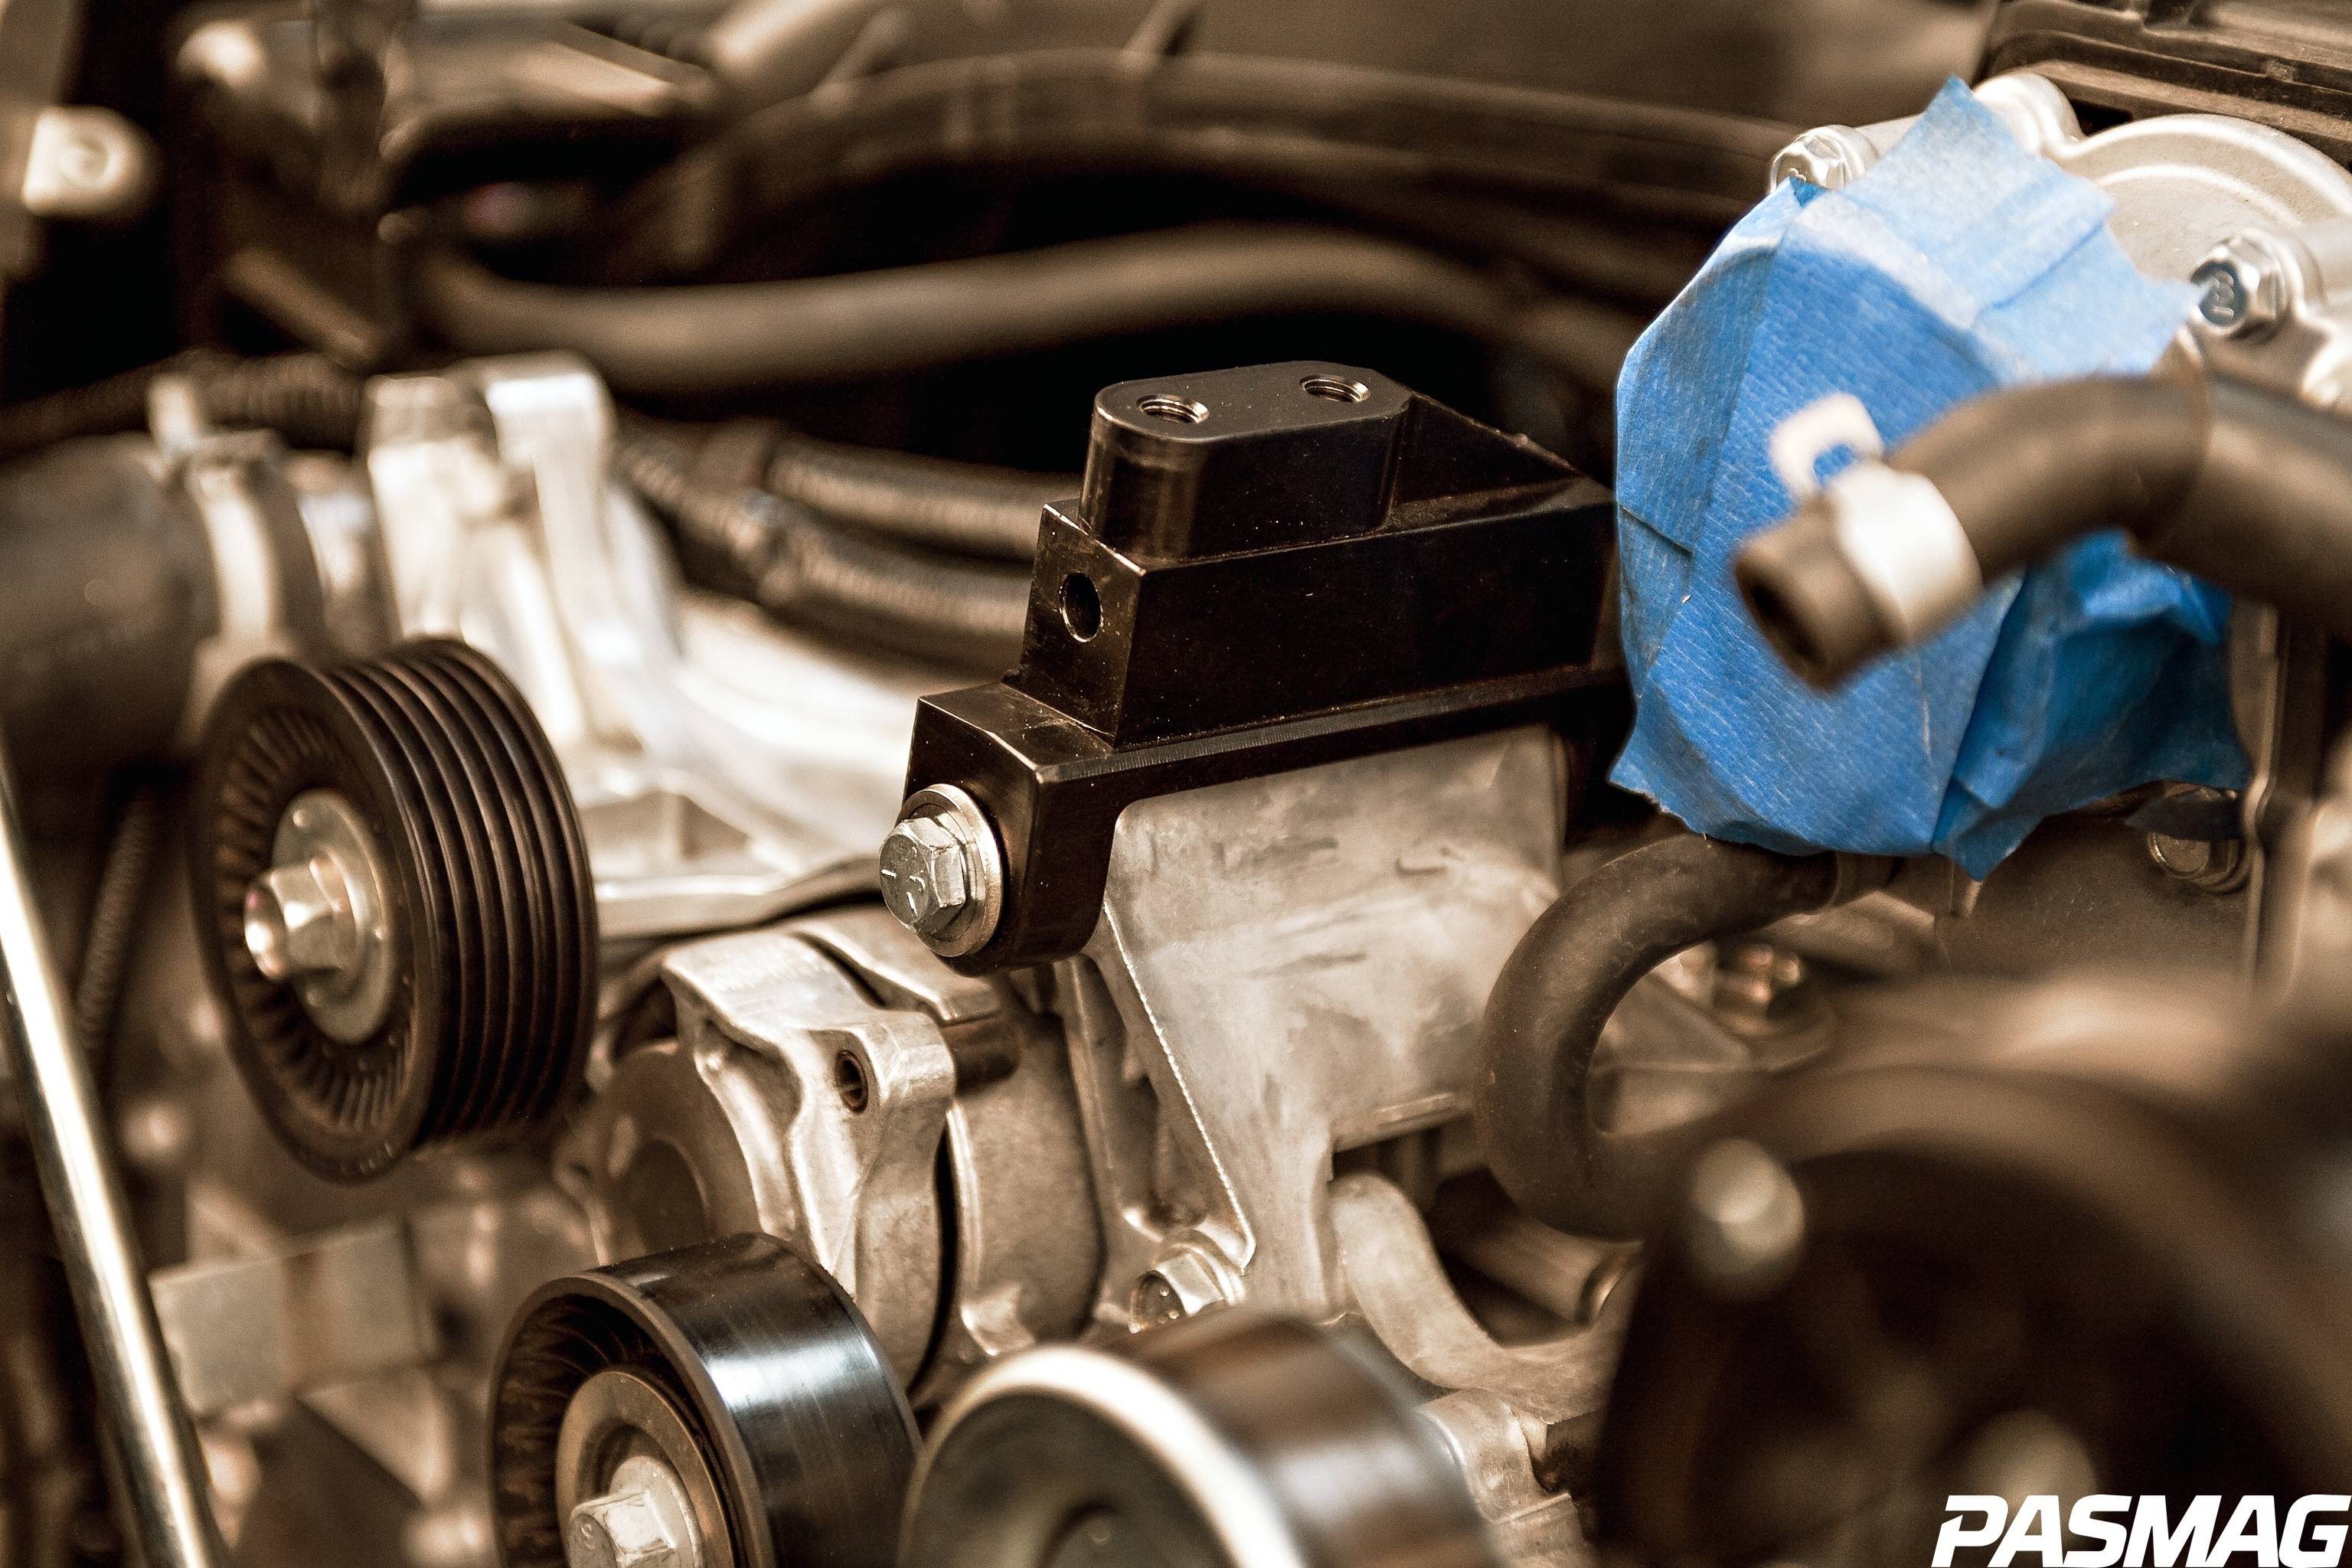
Next, remove the two lower A/C compressor mounting bolts and install the supplied mounting bracket using the new bolts provided. Once finished, remove the grooved and smooth idler pulleys from the engine cover and set them aside. Replace the smooth idler pulley above the crank damper with the supplied 2.75-inch pulley and bolt.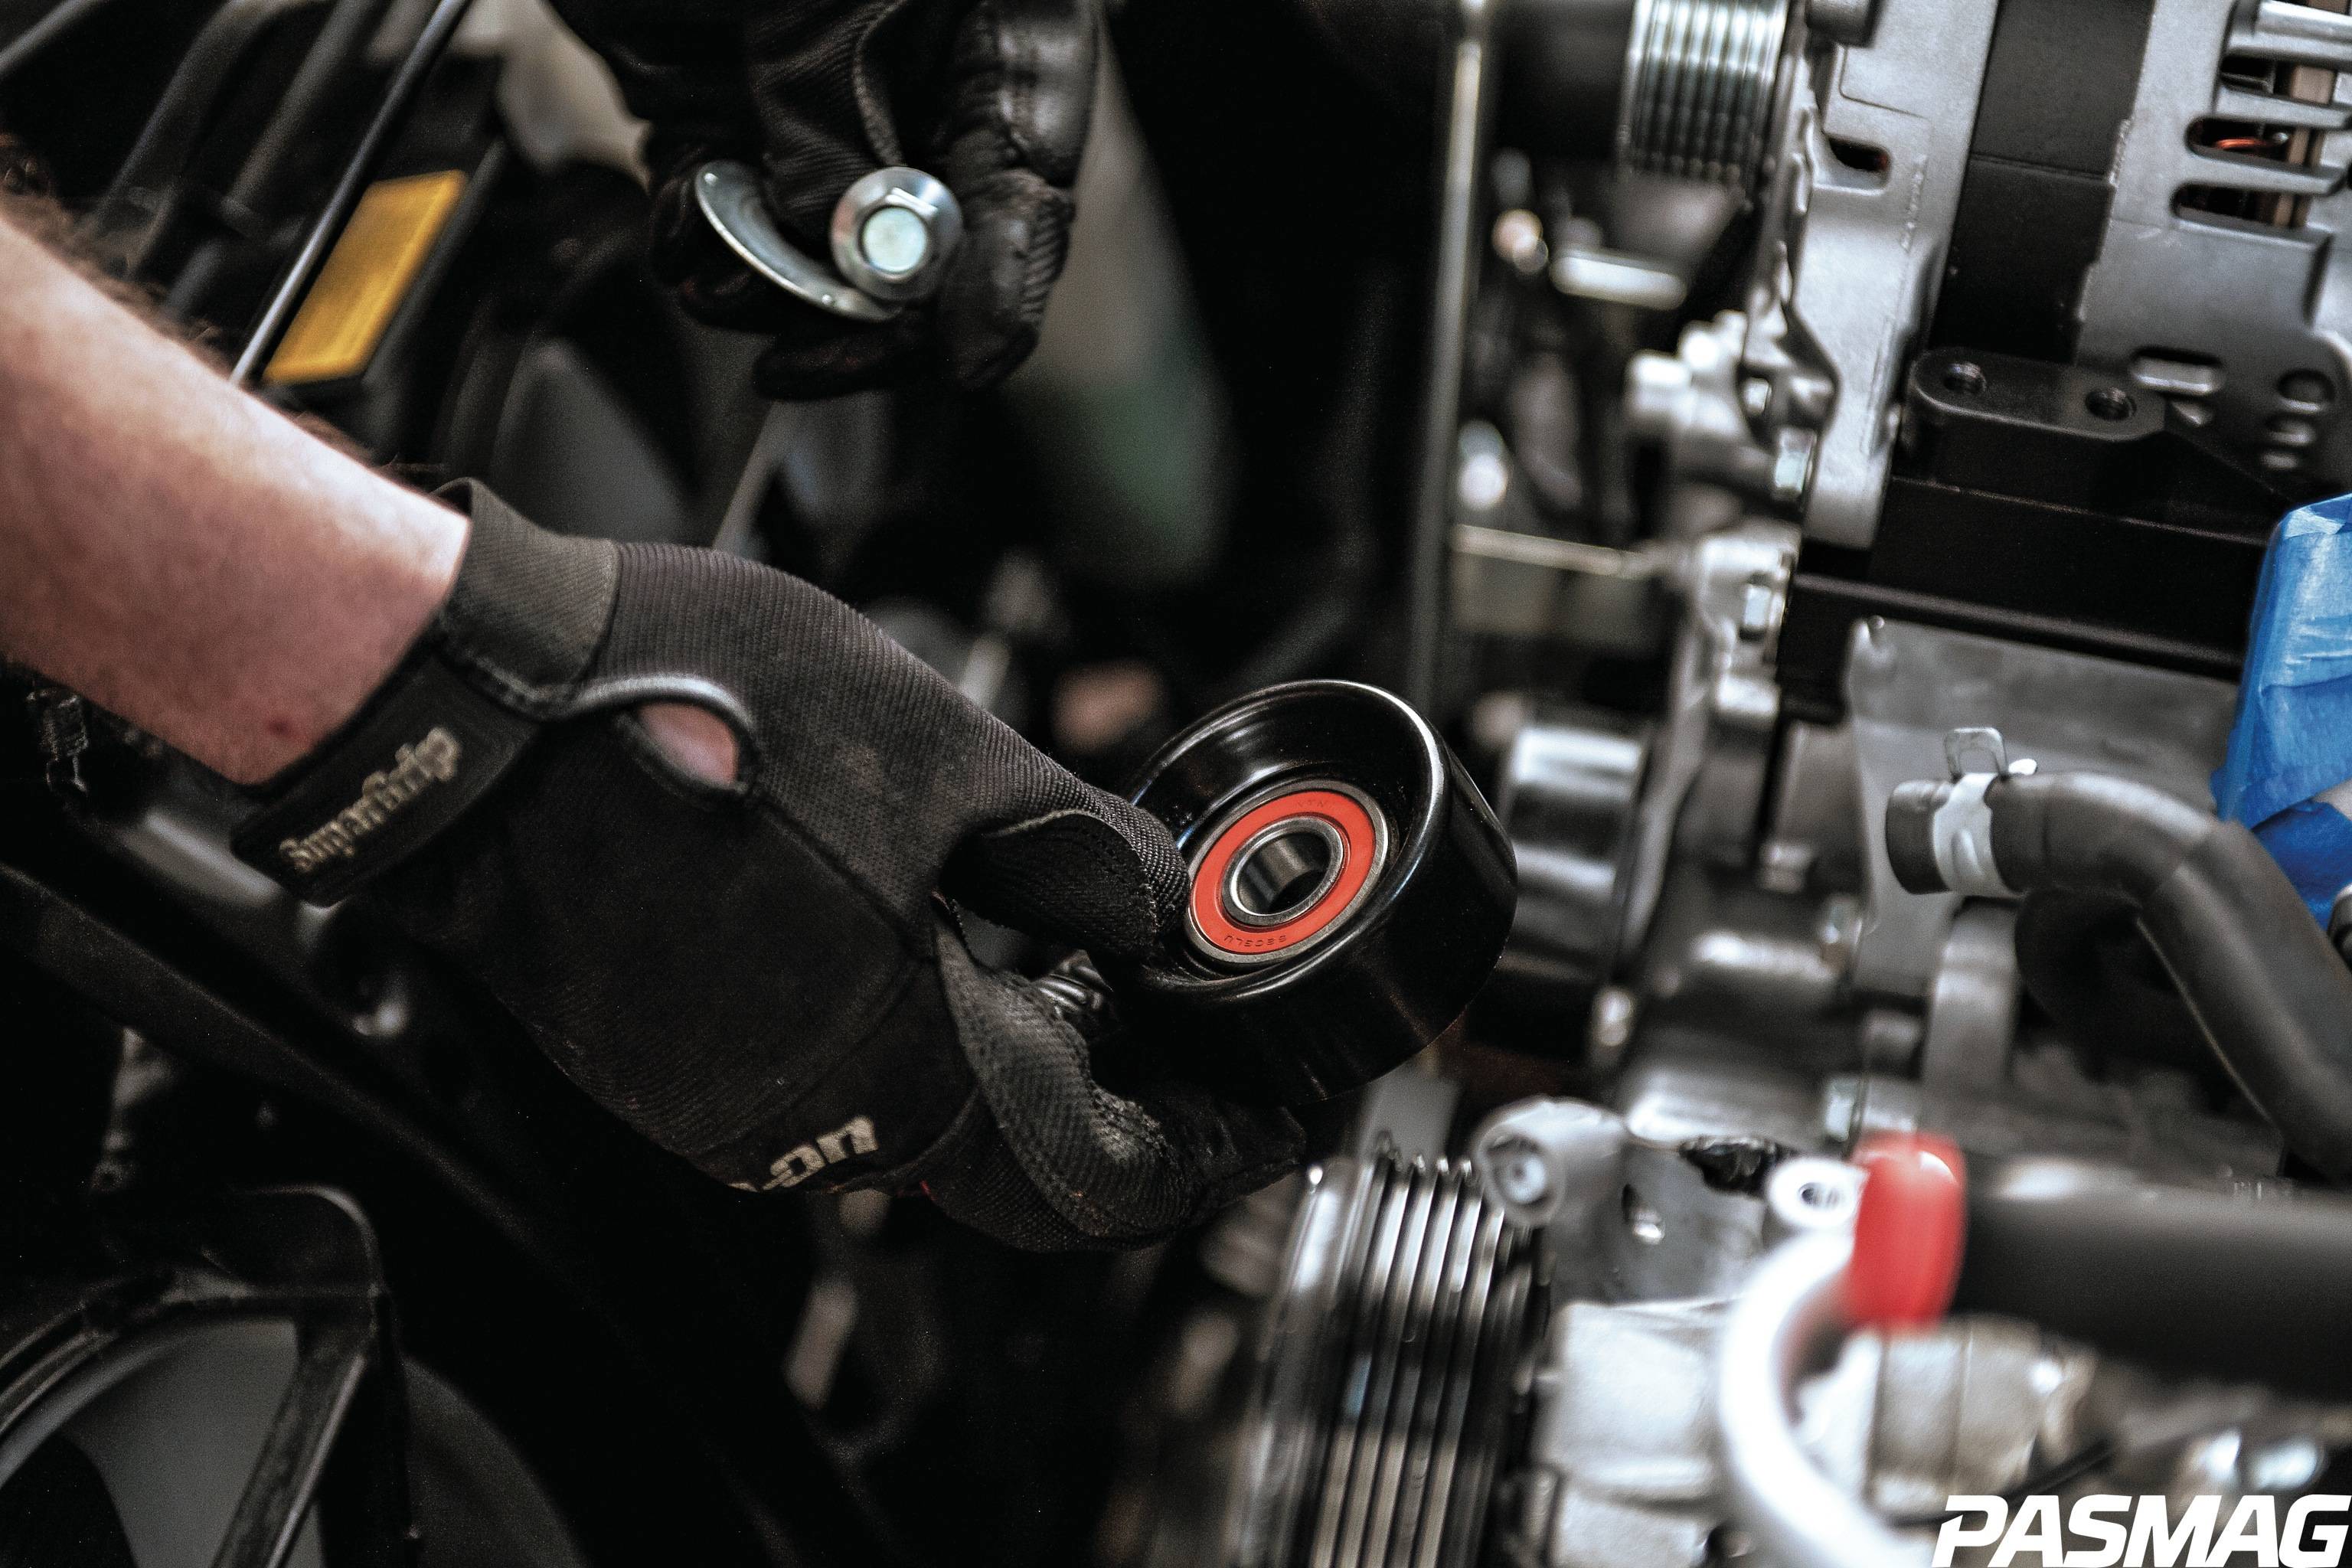
Now locate the pre-assembled supercharger mounting bracket in your kit and grab the belt we set aside to “relax.” Re-install the remaining stock idler pulleys back in their original locations and loosely fit the supplied spacers and bolts as outlined in the Vortech installation manual. Using the belt routing guide provided with the kit, loosely route the new belt leaving enough slack for the supercharger.
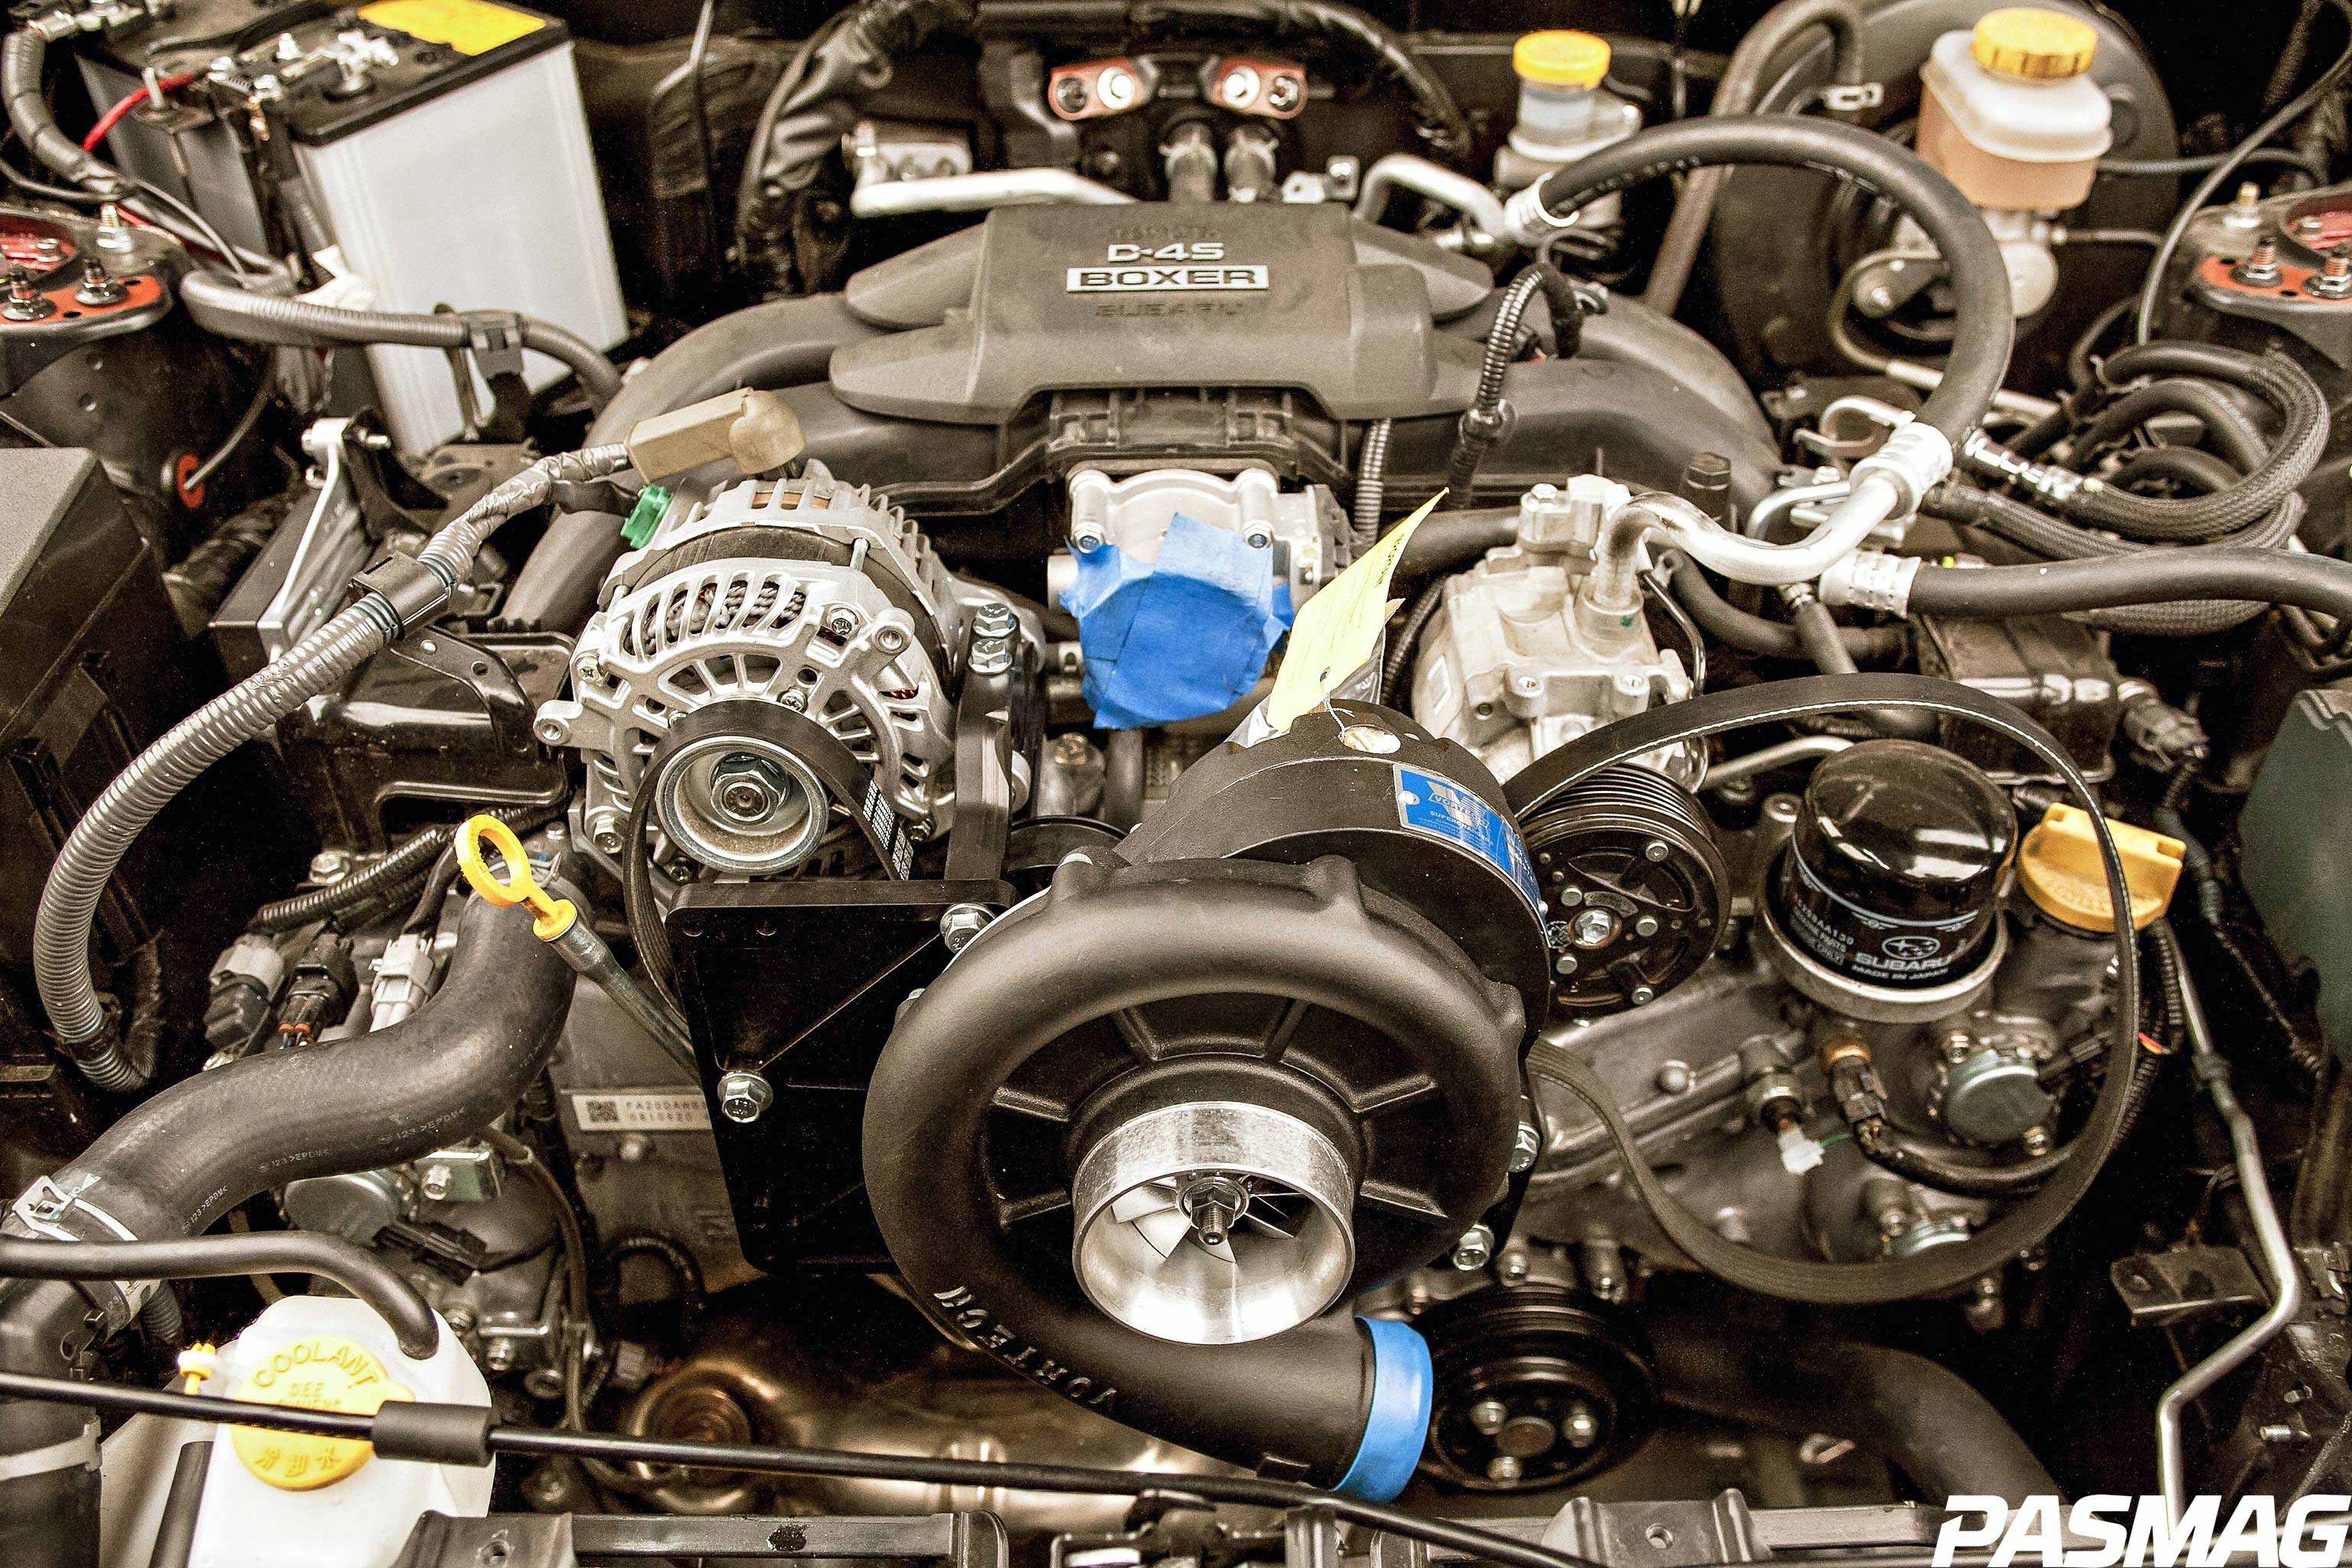
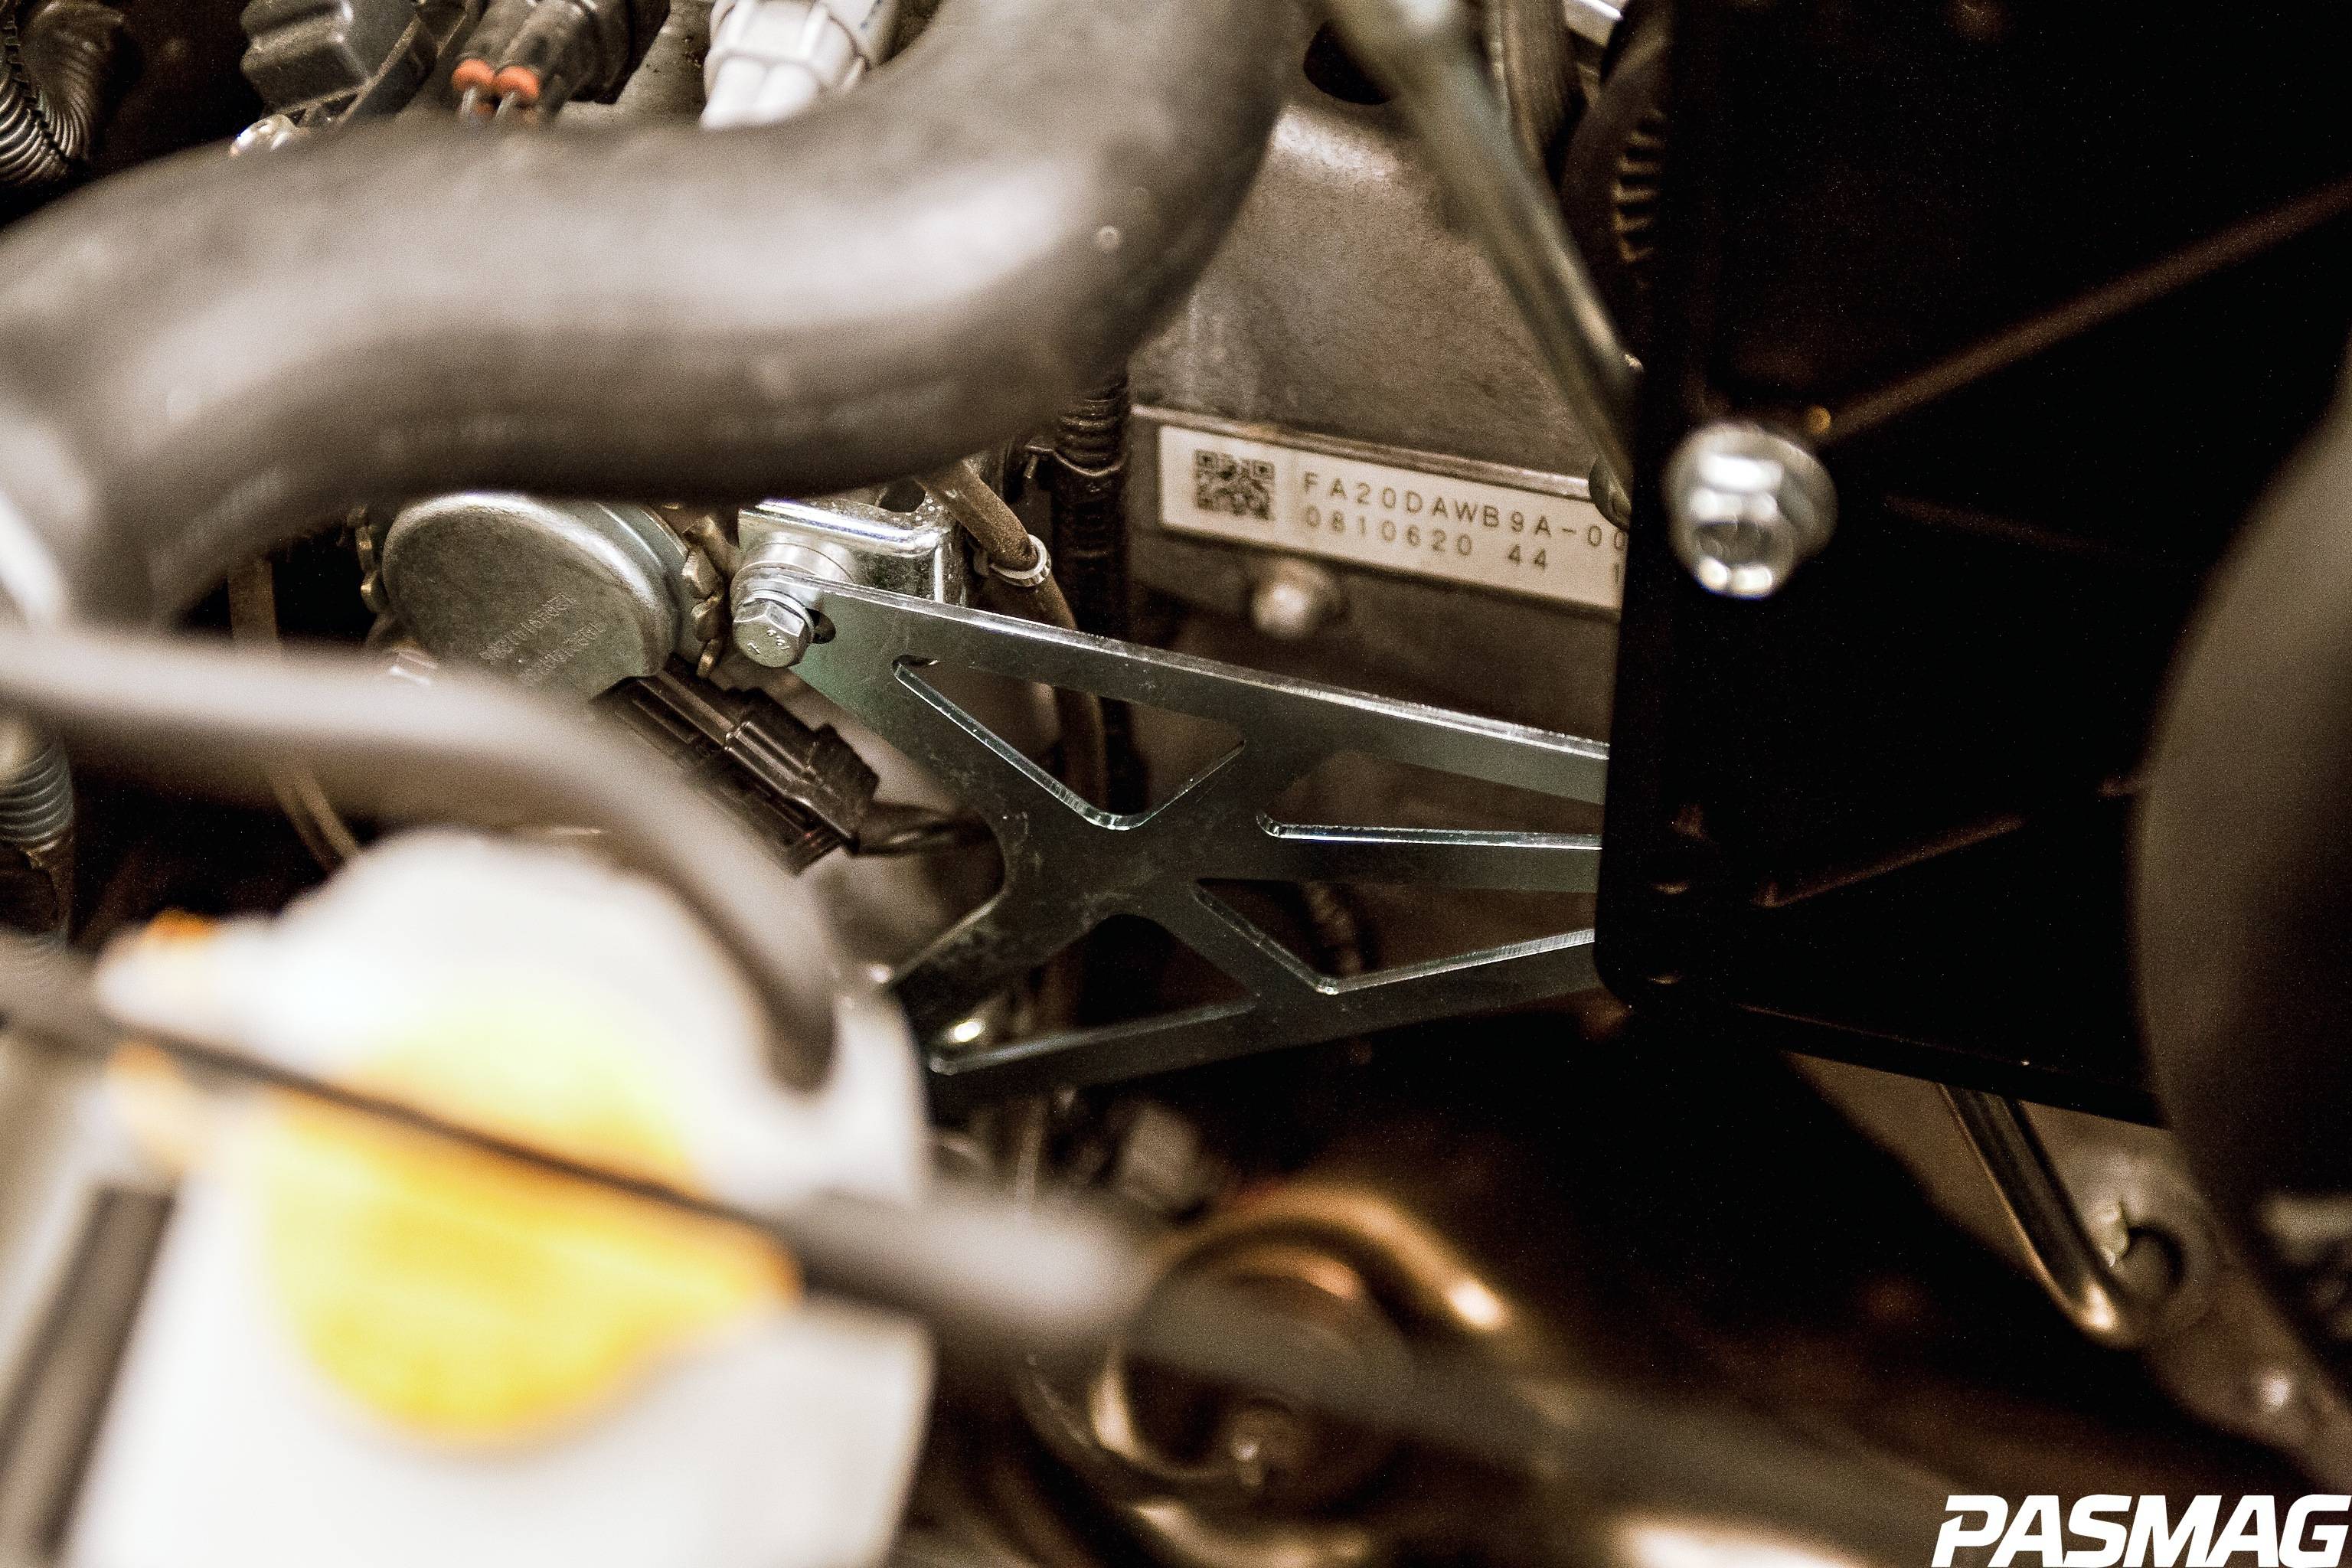
Now is when it all starts coming together! Loosely mount the supercharger mounting bracket and supercharger onto the front of the motor using the guidelines in the installation guide. Once mounted, finish routing the belt via the supplied diagram, and tighten all of the mounting bracket bolts and the belt tension. Once finished, locate and install the supplied mounting bracket stiffener to the factory cam covers. Finally, mount the supplied air box support bracket to the driver’s side frame rail.
 |
 |
Now we’ll relocate the hood prop rod. Locate the prop relocation bracket and use it as a template to mark mounting holes that need to be drilled. To prevent pain chips, put masking tape over the area and mark. Then carefully drill out the mounting holes and attach the new bracket.
Just like that we’re onto the next step! Re-install the two plastic dust covers removed from the alternator and A/C compressor earlier on. The alternator cover will bolt right back on, however the A/C compressor cover will need some modification to clear the supercharger belt.
From here we will install the charge air cooler. If you haven’t already removed the front bumper cover, do so now. With the front bumper cover removed, locate and remove the windshield washer fluid reservoir and filter. Next locate and remove the two plastic side panels on either side of the radiator. Use the supplied paper templates to modify the two plastic panels to fit the new charge air cooler.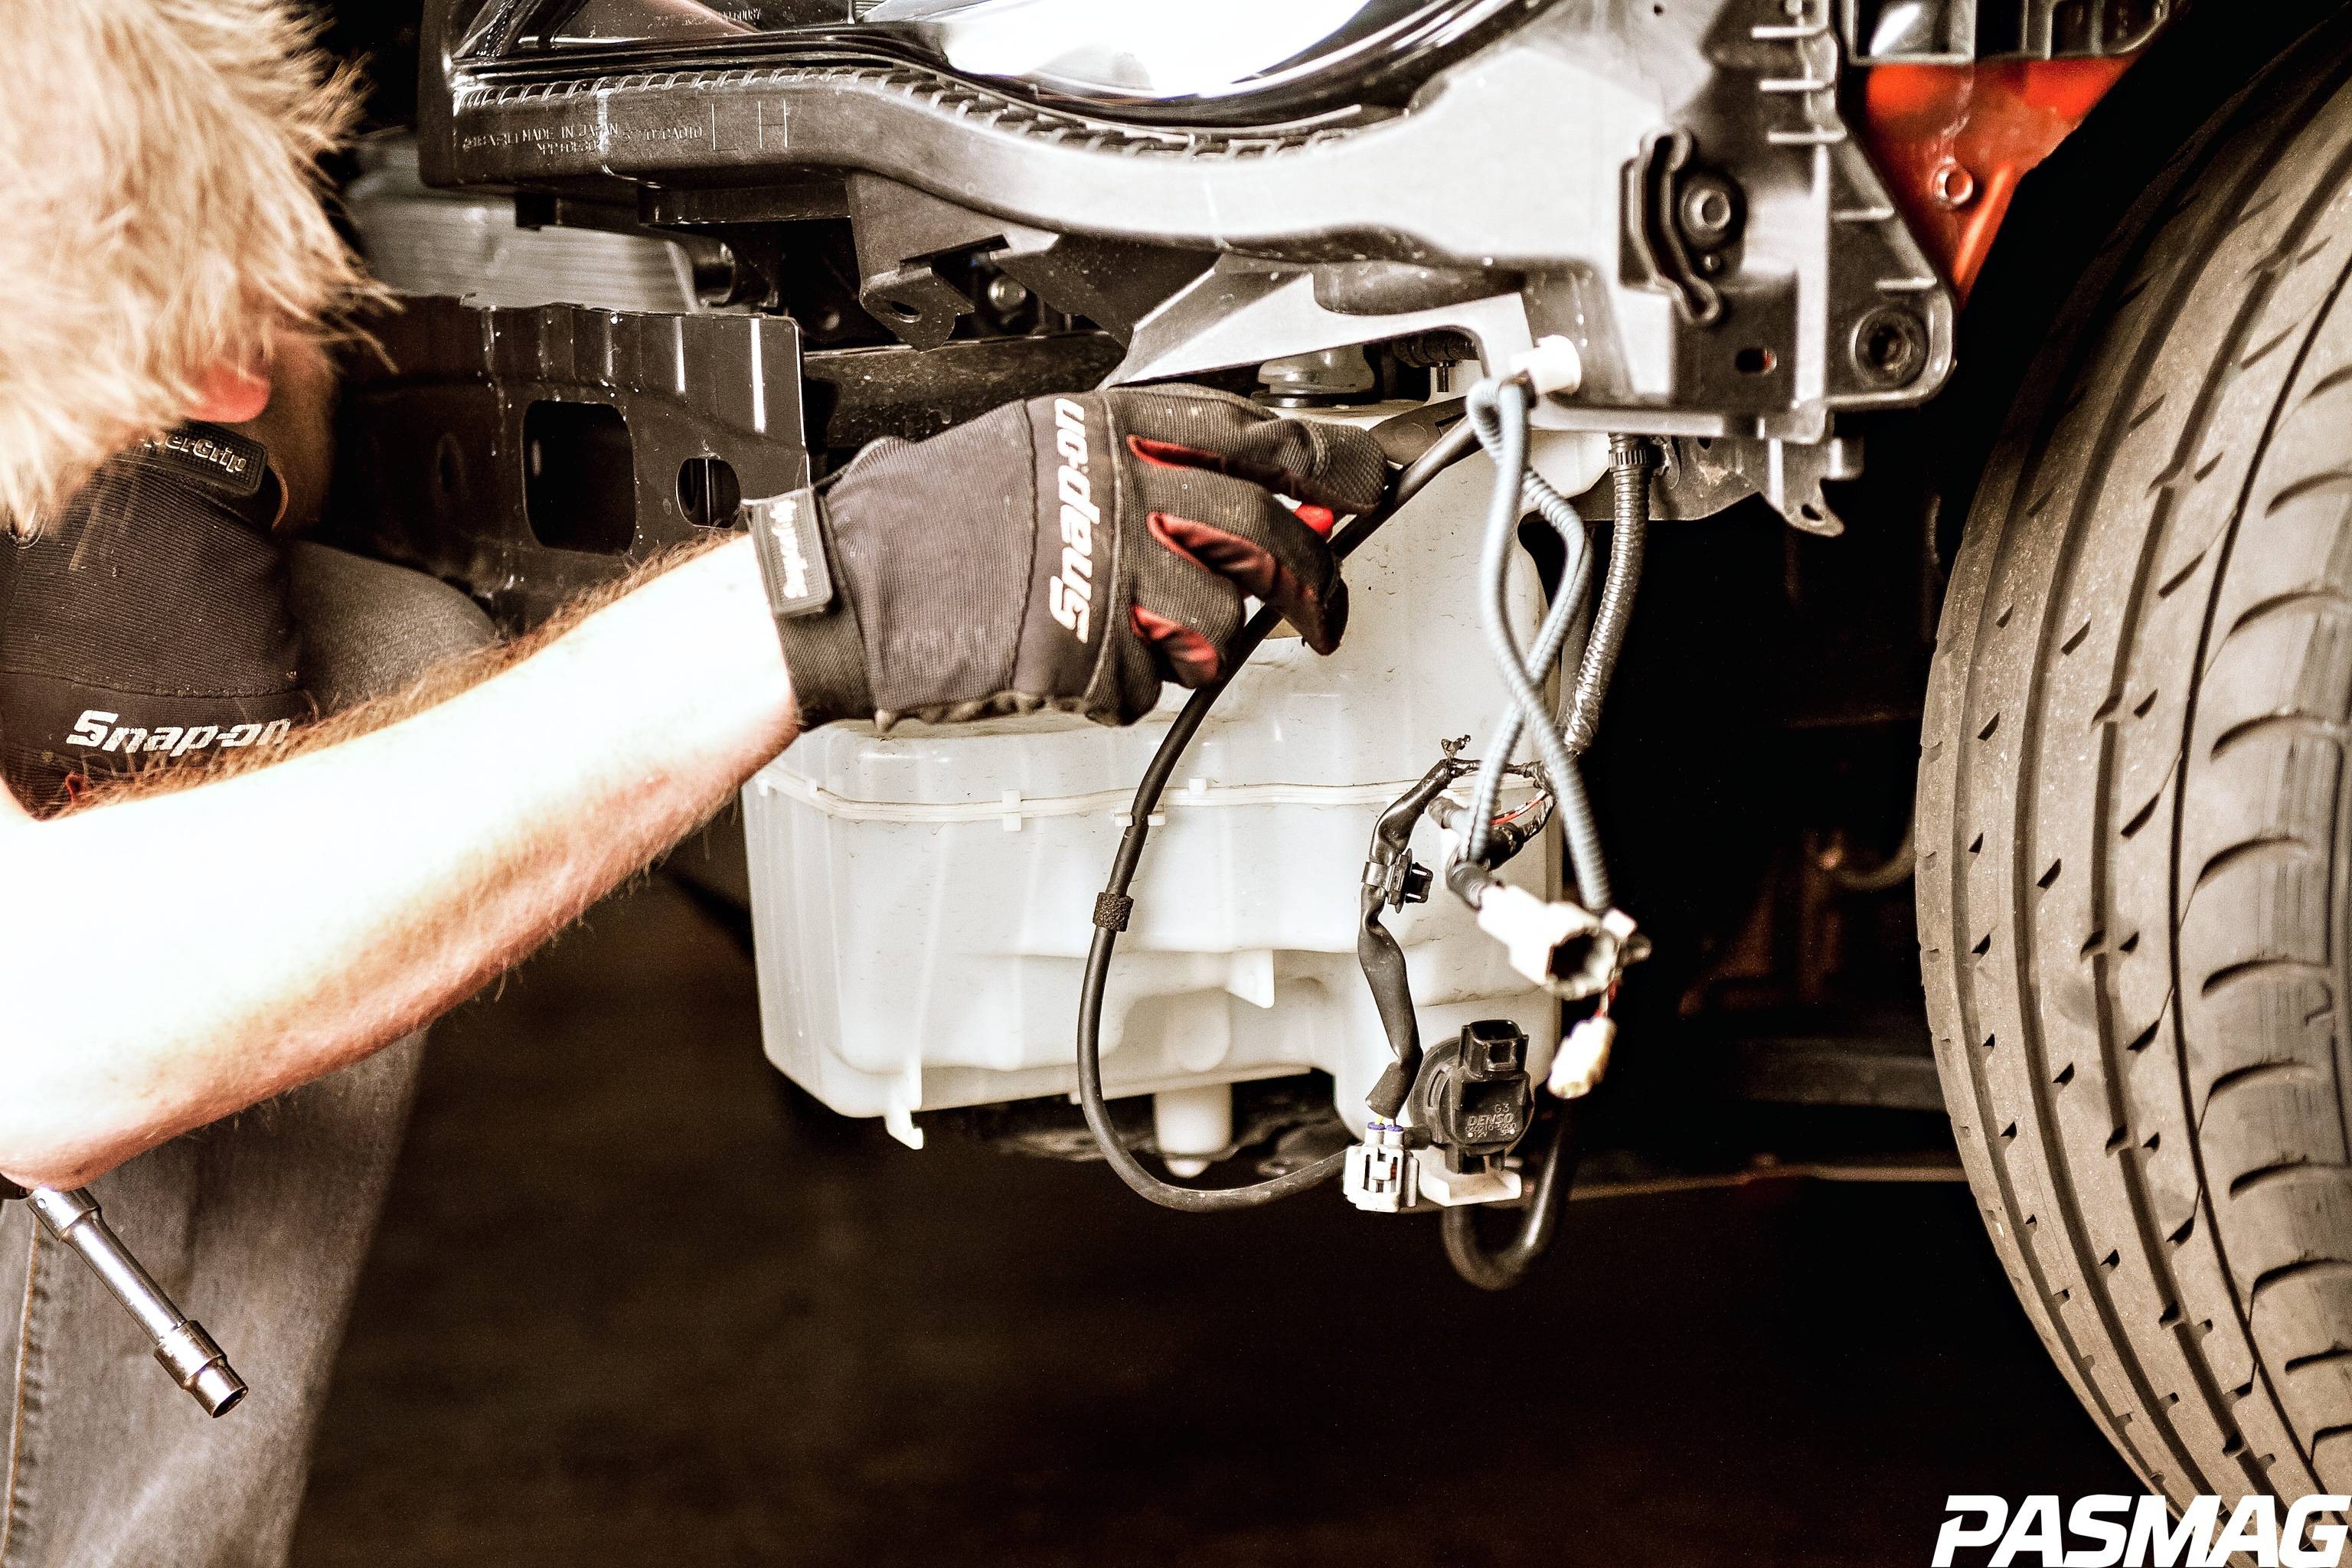
Next, remove the horn attached to the A/C condenser and with a set of pliers, flatten out the mounting tab. Relocate to its new position using the diagram supplied in the Vortech installation manual. Temporarily remove the lower bolt from the radiator center support and loosen, but do not remove the two upper bolts. Locate the charge air cooler and mounting brackets provided in your kit. Attach the mounting brackets to the cooler while off the car leaving them loose. Using the slot guide on the cooler, temporarily attach it to the center support and mark the holes which need to be drilled to mount the side brackets to the OEM bumper beam. Remove the cooler and set aside. Carefully drill the mounting holes then re-mount the cooler.
Moving back to the top of the engine bay, locate and install the plug-and-play MAF sensor extensions. Once finished, move to the washer fluid reservoir by first locating the stock unit removed earlier. Remove the filler neck and pump from the OEM reservoir and set aside. Cut the excess length off the bottom of the filler neck using the Vortech booklet as a guide. Once cut, add the supplied hose and attach to the vehicle using the location specified in the guide. Locate the supplied washer fluid reservoir and install the OEM filler neck grommet and OEM pump in addition to the supplied mounting brackets. Attach the new reservoir to the stock location and reconnect the electrical connection and fluid hose. Refill your reservoir with washer fluid.
To finish the installation of the hard parts we move to the charge air cooler to install the piping that connects it together. Start on the driver side using the supplied piping, silicone connectors and hose clamps. Route and loosely mount the piping, making sure to loosely install the hose clamps first. Next, move to the passenger side routing the new piping from the throttle body down to the cooler. Once in place, tighten all the hose clamps. With the piping in place, re-install the OEM plastic side panels we modified earlier. Connect the MAF sensor extension to the MAF module on the new piping. Next, install the compressor bypass valve onto the new piping using the directions provided with your kit. Installation varies depending on your FR-S or BRZ transmission. Next, replace the OEM MAP sensor with the supplied replacement and splice the supplied check valve into the OEM breather hose.
All that’s left to install from the new kit is the air intake. Locate the intake and accompanying parts and simply bolt it to the mounting brackets connecting it to the supercharger inlet. Once positioned, tighten the provided hose clamps. Locate the OEM breather hose again and attach the supplied hose union, then attach the hose to the new air box, routing it away from sharp edges and moving parts that may damage it. Cut the length of the hose if necessary. Take a good look over work because you’re all done! Make sure everything is tight and nothing is rubbing on anything it shouldn’t be.
Once you’ve visually checked your work, start the car and let it idle for a few minutes, checking for leaks and clearance issues. Vortech also suggests replacing your spark plugs if your car has over 30,000 miles on it. Once the car has idled for a while, let it cool off and fix any leaks or clearance issues. Take the car for a slow test drive and listen for knocking or detonation with the engine. If everything checks out, re-install your front bumper and take your much improved FR-S or BRZ on your favorite drive!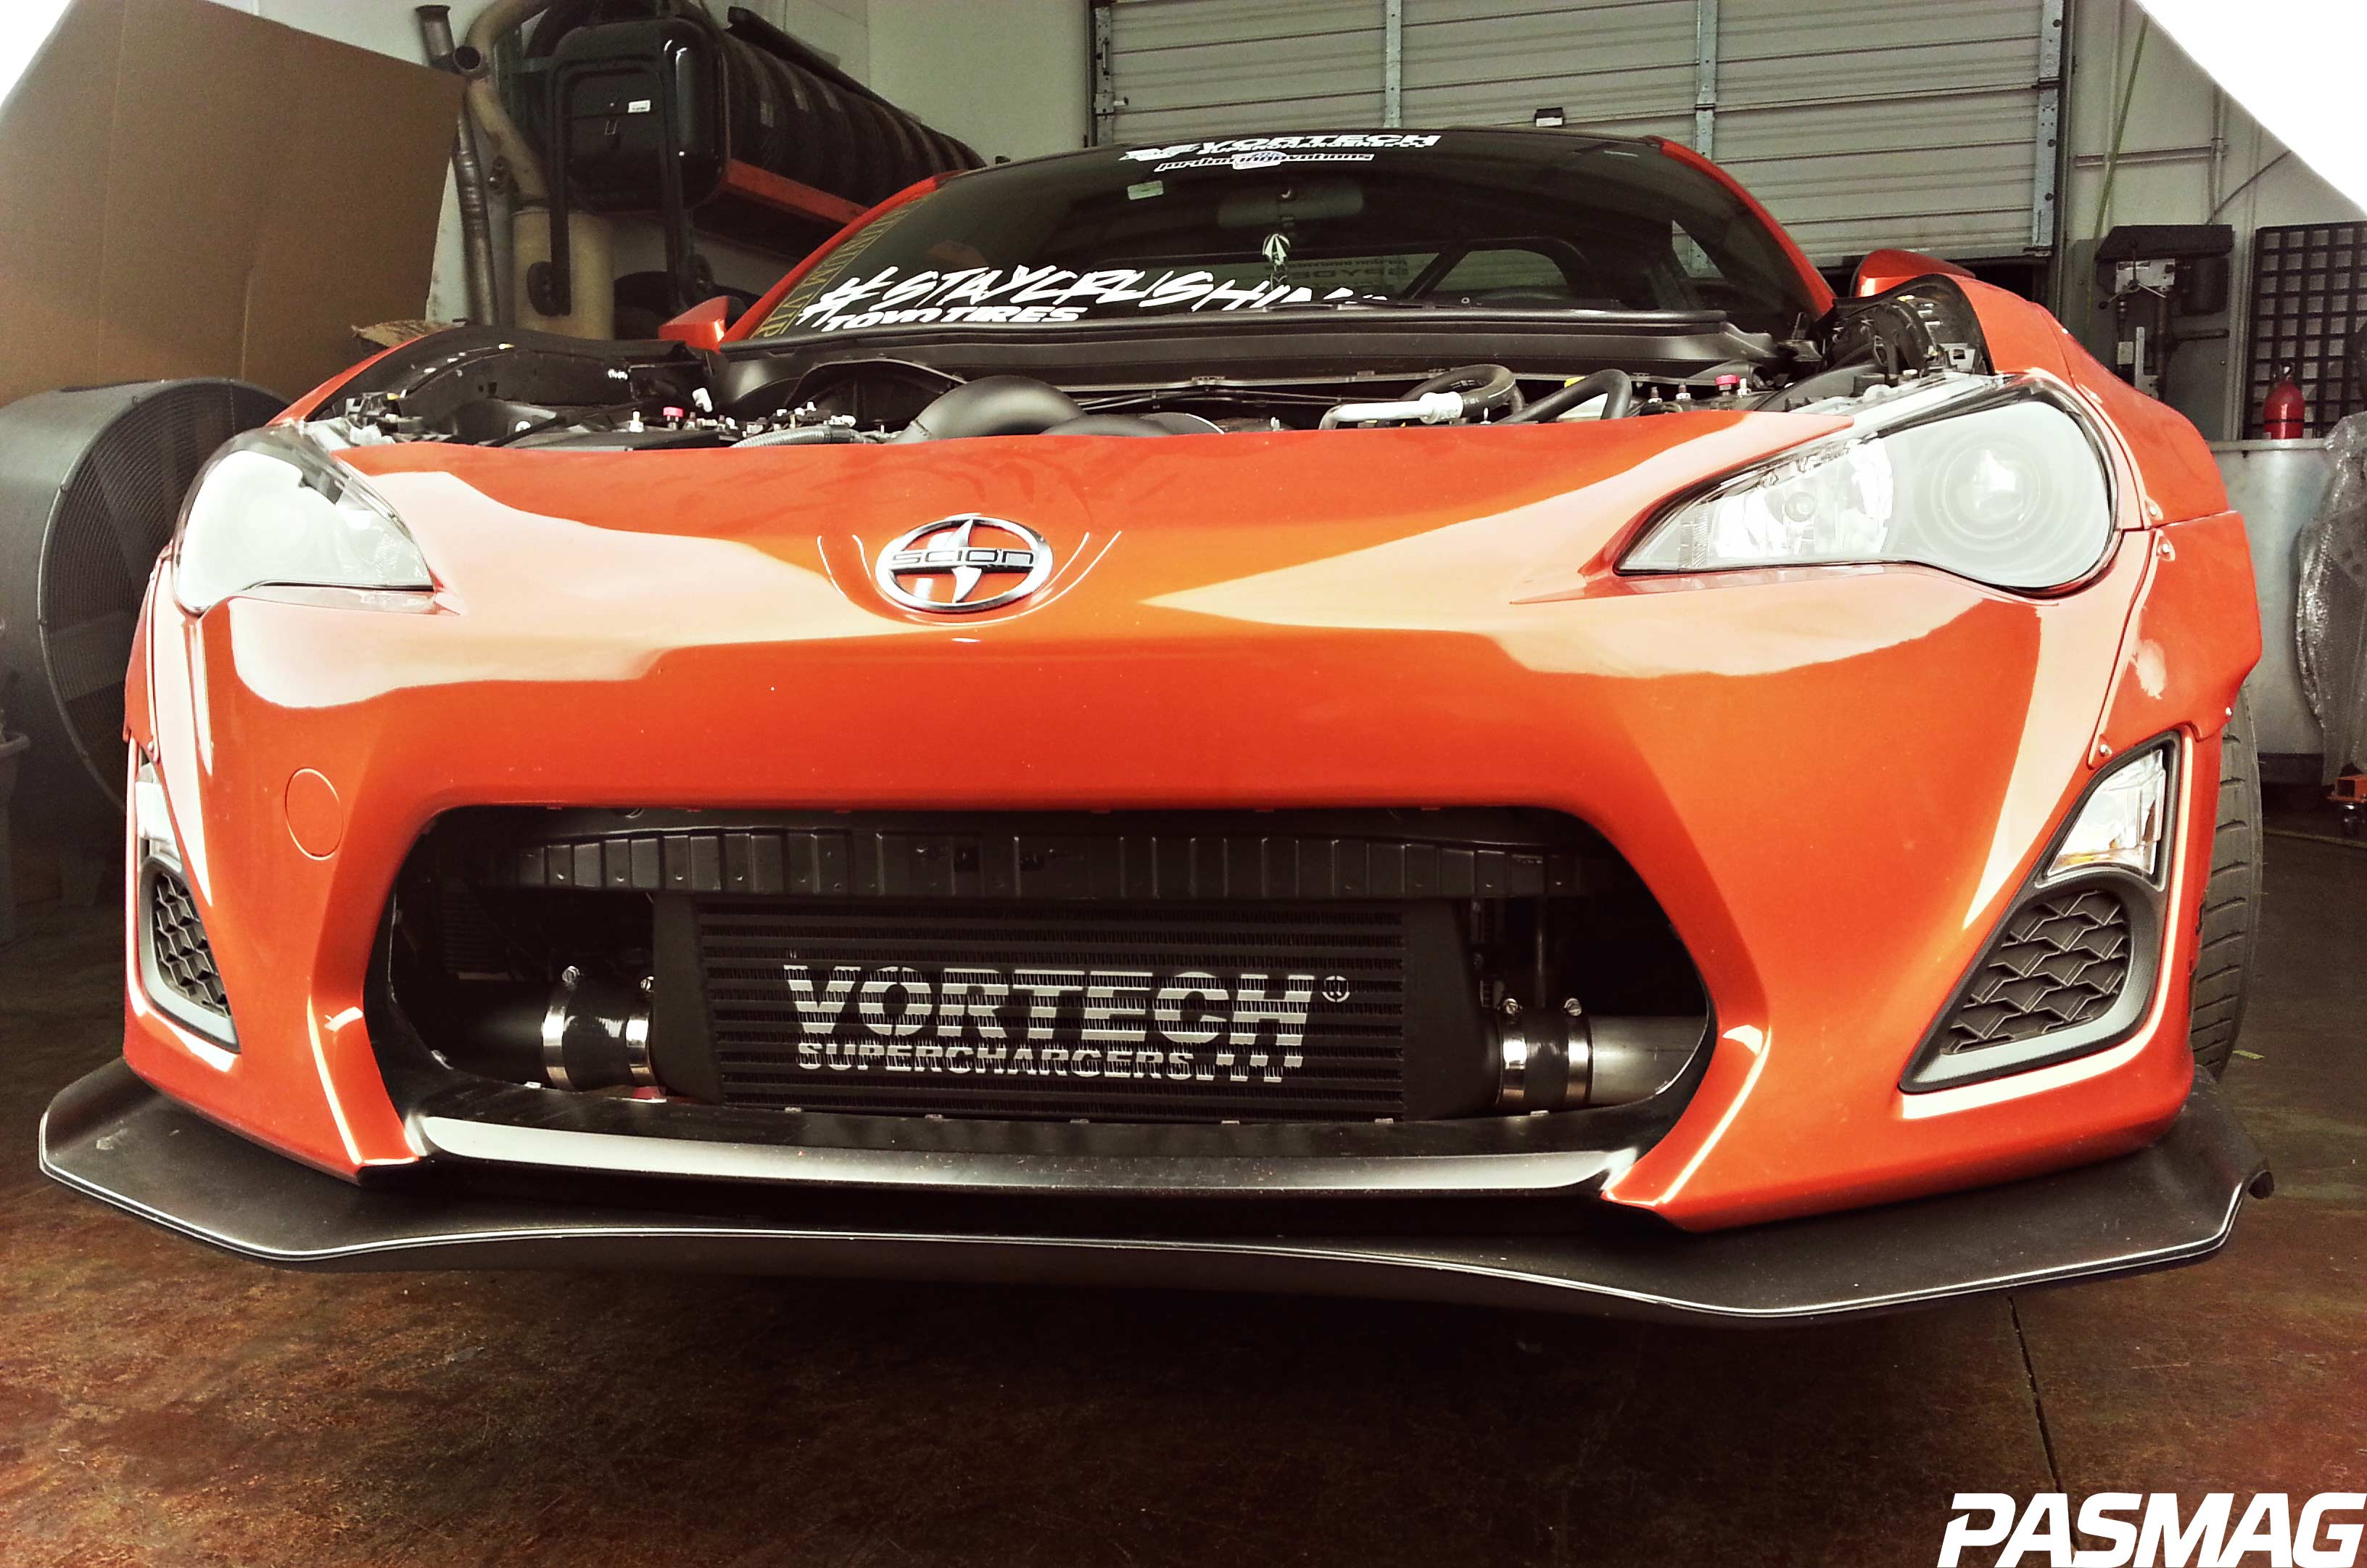
Install notes at a glance:
• Remove hood
• Jack car onto jack stands
• Remove front bumper
• Remove intake/air box (keep O-ring seal for use on Vortech Supercharger)
• Remove belt dust covers
• Disconnect A/C clutch senor
• Disconnect MAF (mass air flow) sensor (carefully!)
• Remove new belt from Vortech kit and allow to “relax”
• Un-mount alternator (loosen captive nut to allow it to pivot)
• Grind alternator alignment nub flat with carbide bit (safety glass suggested)
• Finger tighten black alternator bracket from Vortech kit
• Replace alternator and bolt to new black bracket
• Remove smooth pulley and replace with Vortech smooth pulley (using supplied Vortech bolt for clearance purposes, do not use old pulley bolt)
• Install A/C bracket/air box support from Vortech
• Loop new longer Vortech belt (relaxed belt)
• Attach charger snail
• Attach black 3rd plane stabilizer from Vortech kit to black alternator bracket
• Install steel triangle plate to tie super charger snail plate to engine block under alternator
• Before re-installing dust covers, cutting A/C compressor pulley necessary to clear super charger pulley
• Relocated hood support latch (consists of tapping side of ending bay, passenger side, new hood mount supplied)
• Remove Washer fluid tank for relocation (for ducting clearance)
• Relocate horn (ducting clearance)
• Install Intercooler (involves tapping frame by radiator support and using supplied “self-tapping” screws from kit, which don’t really self “tap” frame steel)
• Run piping from snail and intake to intercooler using supplied couplers and hose clamps
• Compressor bypass valve
• PVC valve
• Vortech air box to supercharger snail with stock rubber connect gasket and hose clamp
• Need to lengthen harness for MAF sensor plug (carefully cutting sheath away to expose harness)
Related Articles
 New Cars for Enthusiasts at CIAS 2024
 Whiteline Grip Series Kit for VB Subaru WRX
 ACT Unveils Push-Type Mod-Twin for Subaru WRX
 Luke Skalisius Tuning 365 Takeover for Importfest 2023
 Vortech Superchargers - V-13 94C Billet Centrifugal Supercharger
 ISC Suspension Lowering Spring Kit for 2015-2021 Subaru WRX