
Written by Micky Slinger | Photography by Greddy
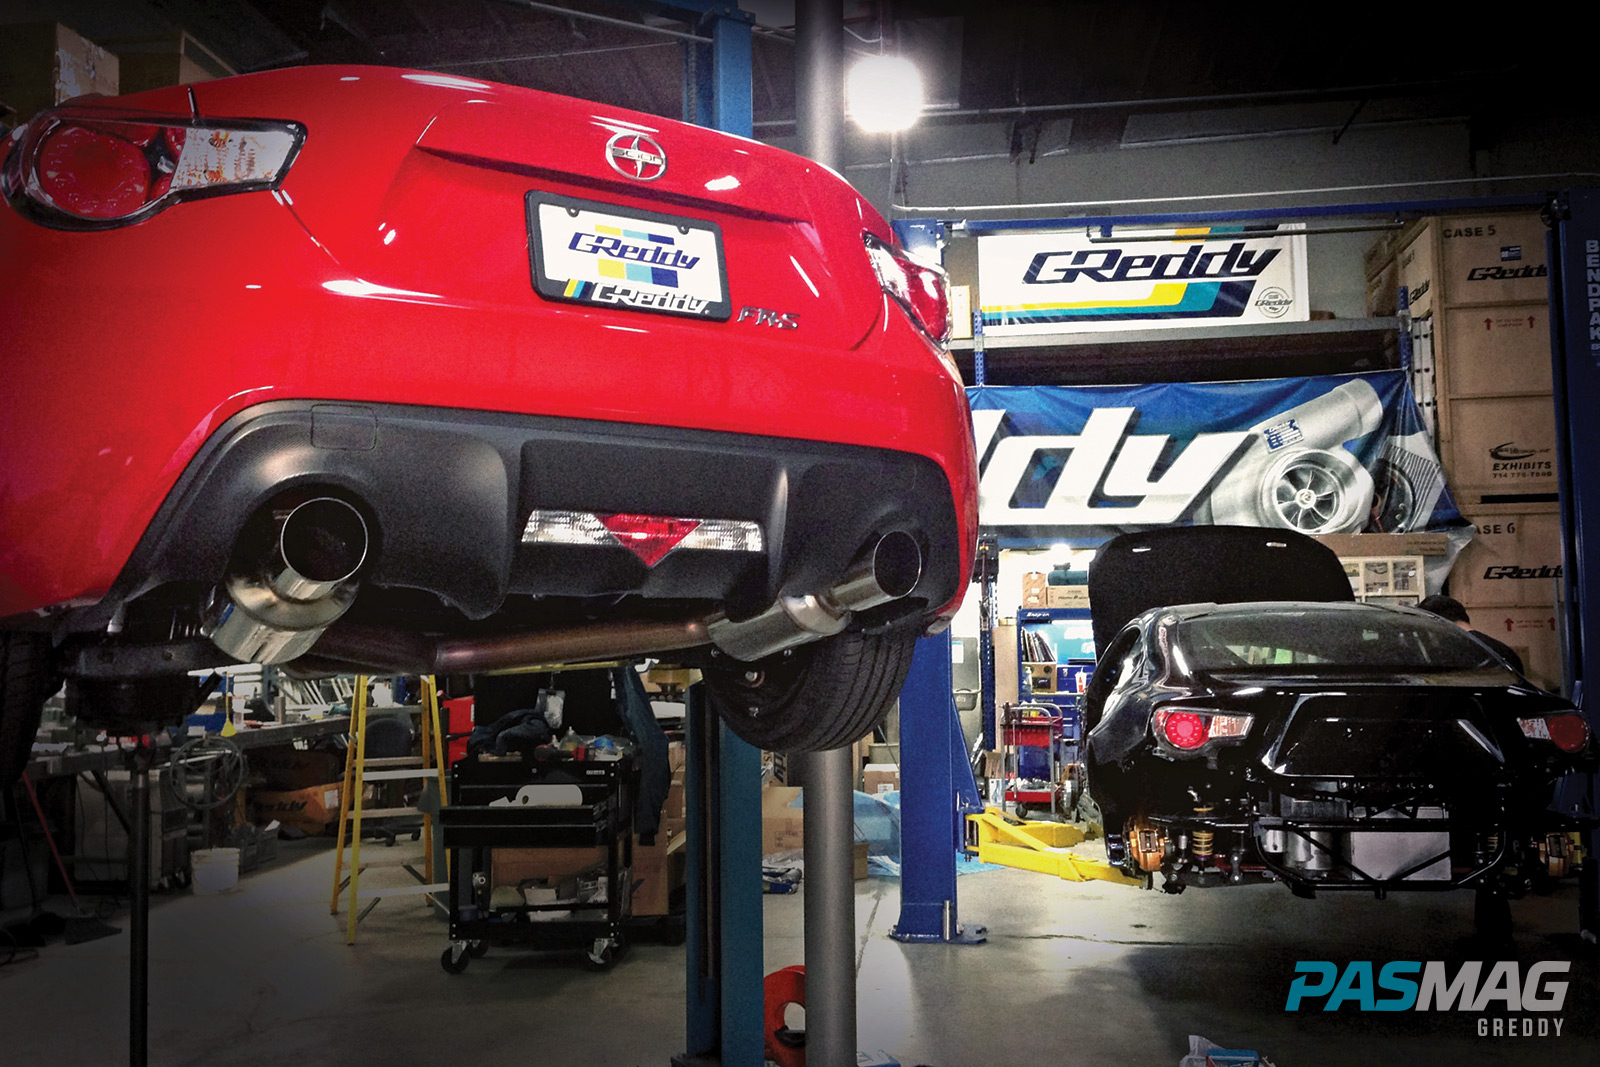
From a young age, Kenshiro Gushi put the drift scene in shock and awe with his natural ability. Whether it’s Formula DRIFT, D1 Grand Prix, Pikes Peak, or any invitational he decides to crush, Gushi continuously defies expectations. The same can be said of his daily driver, the Scion FR-S. Scion’s new enthusiast car has taken the automotive world by storm and won its way into many a gearhead’s heart.
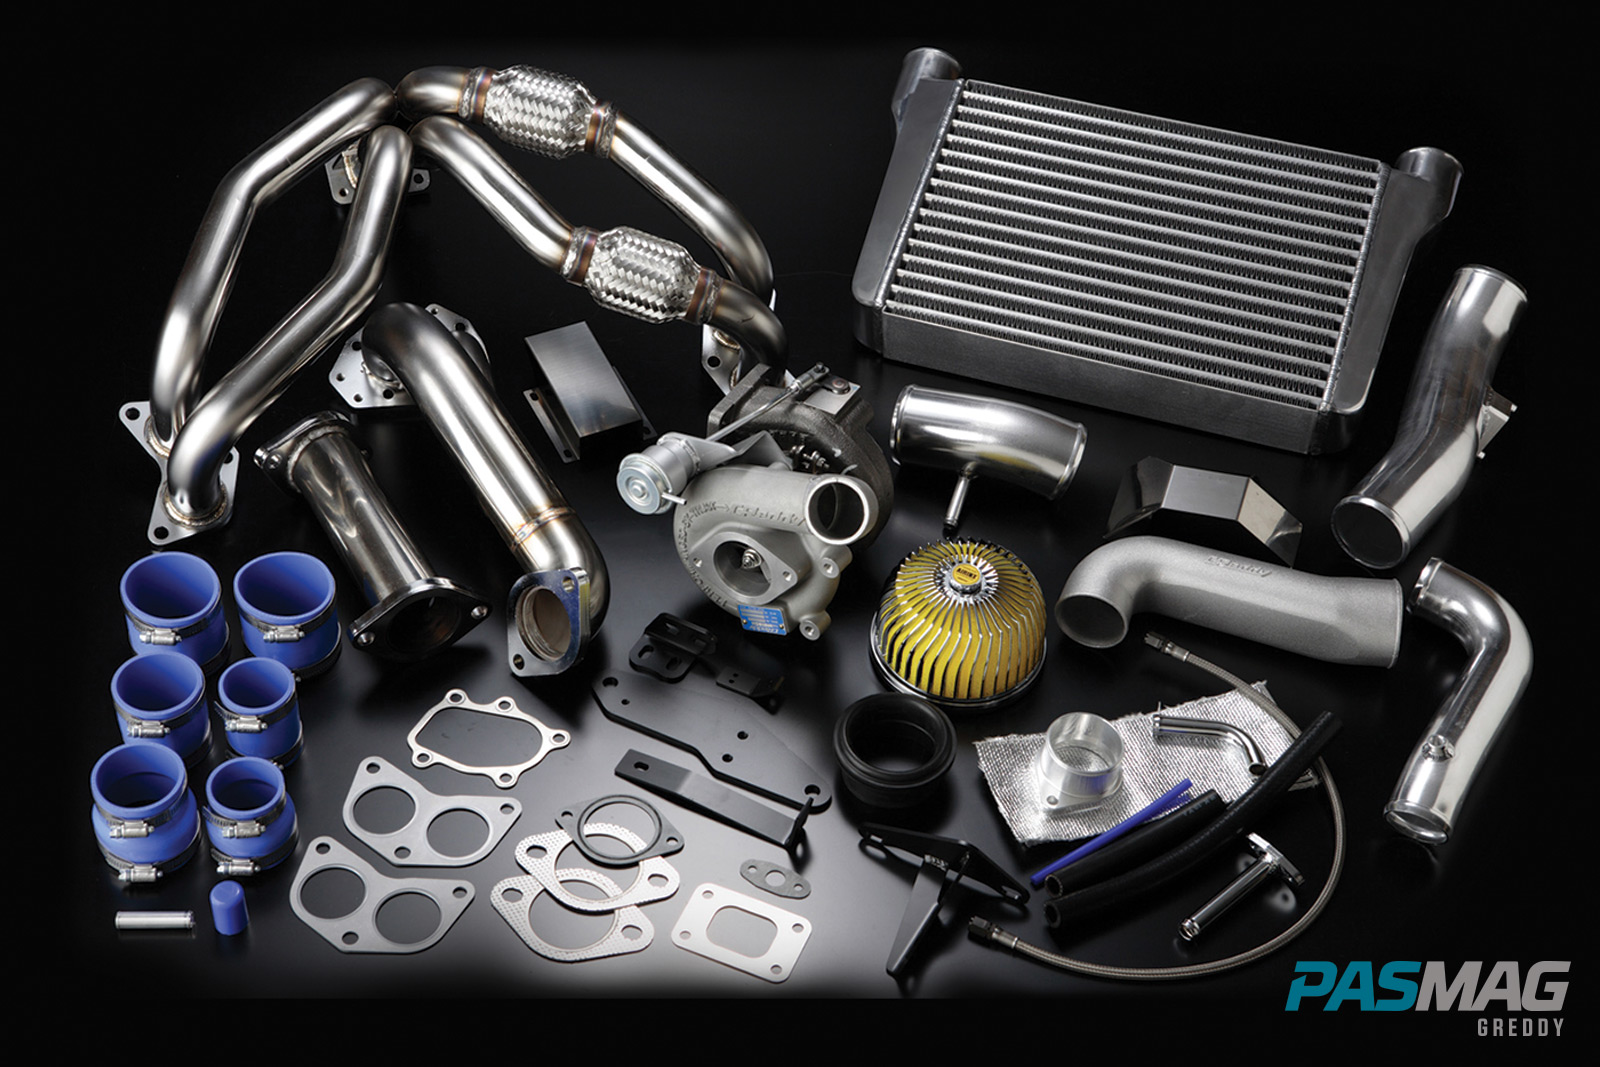
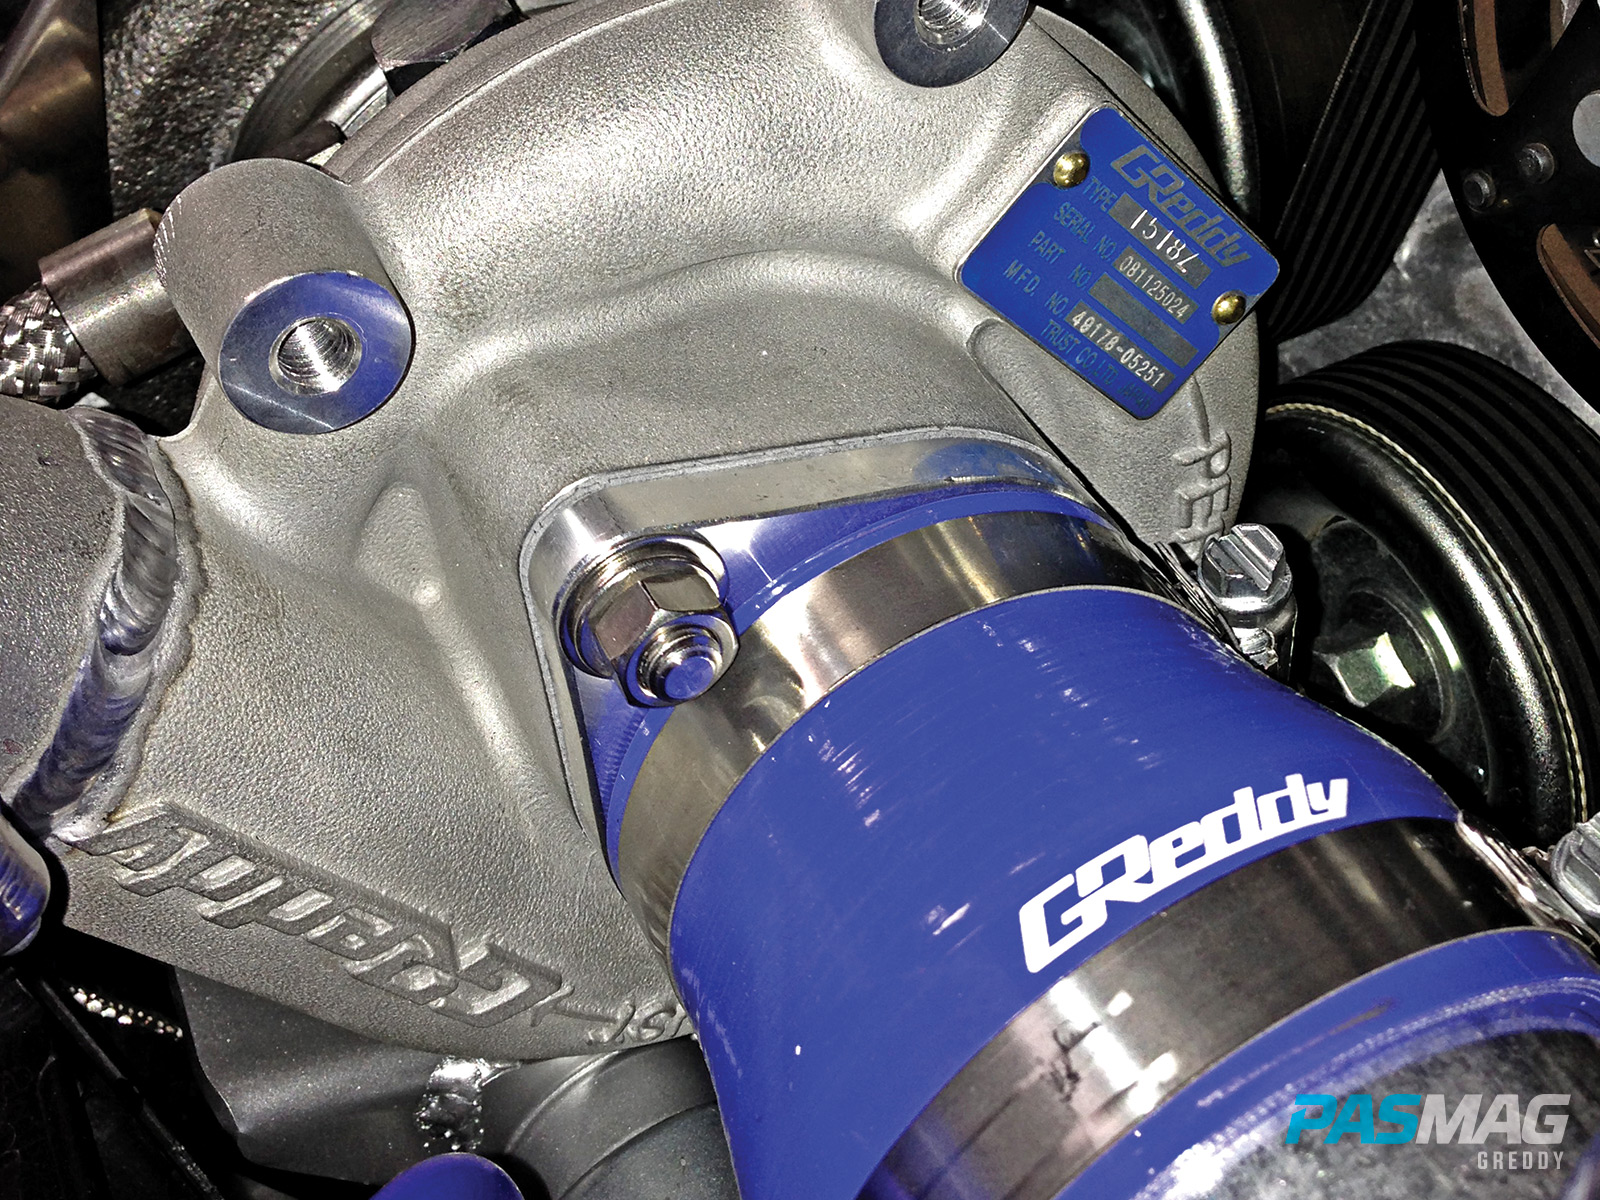
Of course, a demanding driver like Gushi is well-suited to a car that wants nothing more than to be thrashed about, but Gushi is no average driver. He soon discovered he’d be a little happier if, when he pushed his FR-S on the track, it gave him a bit more push back. As a part of the GReddy Racing Team, it made sense to look within for a solution. GReddy delivered. Having released its T518Z Tuner Turbo Kit for the ZN6 and ZC6 chassis, GReddy believes it has just the thing for Gushi’s needs. So here’s how he outfitted his first FR-S, “Marilyn,” with a bit of GReddy induction goodness...
 The work was done, of course, by the man himself.
The FR-S install starts on the hydraulic lift. Safety first: disconnect the negative battery terminal. Begin by removing the necessary OEM parts. Just to be safe, refer to the factory service manual prior to uninstalling factory bits. The underside of the FR-S looks kind of like a Hot Wheels car with all of the black underbody covers, but you’ll need to spoil the illusion a little bit by removing the front cover. Drain the oil into a catch can and remove the oil pan and oil pressure switch.
To get at the meat of the install, the FR-S’s face needs to be ripped off, so remove the front bumper. A tap with a flat-head screwdriver on the inside tabs of those pesky side marker lights should help with removal. Next to come out is the washer tank and bumper reinforcement, followed by the air cleaner case and inlet assembly. Install the five (5) mm silicone cap to the L-joint pipe below the brake booster after removing the intake chamber. Once the radiator plate, support sub assembly, fan and shield and reservoir tank are out, the manifold should be fairly easy to remove.
Getting that turbo goodness installed can now begin. Before getting started, put on safety glasses. Wash out the oil pan and scrape off the excess silicone sealant from the part and mounting edges. Following the turbo kit manual, tap a 13 mm hole for an oil return tube.
Take the turbo manifold and install the all-important heat shield, followed by three supplied stud bolts around the opening. Install the manifold, oil pan, and gaskets,
but not too tight - they’ll be coming off in a bit. Stick the oil return tube and gasket onto the turbo assembly and install it temporarily using the OEM bolts. Install the oil return hose bracket on the factory bolt, just under the crank pulley.
 |
 |
What’s the reasoning behind the loosely installed parts? To mark the oil return tube for correct positioning. Make sure it will not touch the crank pulley and that it’s aligned properly with the oil return hose bracket. Now remove the turbo, manifold, oil pan and all associated gaskets and get hands-on with that oil pan again.
Gushi Tip: “The kit requires you to drill a hole into your oil pan and weld on a return tube for the turbo oil return line. You have a few options. The better option would be to buy a new pan from Scion or Subaru and keep your stock one as a spare. This way, you can continue to drive your car while you get everything prepped and you will also end up with a spare.”
Put on some welding gear and weld on the return tube using the markings and measurements you just made. Reinstall the newly modified oil pan with some new silicone to seal it up.
Next is the radiator fan and a little electrical work. Looking at the top of the fan shield, cut out a portion on the left and drill two five (5) mm holes on the right (as shown in the manual). Wrap the fan harness in thermo wrap and it’s ready to be relocated. Reinstall the radiator fan, shield, and reservoir tank and reconnect the coupler. Also, wrap the end of the lower radiator hose nearest the oil pan.
Get the manifold and test pipe bracket ready for install, but don’t dare reuse those nuts! For this part of the install, some replacements will need to be picked up from a dealer first.
The turbo can finally go on. Using a ratchet and hex key, loosen the tensioner pulley by turning the belt clockwise while keeping tension off the pulley by using the hex key in the orifice to the left. Remove the idler pulley’s number one and two bolts and add the turbo mounting bracket using the spacers provided. Spacer “A” has a lip, so make sure it’s inserted into the idler pulley. Do not remove the belt when installing the bracket. Now the turbo assembly and turbine inlet gasket are ready to be installed.
Messing with oil fittings comes next. Grab the straight union fitting and install it into the three-way fitting. Make sure to use threaded seals and don’t over-tighten anything in this section. The factory oil switch that was uninstalled at the beginning can be placed onto the three-way fitting now as well. On the opposite side of the switch, install the 90-degree elbow fitting and reconnect the oil pressure switch harness. Once the banjo bolt and crush washer are installed on the turbo assembly, connect the oil pressure line from the elbow fitting to the banjo bolt. There should be plenty of zip ties in the box, so use those to tie the oil pressure line to the radiator fan cover. Make sure the line is nice and secure. As Smokey the Turbo Bear says, “Only you can prevent engine fires.”
 |
 |
After wrapping the oil return hose with thermo cloth, route it between the turbo and oil pan and mount it to the hose bracket. GReddy recommends using stainless steel wire.
Installing the down-pipe is a piece of cake with the supplied hardware and turbine outlet gasket. After the down-pipe is nice and tight, wrap the air/fuel sensor harness with thermo cloth and install that and the O2 sensor into the test pipe. Using the complimentary gaskets and hardware, bolt on the test pipe while making any adjustments needed to the exhaust system. Now adjust and tighten on turbine bracket “B” and reconnect the O2 and air/fuel sensor harness couplers.
Turbine bracket “A” comes right after, but install it loosely. The heat shield should slide right over the down pipe hardware with everything fitting nicely in the cutouts. Tighten it all up.
Have your silicone ready, because the free rotation union installation onto the compression pipe is going to need some sealing. Next, loosely install compression pipes C-1 to C-3 for future adjustments. Make sure you cut a hole in the anti-diversion foam for C-2 to fit.

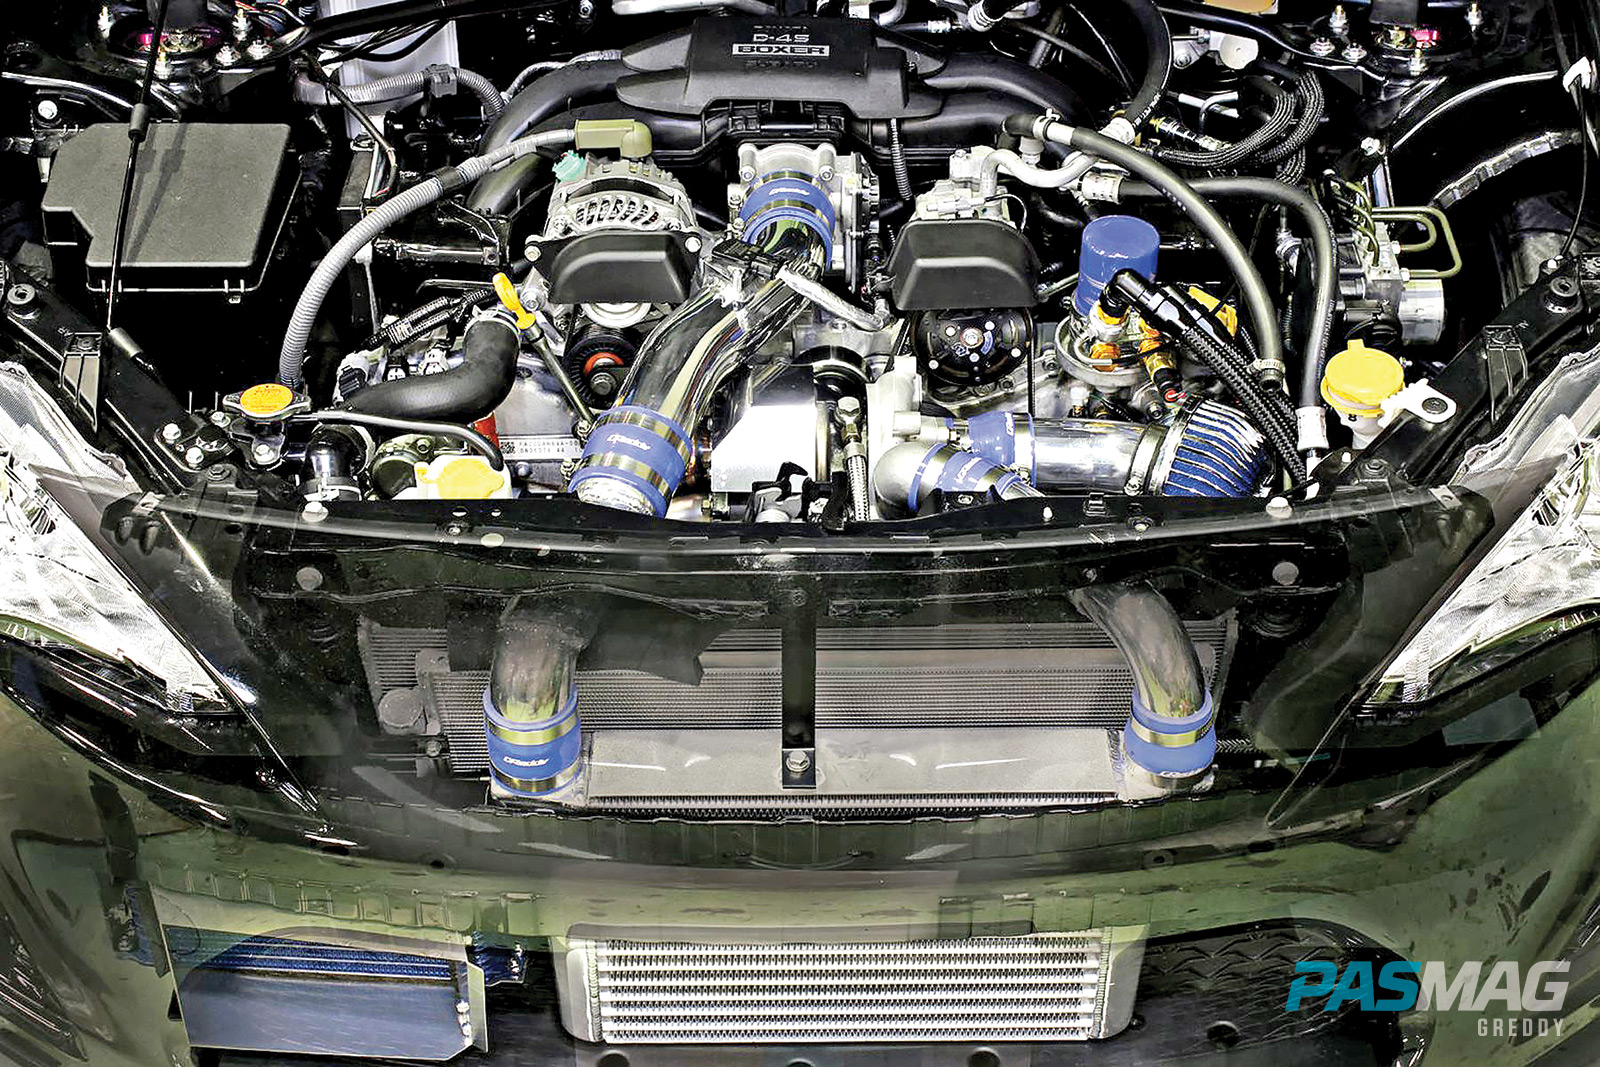
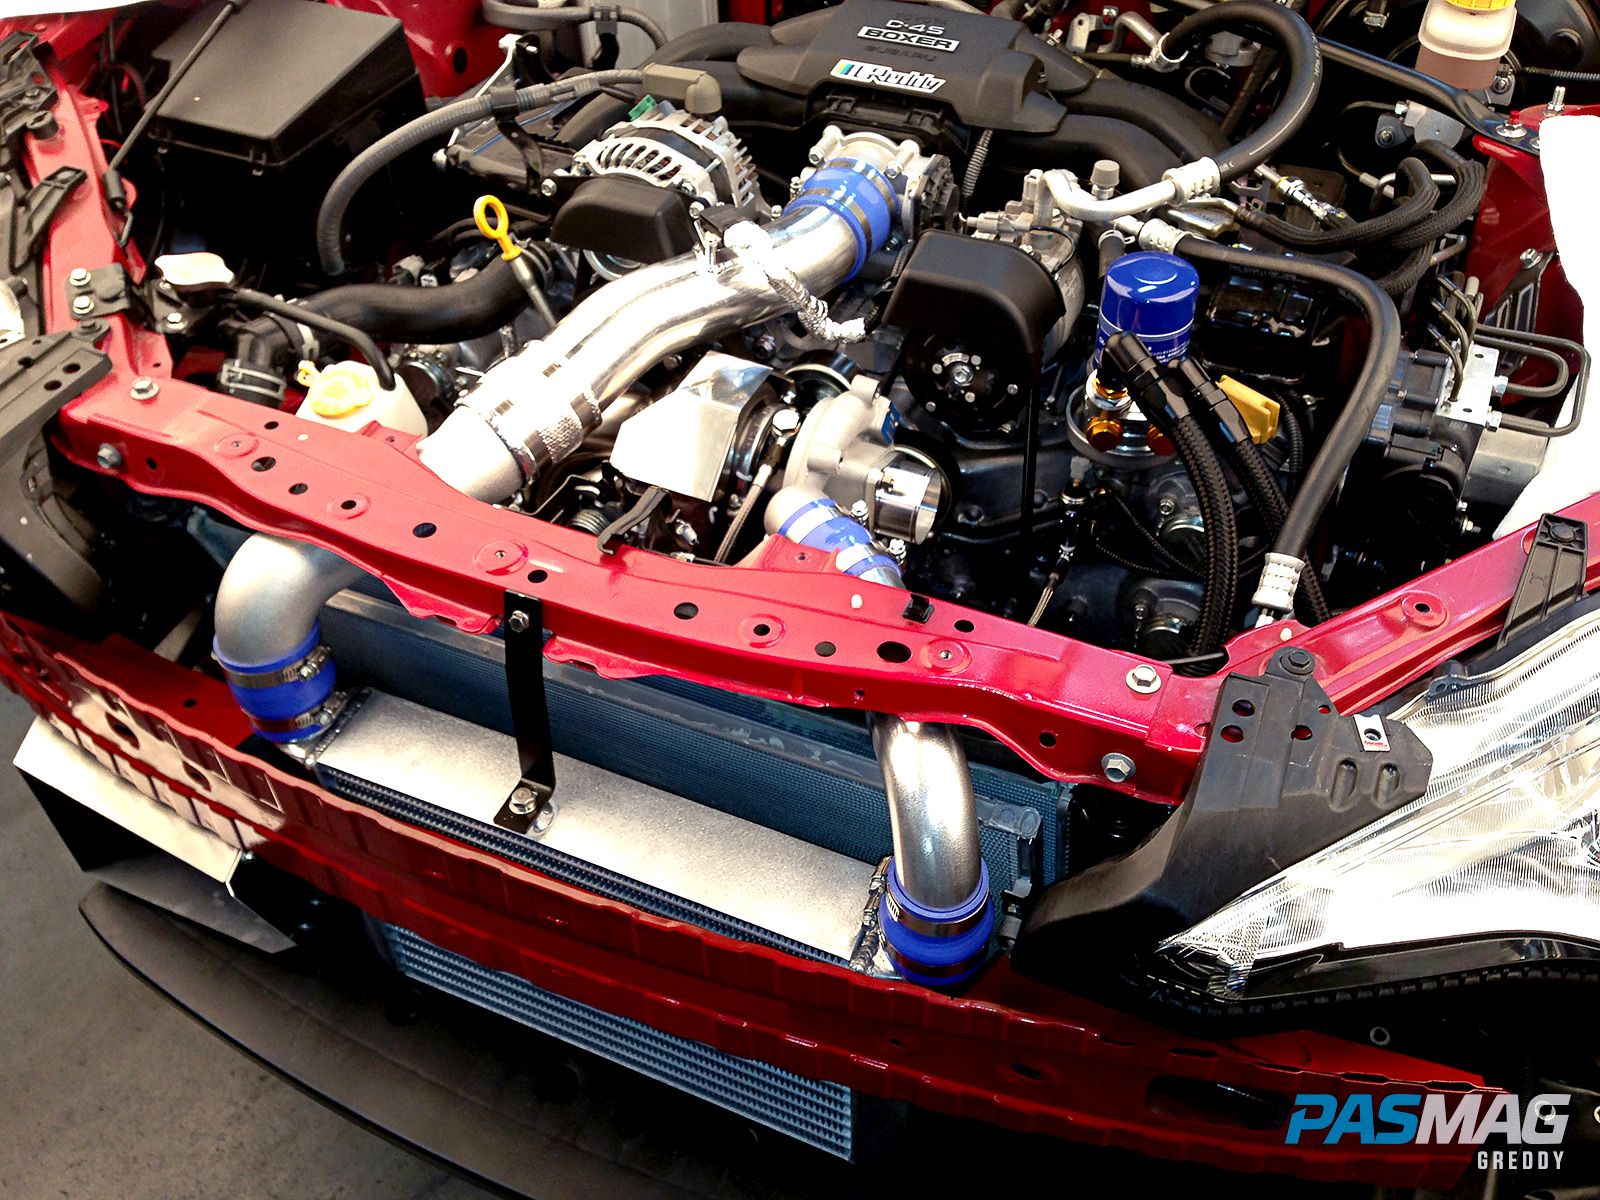
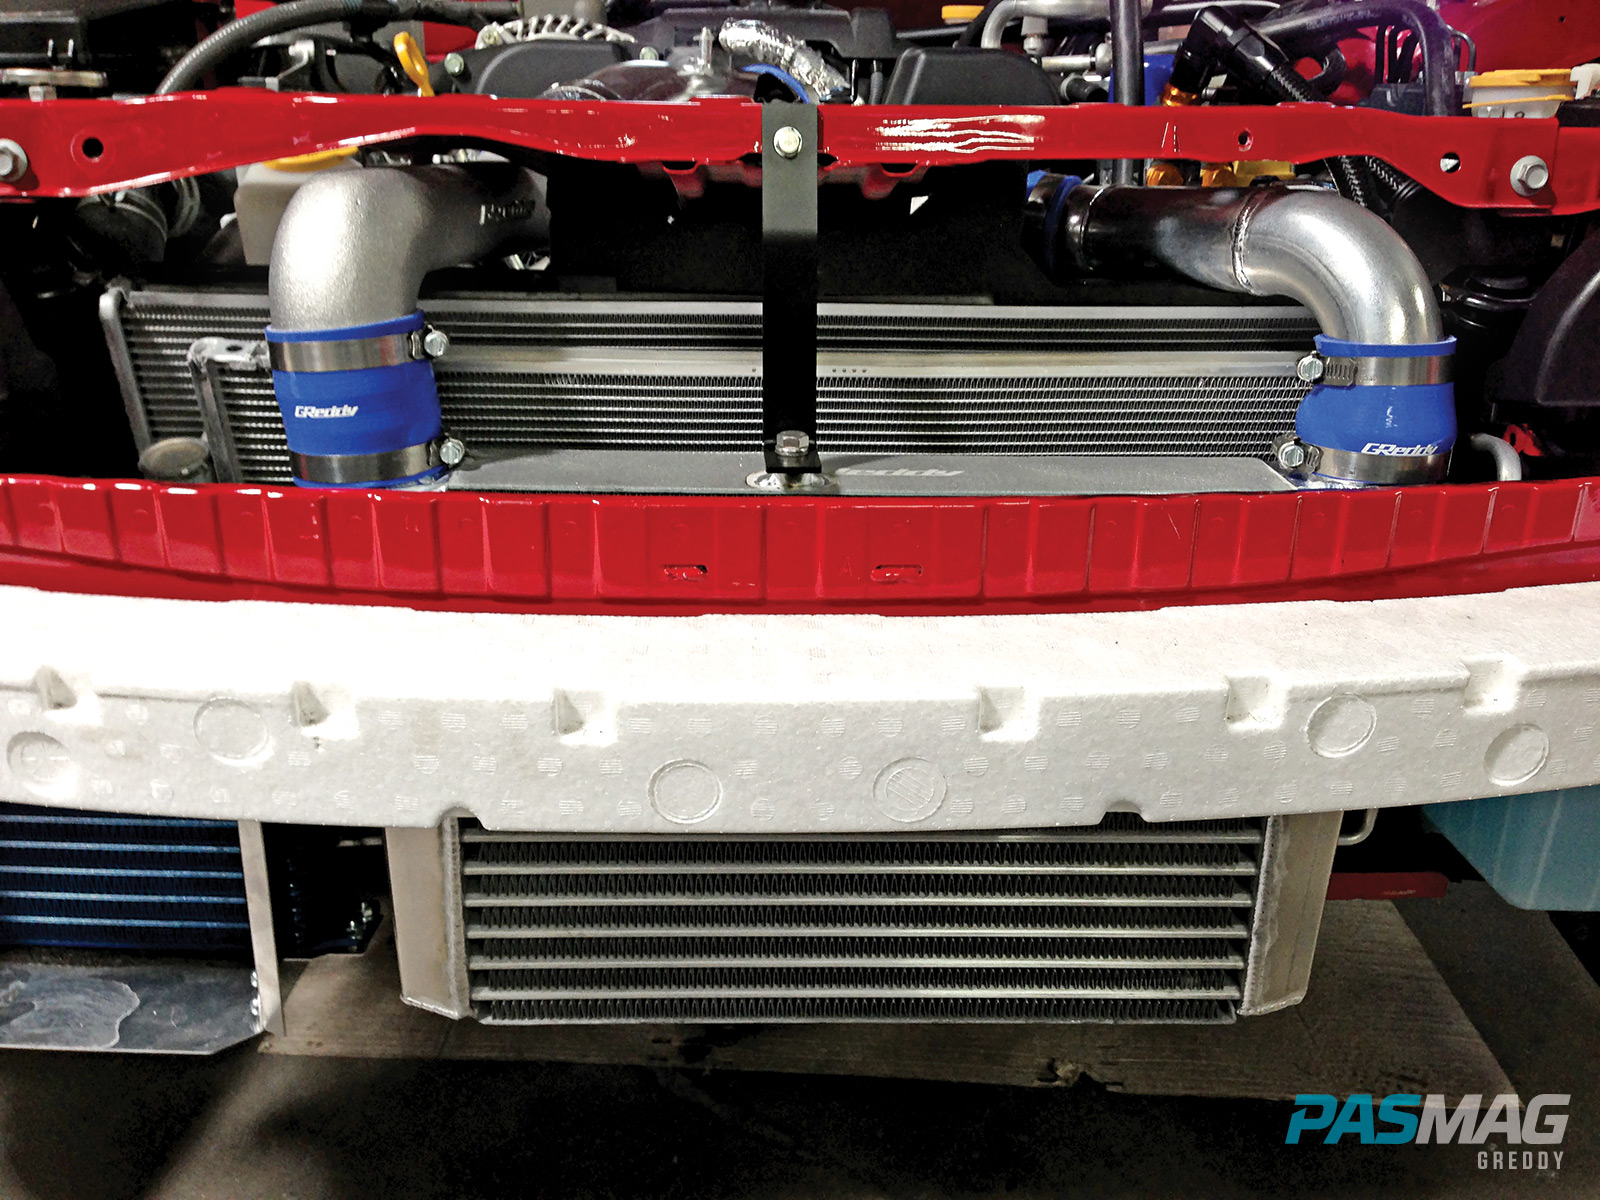
It’s time to get the intercooler mounted up. Reinstall the radiator core support sub assembly and relocate the hood latch cable using some zip ties. Put the intercooler bracket on, but keep it loose for now. After removing the front bumper bracket and drilling two seven (7) mm holes, reinstall and fit the intercooler into place with the mounting spacers and tighten up the intercooler bracket. Hook up the piping, check the clearance, and tighten those hose clamps. Install the airflow meter on the appropriate pipe, wrap the airflow harness in thermo wrap and connect it to the coupler. Connect the compression tube and free rotation union to the turbo actuator. Frosty.
As much as a turbo needs oil, it needs air as well. Start by installing the intake tube adapter flange onto the turbo compressor inlet with the supplied stud bolts and gasket. Assemble the Airinx air filter, attach it to the intake pipe and install. Extend the ventilation hose using the 12 mm hose union and supplied rubber hose, then connect it to the intake tube.
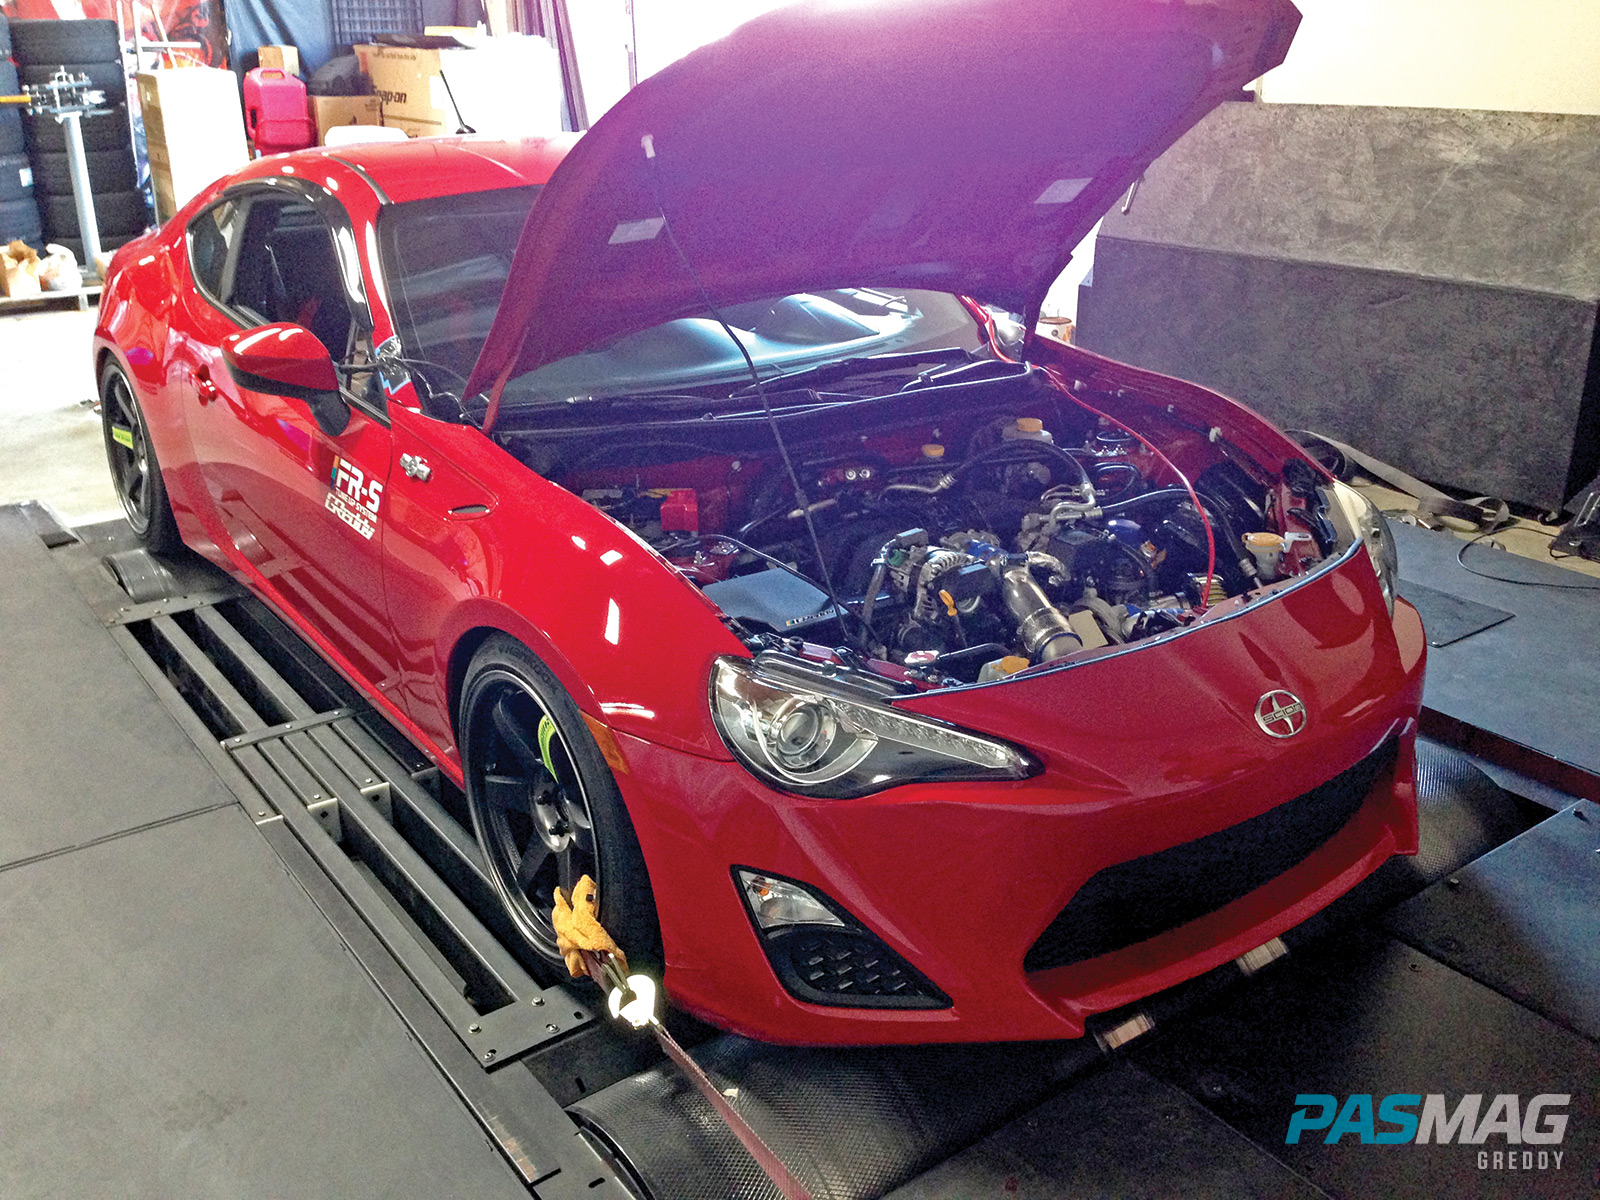
Now comes the moment of truth. Replace the engine oil, reconnect the battery and remove the ECU harness from the ECU. Give the engine a crank by turning the ignition. This will pressurize the turbo oil feed line. Double check the oil level and add as needed. Reconnect the ECU and start the engine while checking for leaks. All good? The front bumper reinforcement will need to be modified to fit the intercooler. Cut as needed and reinstall along with the washer tank, bumper cover and underbody cover.
“The only difficult part – not even difficult to be honest - was prying off the oil pan,” Gushi recalls. “The install is seriously a breeze. As long as you have basic tools, anyone can perform this job.”
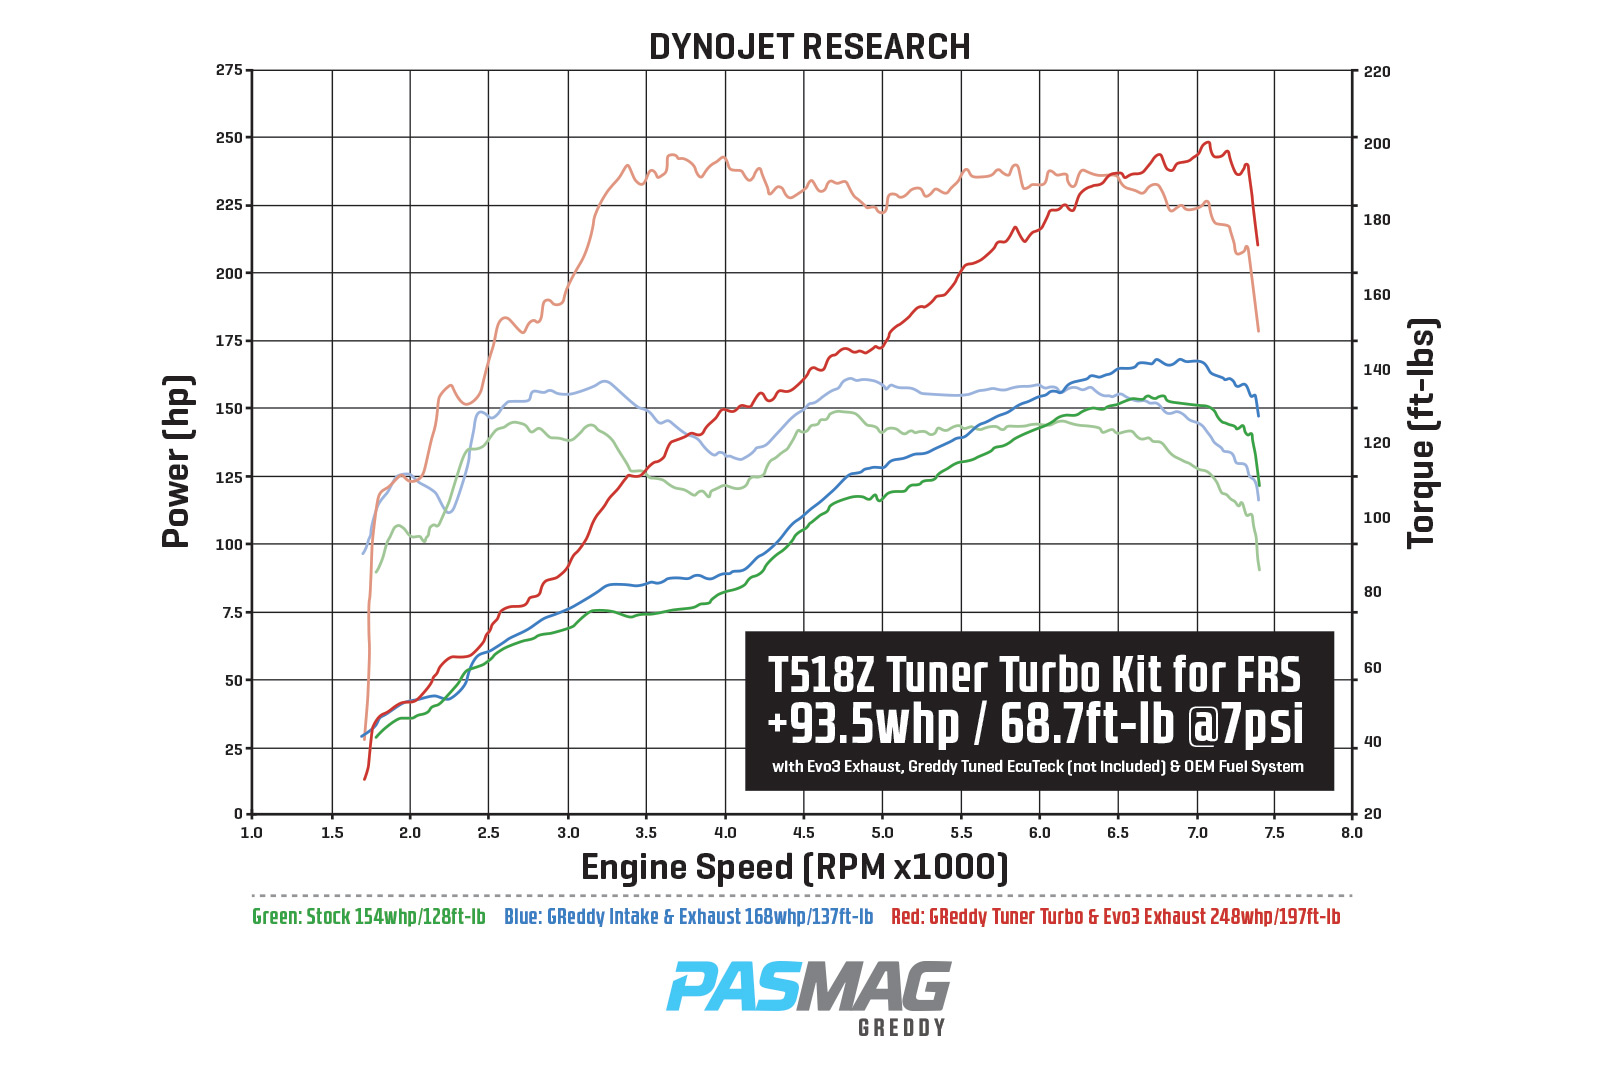 Gushi himself reports he’s running 250 wheel horsepower – at the stock five PSI - which is about 90 more than stock, and he’s thrilled with the difference the kit makes on and off the track. Both Gushi and GReddy recommend running an oil cooler as well – which GReddy offers - as the four-banger boxers run a little hotter with the added boost. Gushi also says an upgraded fuel pump and injectors were a good idea, too, if you’re thinking of increasing boost pressure.
“Not that you run out of fuel with the stock injectors, but as you increase boost, you will be sitting closer to the max capacity of both the pump and injectors,” Gushi says.
So, was he GReddy Tuner Turbo Kit good enough for the best?
“To be honest, I never complained about the factory power output, but after driving my car upon completion, I don't think I can ever go back to NA,” confesses Gushi. “It has a smooth power delivery that is both street-able and also enjoyable on the circuit.”
“I fell in love with my car all over again.”