

The Hyundai Genesis Coupe 3.8L V6 is no slouch from the factory with 306 horsepower, but our guess is that if you’re reading this magazine you believe that more horsepower is better. Fortunately the folks over at TurboKits.com think the same way and have released their bolt-on single turbo kit for the 2010-2012 Genesis Coupe. The kit features everything you’ll need to make an extra 140 hp at the wheels, including a Turbonetics 64 mm billet turbocharger, ECU reflash, and even the required V-band clamps.
The only thing you’ll need is a mechanic’s tool box and some free time! Let’s show you how it’s done.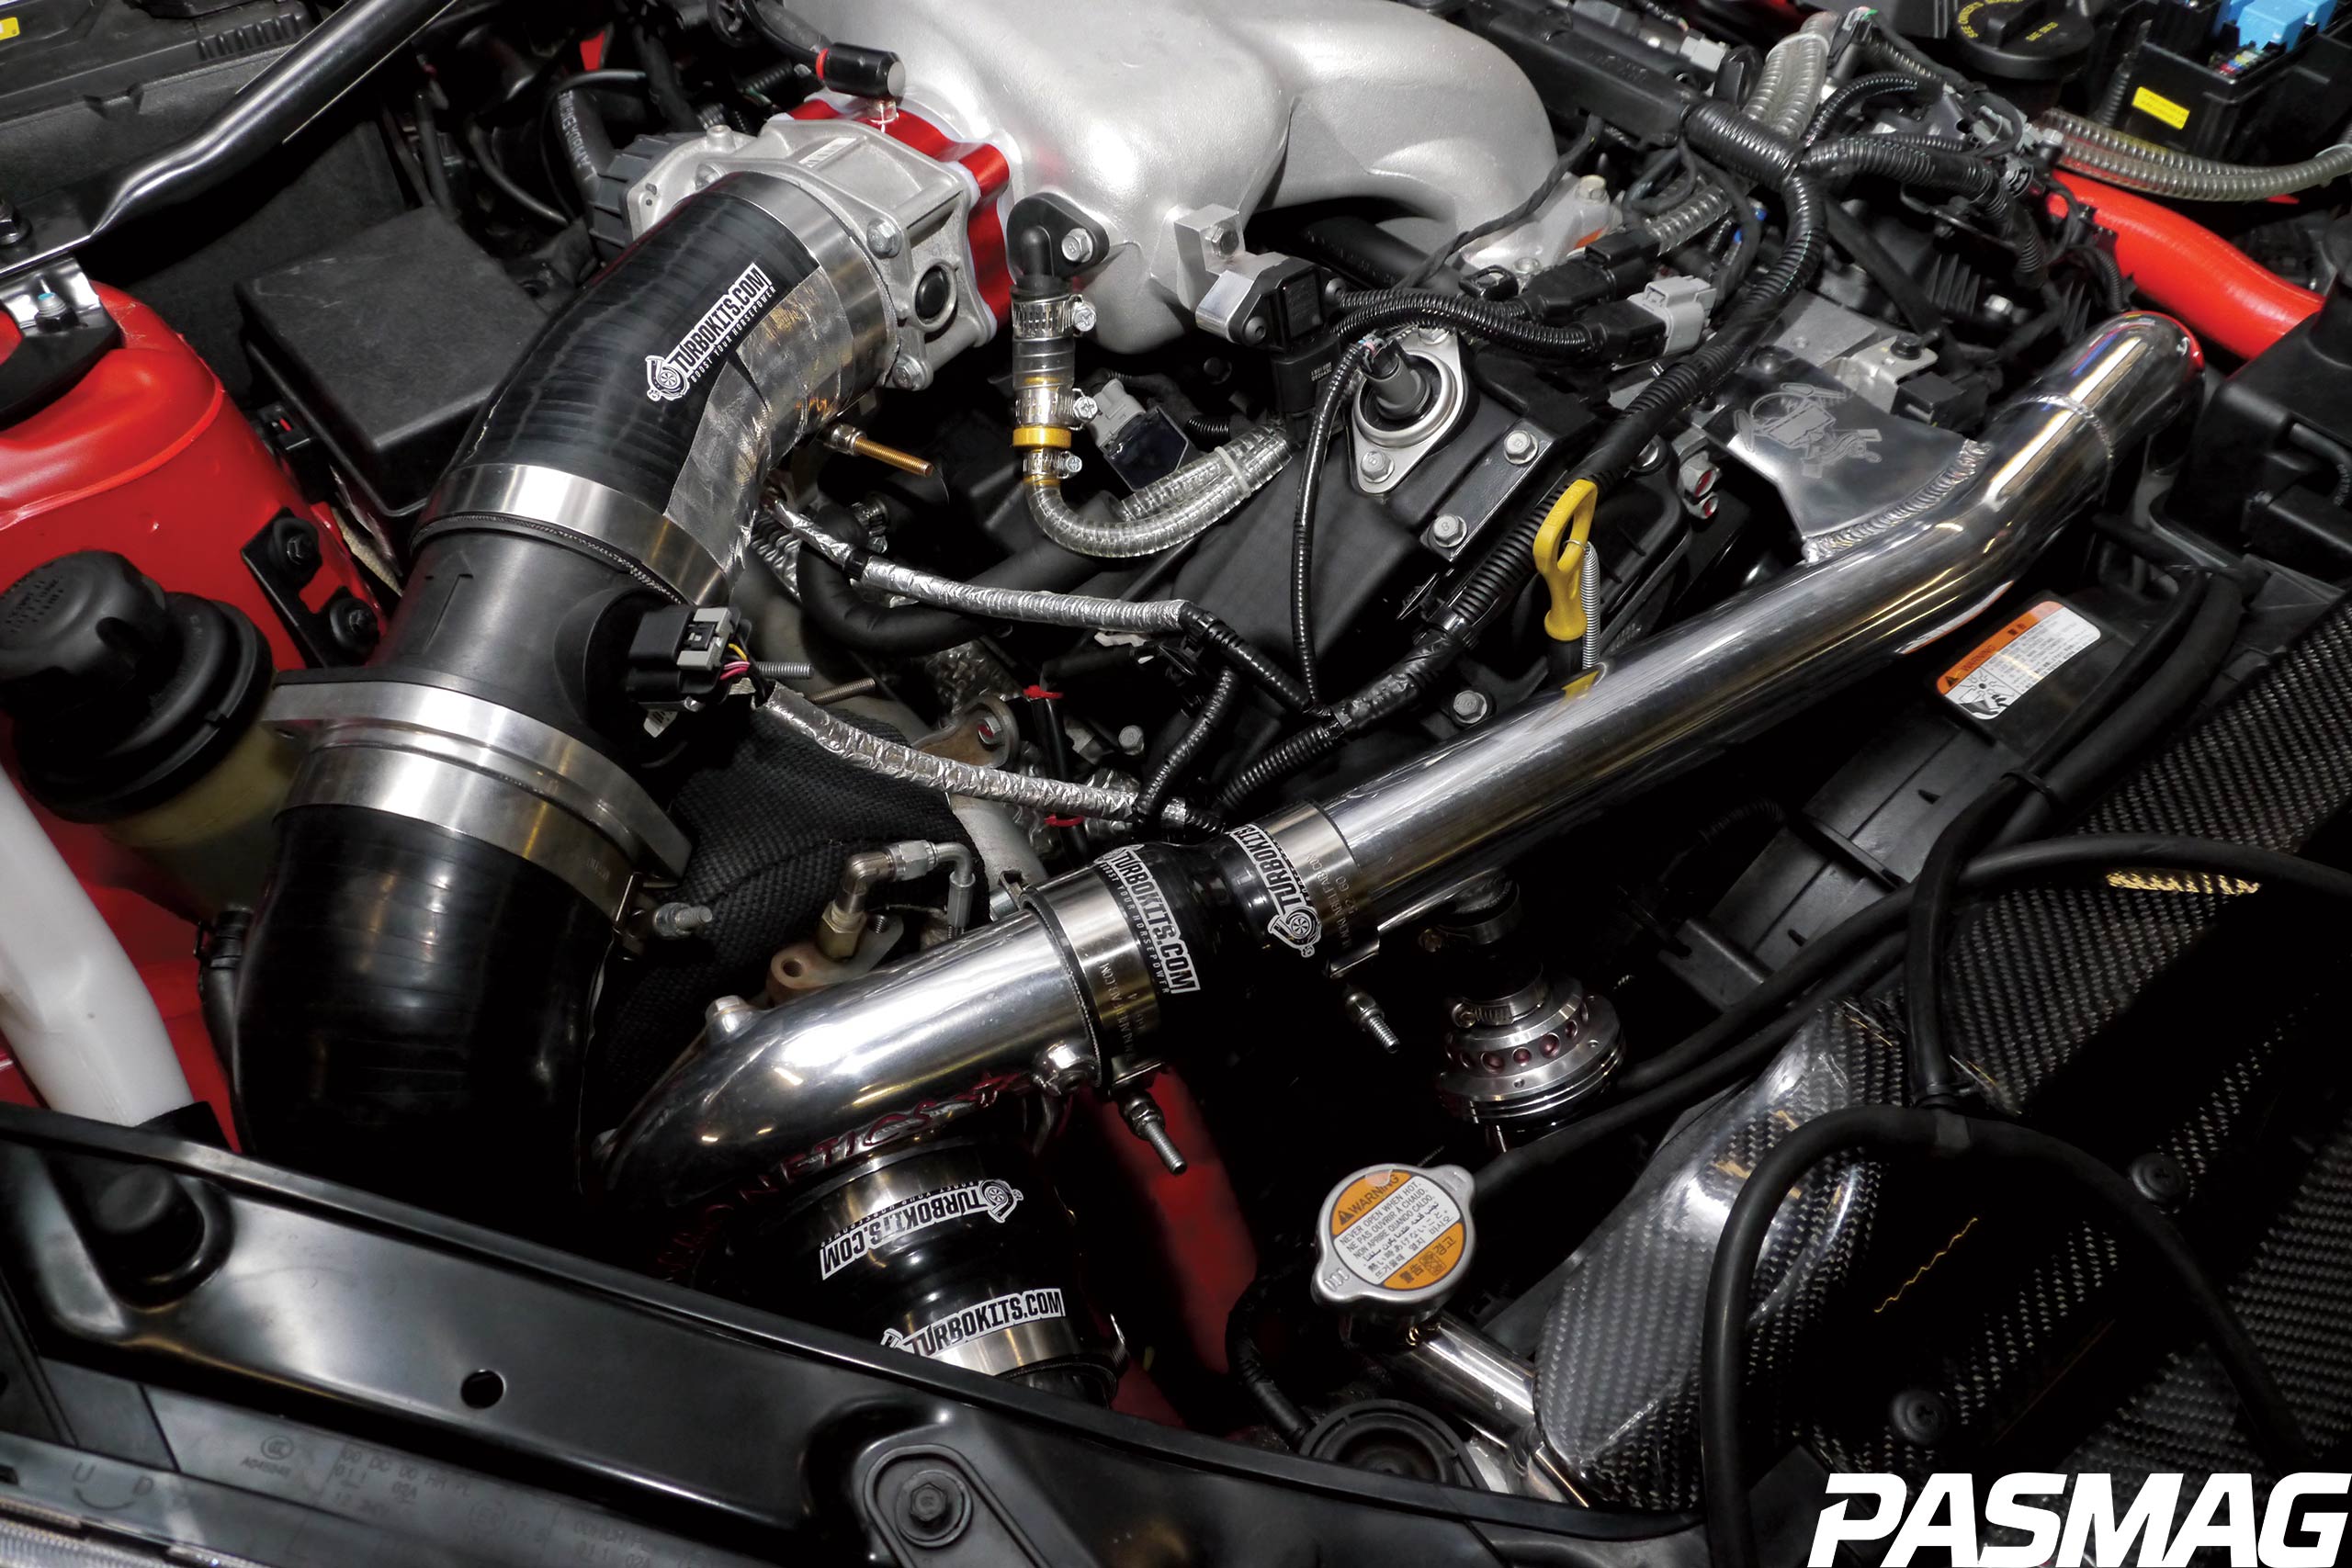
When taking on a project of this magnitude it is always a good idea to start with an organized and clean garage or workspace. Make sure you have all of the required tools and double check to make sure your kit came with all of the required parts. Once you’re organized and ready, lift the car off the ground using a hydraulic lift or a floor jack and properly placed jack stands. Once the car is safely off the ground disconnect the battery by removing the negative cable from its terminal and taping the connecting end up, or securely wrap a towel around it so it does not accidentally make contact with the battery terminal. Now it’s time to start prepping the car for installation. This begins by removing the engine cover, factory intake system, headlights, front wheels, front grille, front bumper and washer fluid reservoir. 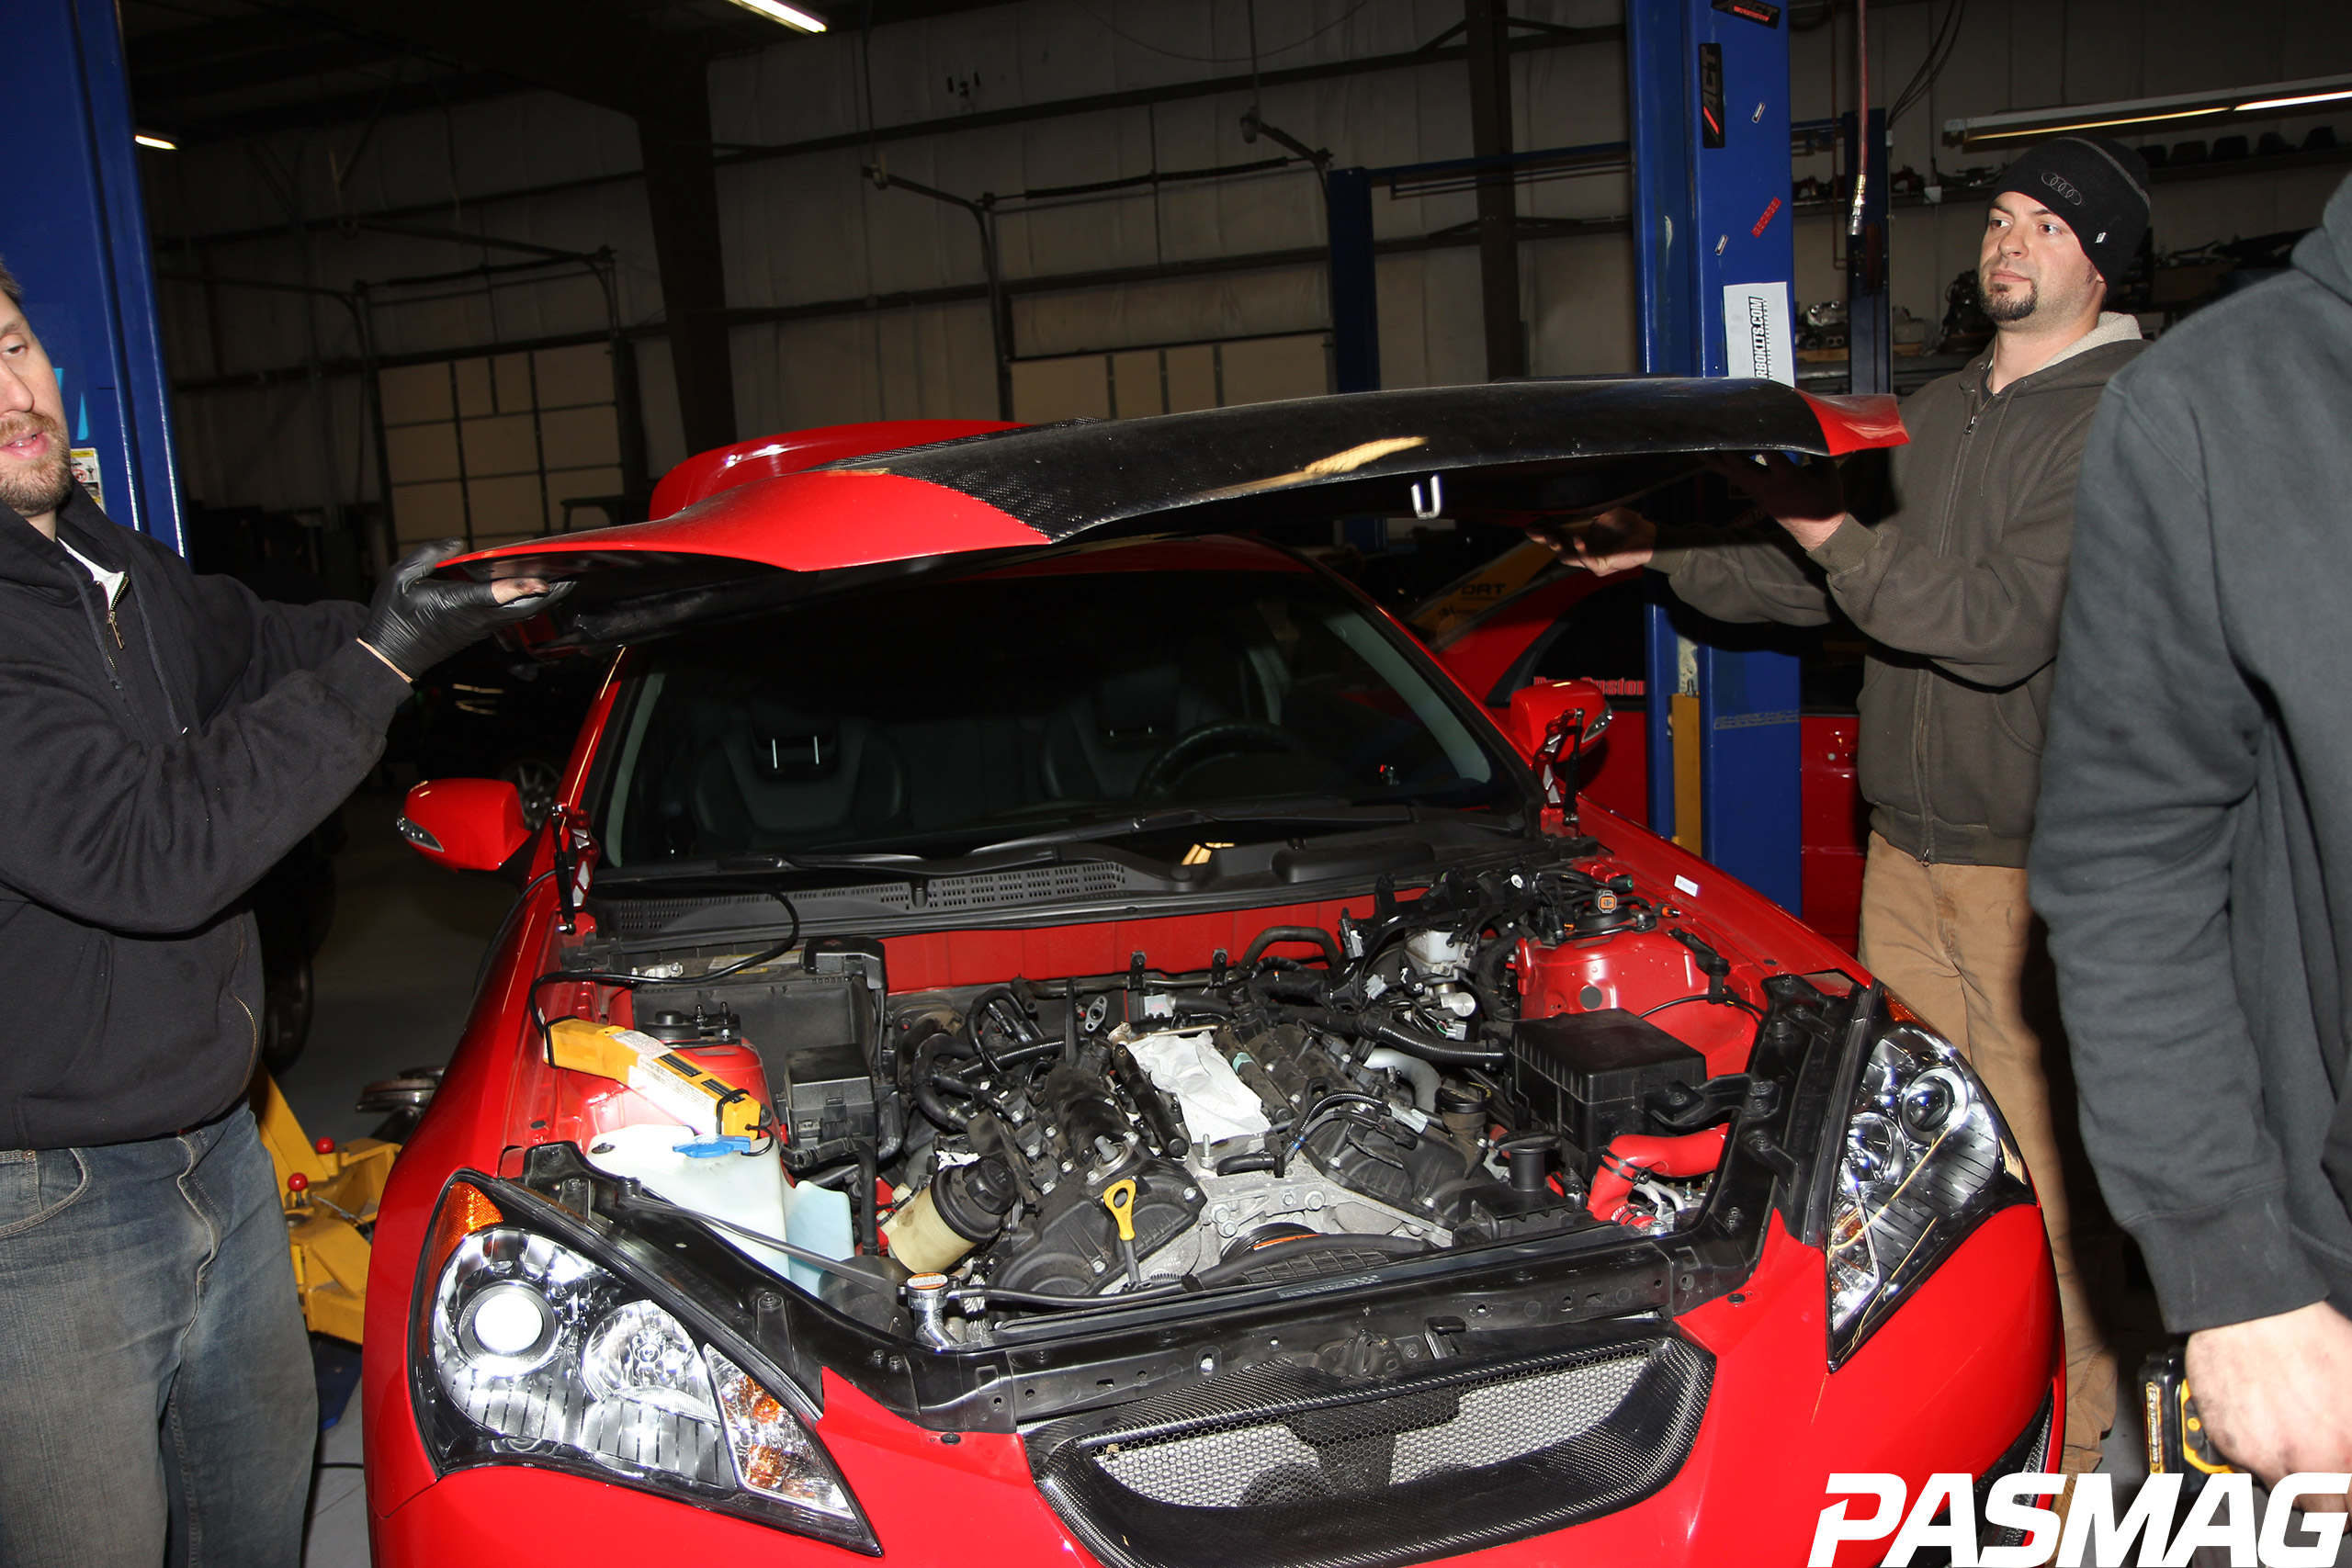
Set all of those components somewhere out of the way.
From there, move underneath the car and remove the O2 sensors from the catalytic converters and position them out of the way. Next, remove the bolts holding the secondary pipes to the catalytic converter and remove the secondary pipes.
Next, drain the oil and remove the bolts, holding the oil pan to the bottom of the engine block. Using a large flathead screwdriver or pry bar, pry the oil pan away from the engine block. Be careful and take your time on this step so you don’t damage the oil pan as it will be re-used. Once the oil pan is off, remove the excess RTV sealant from both the pan and the block using a razor blade or putty knife.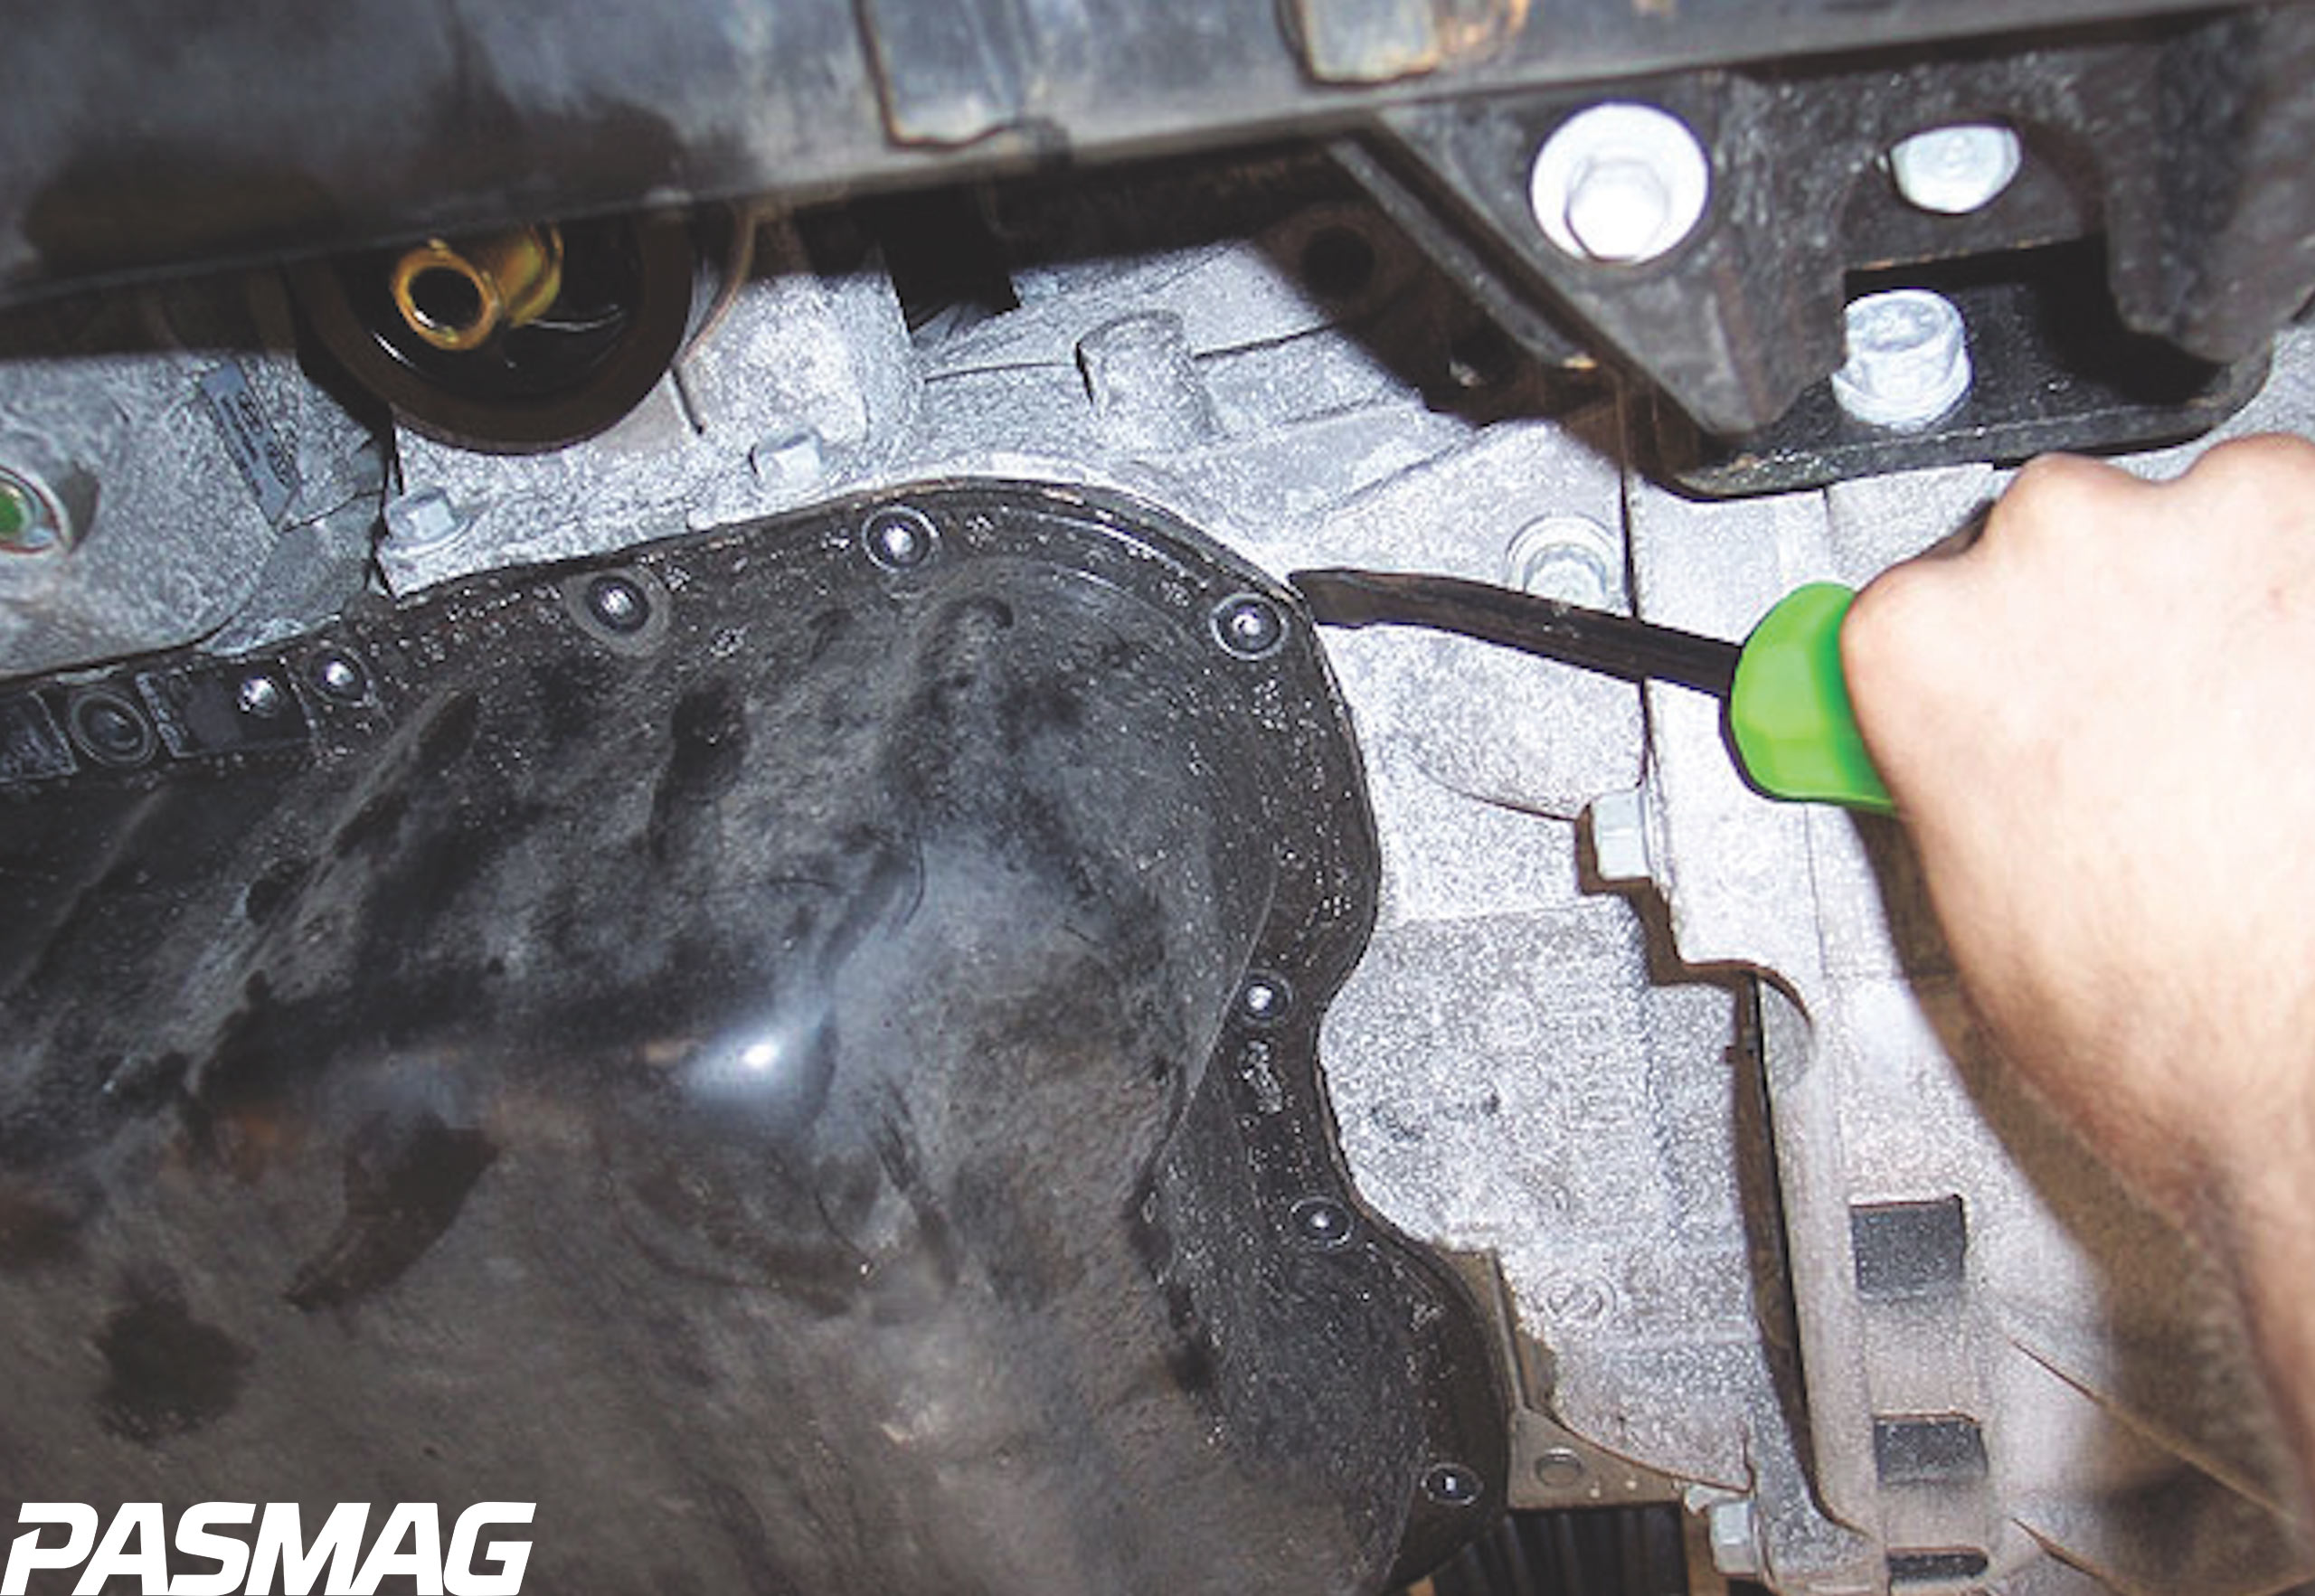
With the oil pan removed, drill out the oil drain fitting hole using the location and details specified in the installation manual provided with your kit. Once the fitting is in place, re-apply RTV sealant and re-install the pan, making sure to wait at least 24 hours before filling the engine with oil to allow the RTV sealant to properly dry.
With those steps finished it’s time to move back to the top of the engine bay and wrap the fuse box, throttle body wiring, and harness in the supplied heat barrier tape.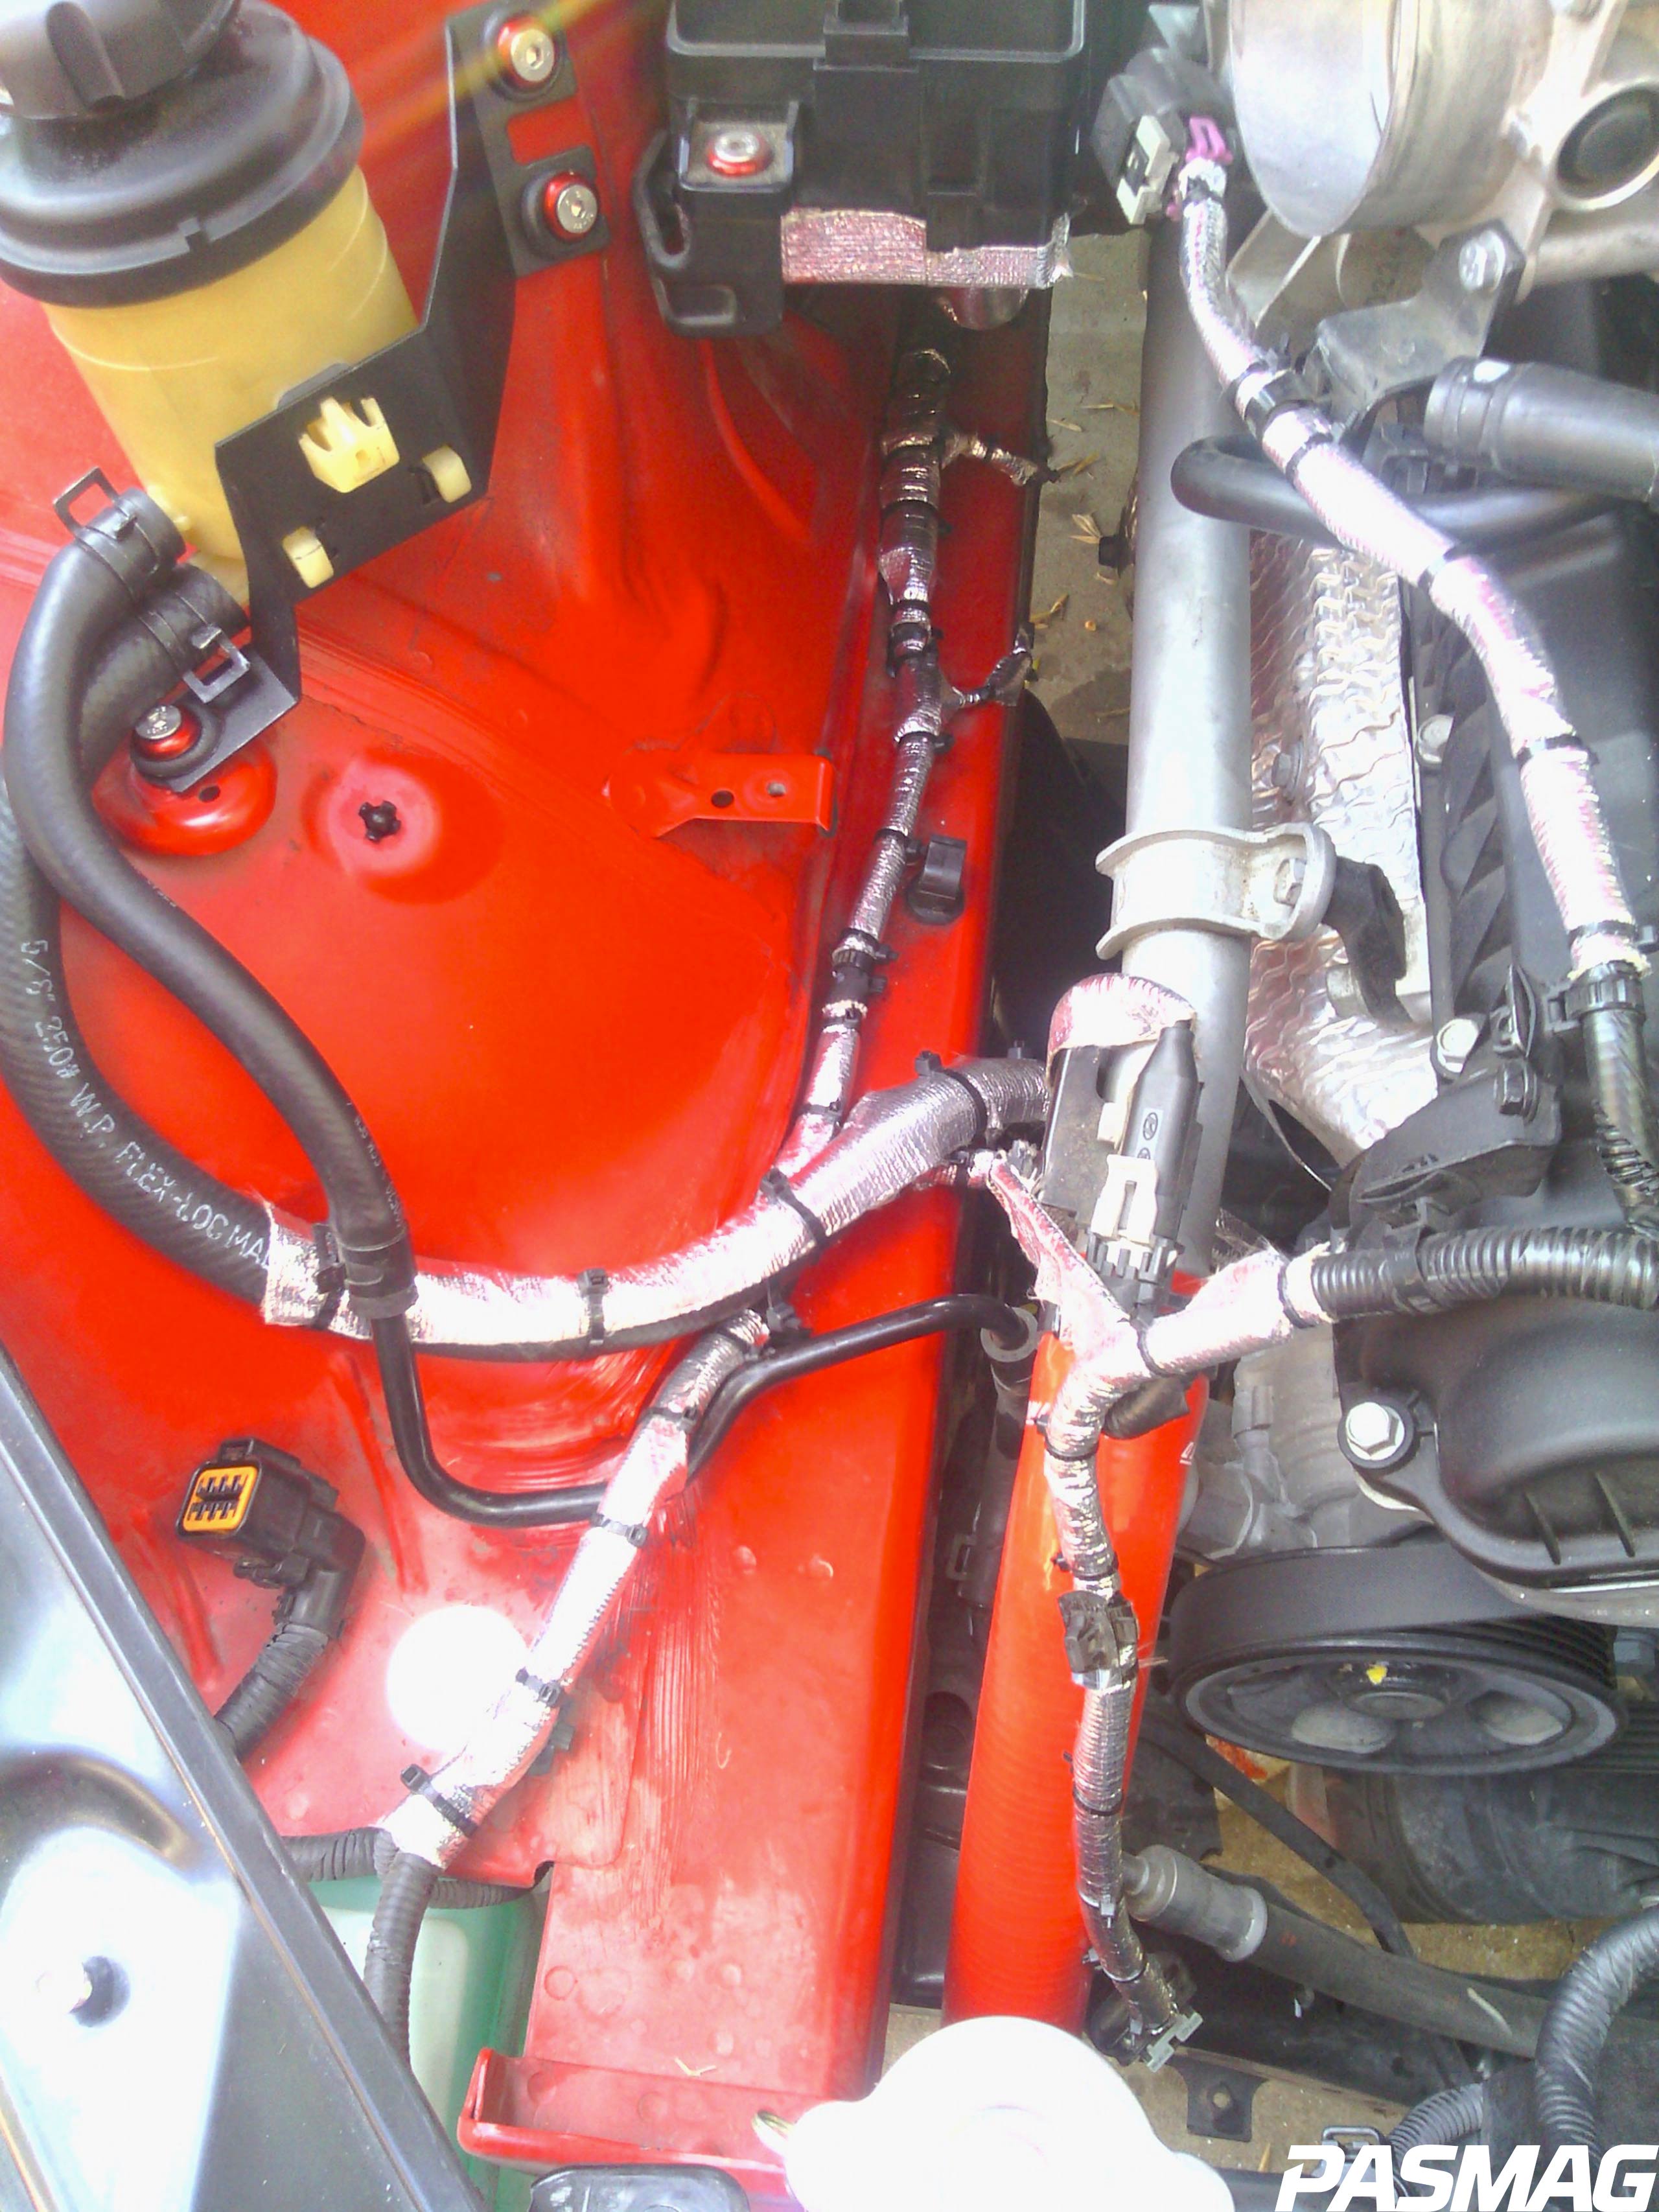
Then, remove the factory power steering reservoir making sure to catch the fluid in a clean bottle for re-use or have a bottle of new power steering fluid on hand for later. Using the supplied power steering bracket re-install the reservoir and re-position the lines.
Now is the fun part – prepping the Turbonetics turbocharger for installation. With a 13 mm wrench, loosen, but do not remove the bolts holding the exhaust and compressor housings in place so all three pieces of the turbo rotate independently. Position the oil feed inlet on the exhaust side and center section of the turbo at 12 ‘o clock and tighten one of the bolts to hold it in place. Position the compressor housing outlet to 3 ‘clock and tighten another bolt to hold it in place. Once everything is lined up, tighten the remaining bolts. Next, install the oil feed fitting, oil drain plug, and NPT flange onto the turbocharger.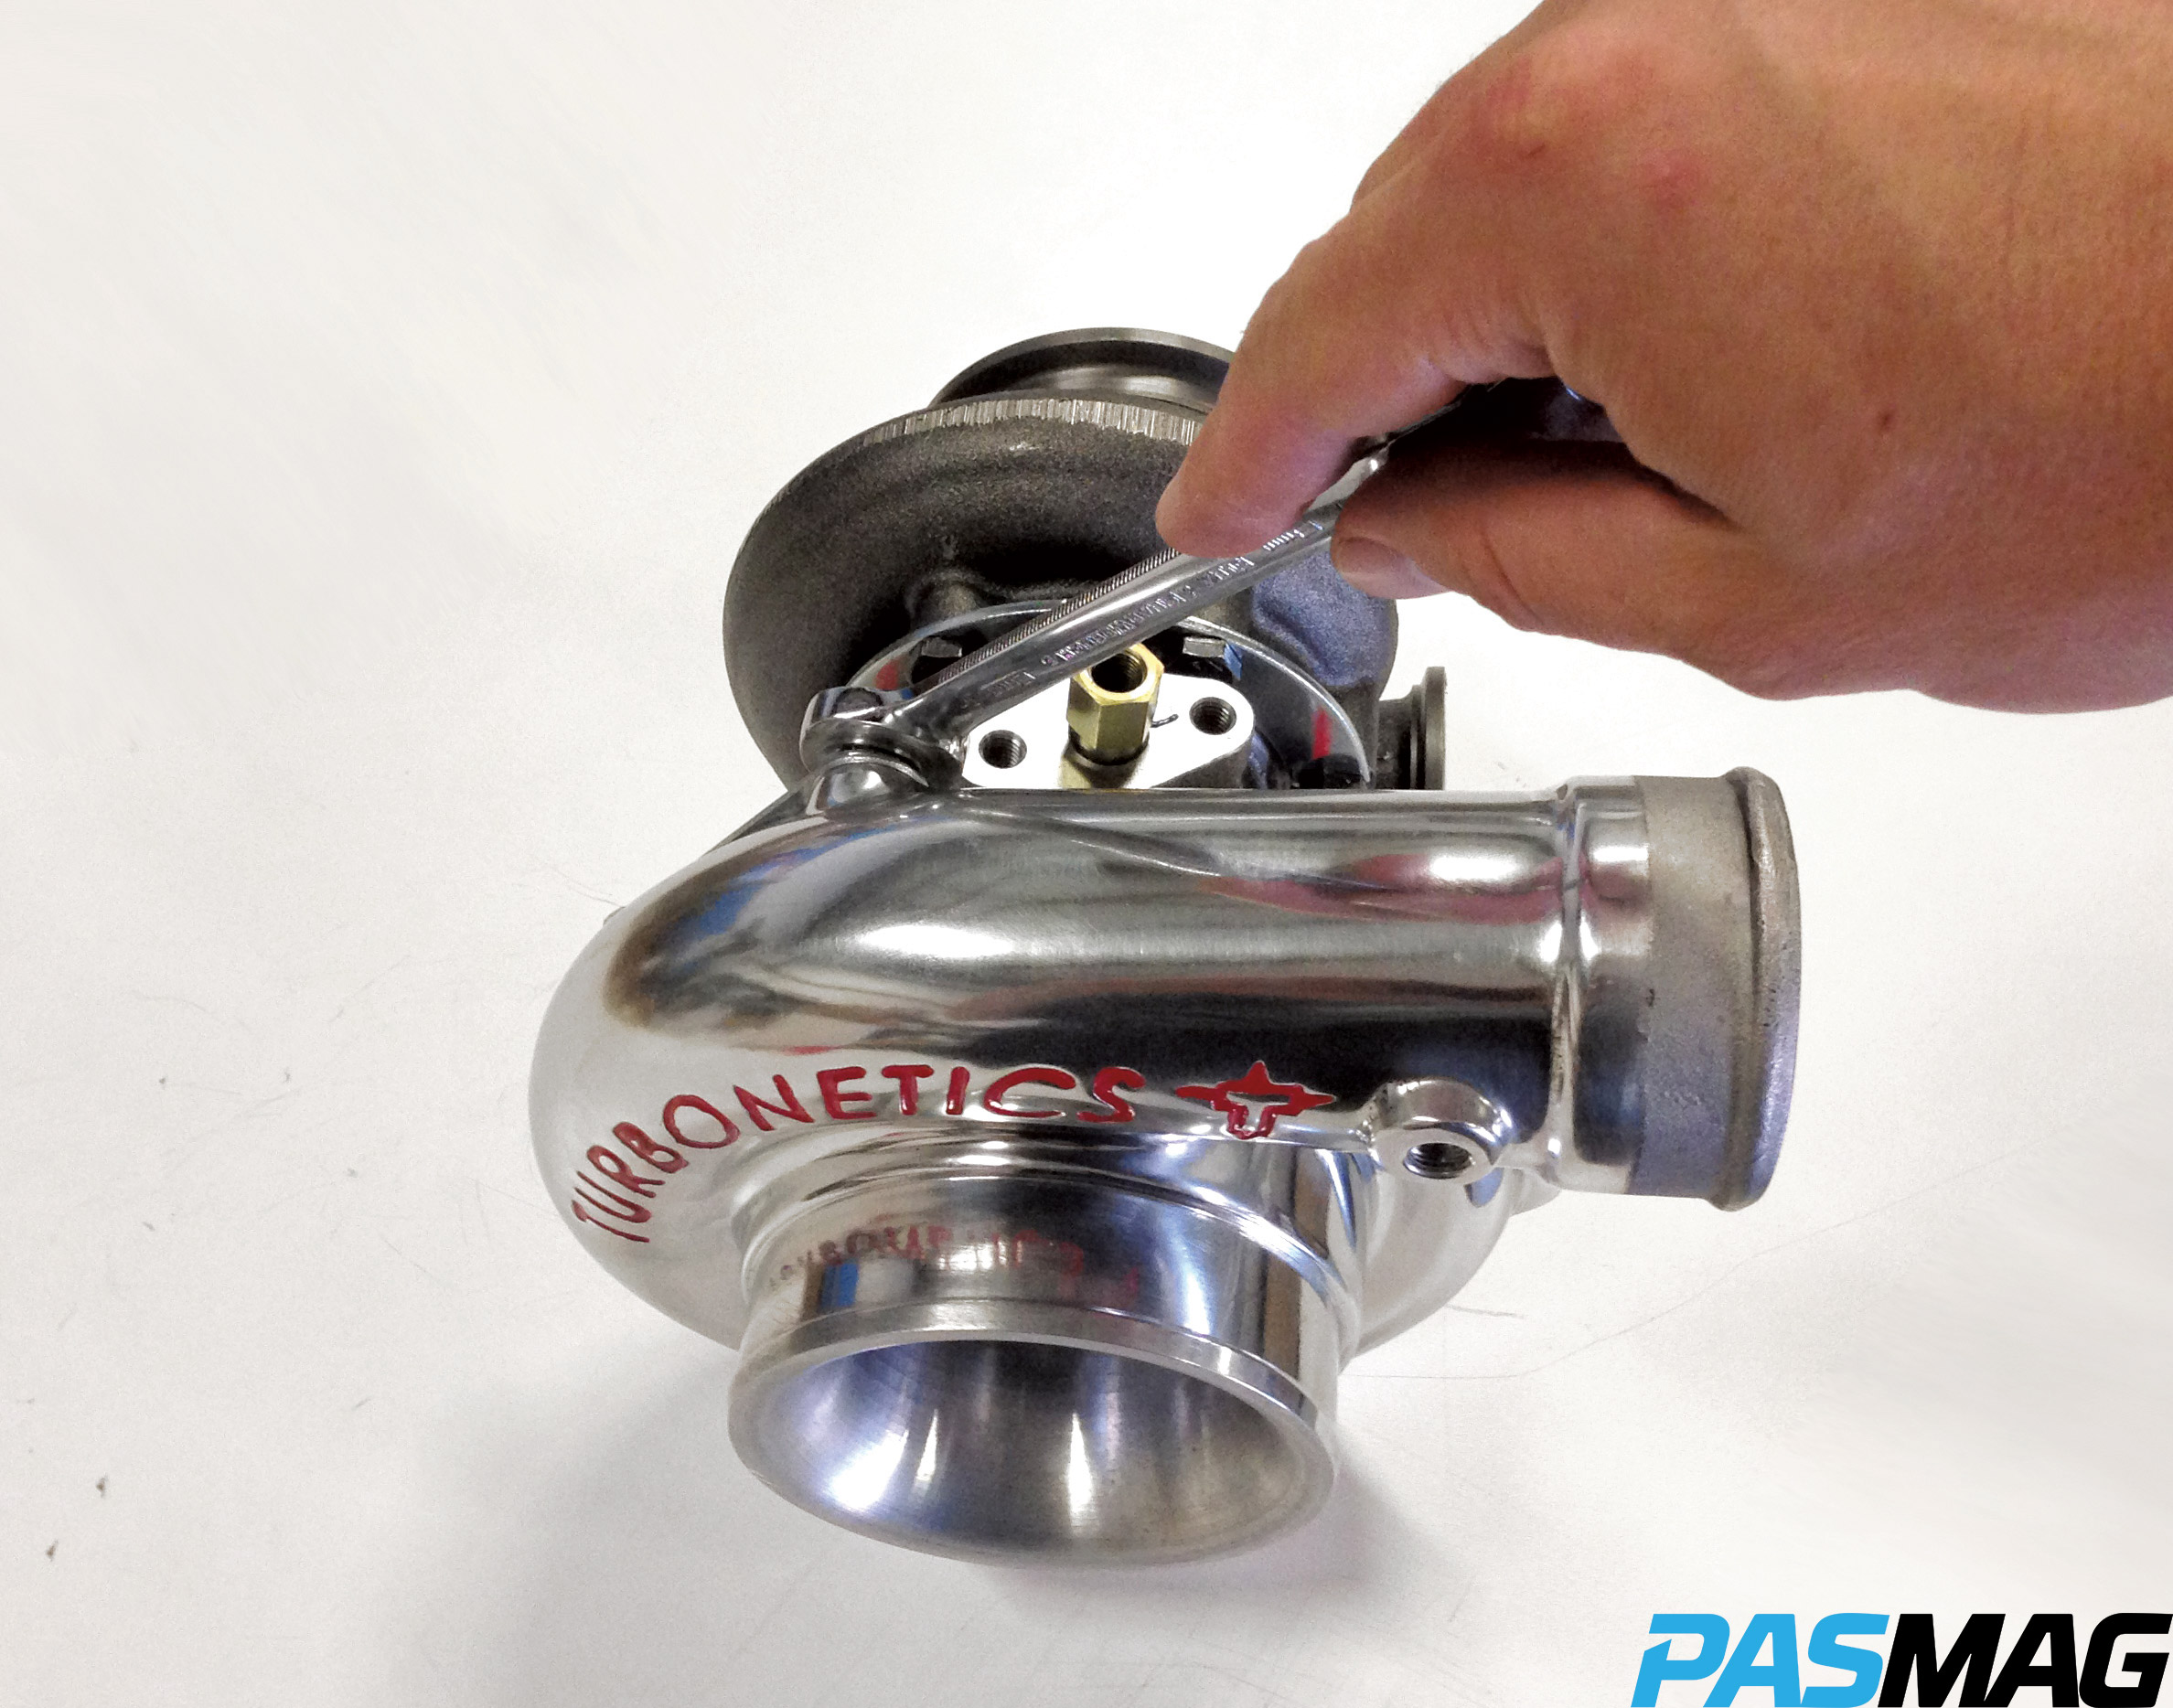
Then remove the Turbosmart wastegate and supplied clamps and fittings. Install the two vacuum fittings on the right hand ports and plug the remaining ports with the supplied plugs.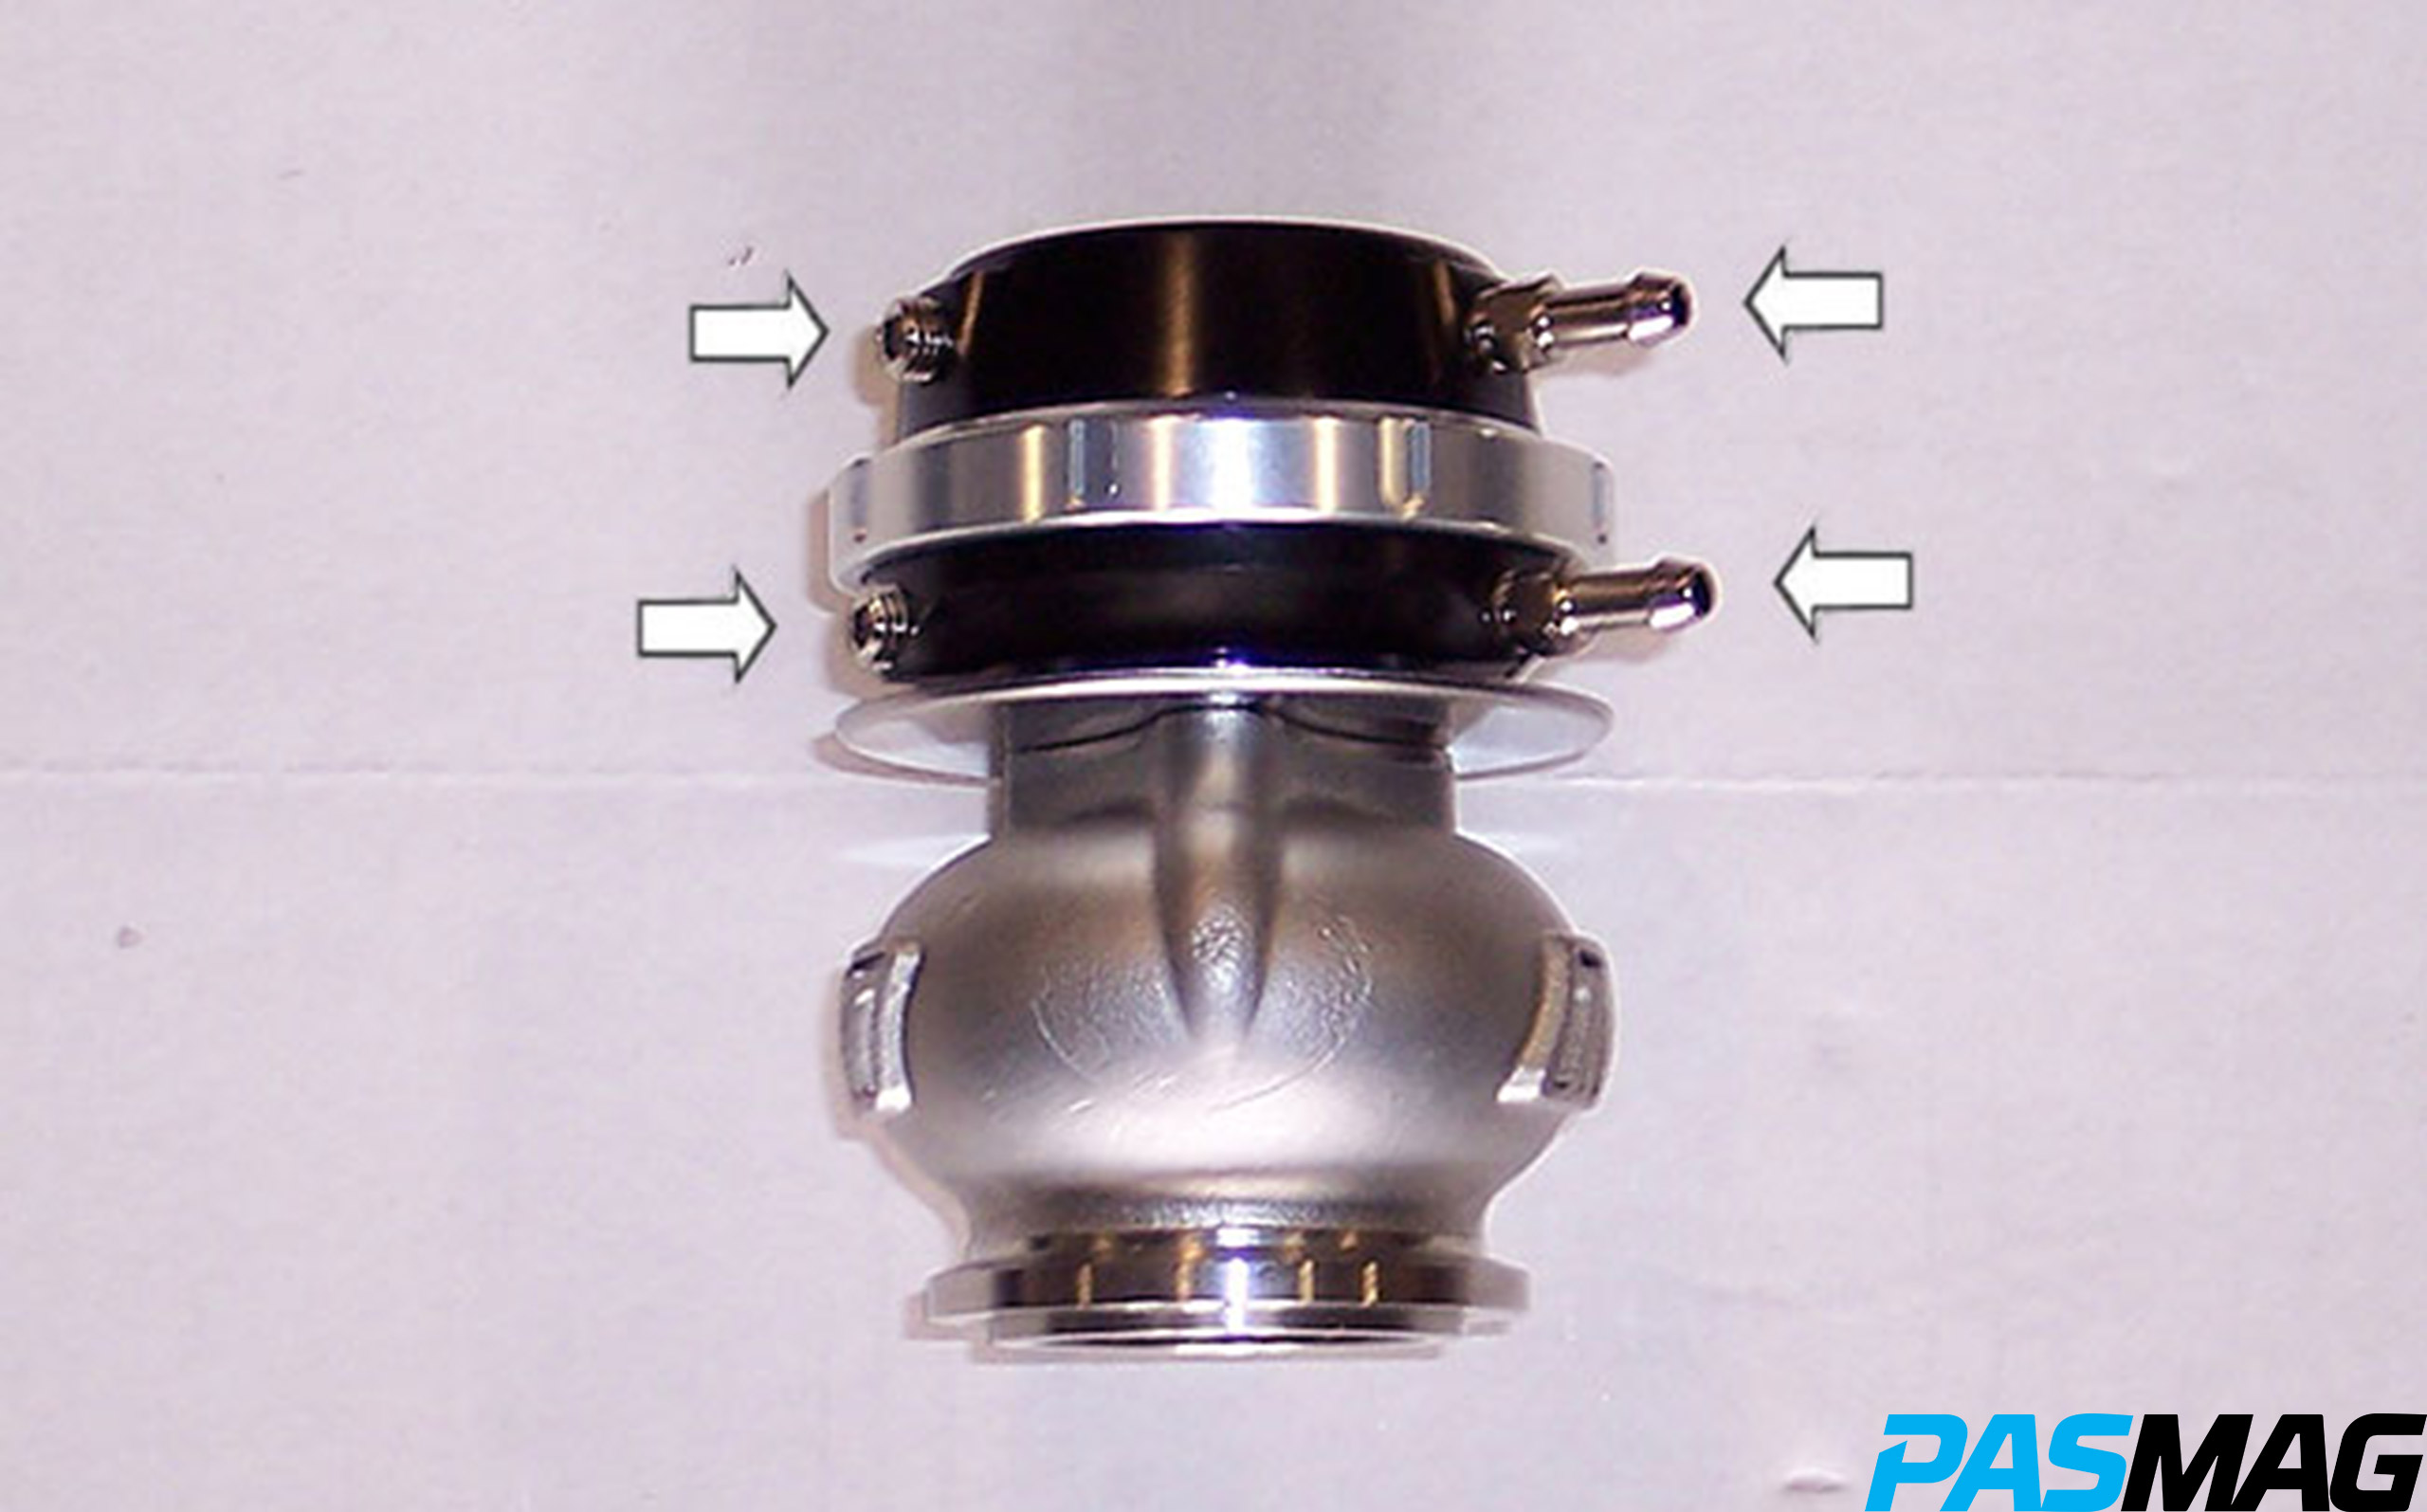
Set the turbocharger and wastegate aside for now.
Now, head back underneath the car and install the supplied exhaust crossover section to the left side catalytic converter outlet flange. Leave loose for now as everything will be tightened up in sequence later on.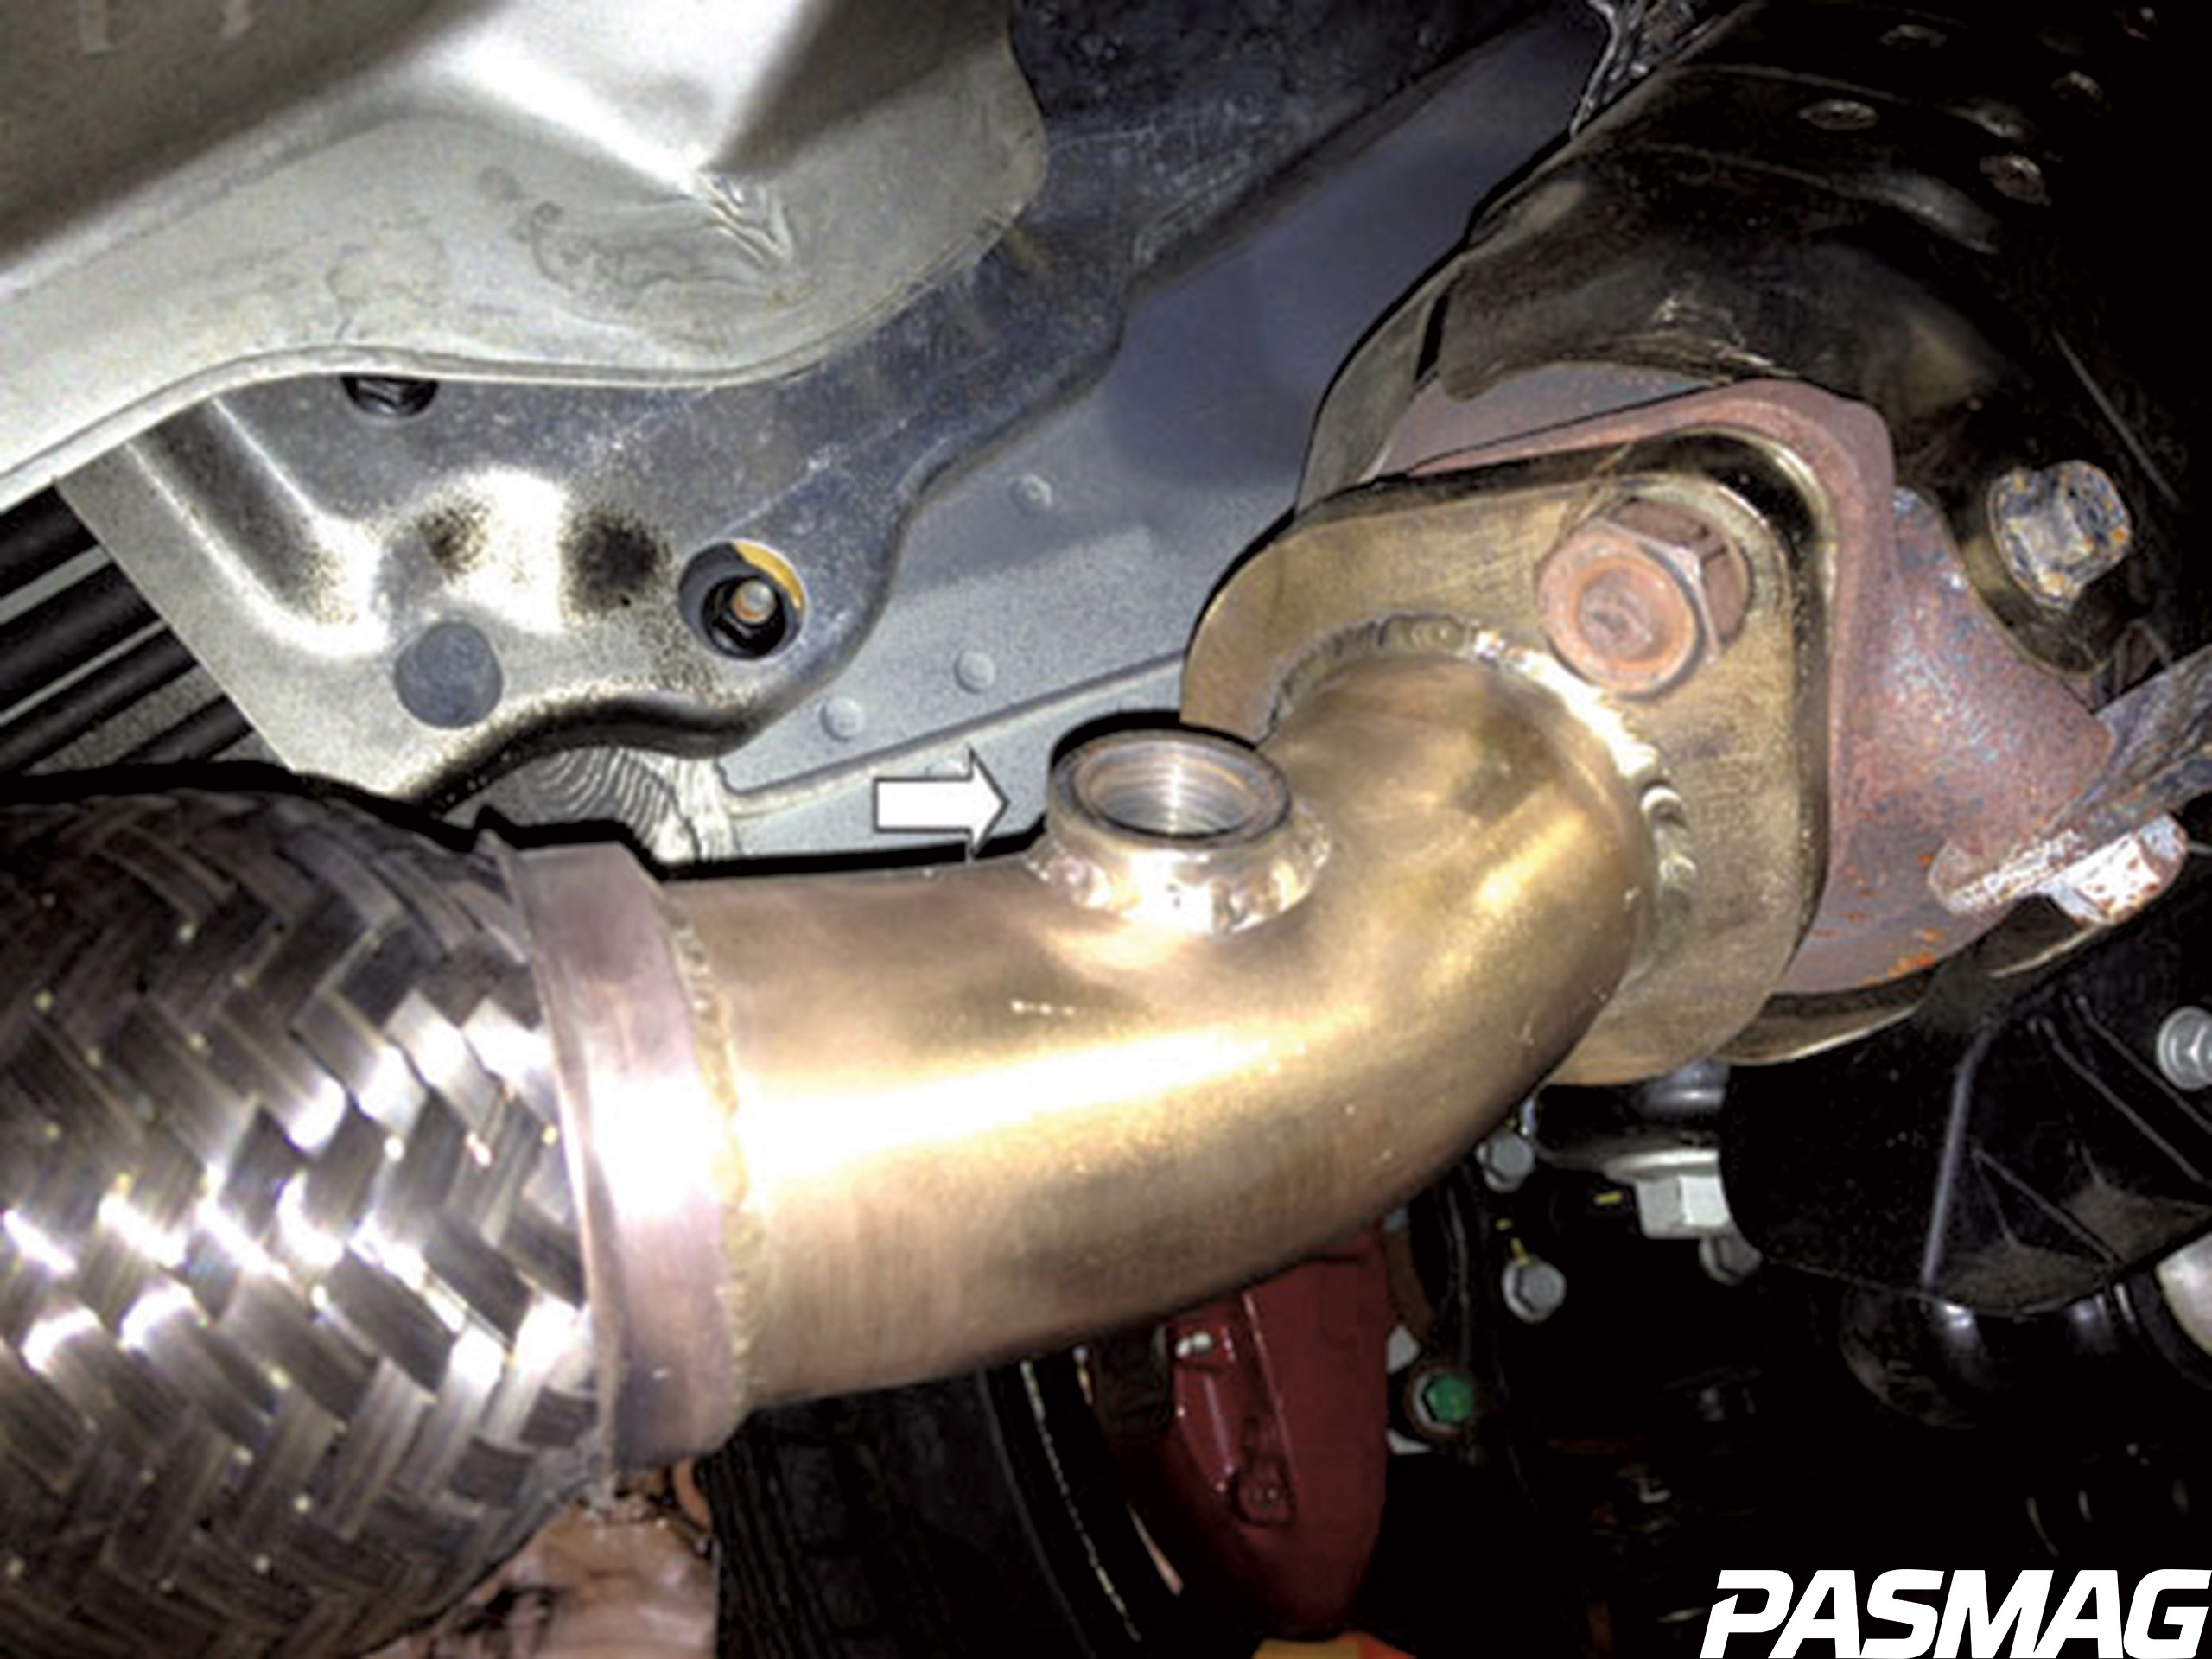
Next, wrap the supplied up-pipe with the supplied exhaust wrap and ties and install from the top of the engine bay. Loosely v-band clamp the up-pipe to the crossover section.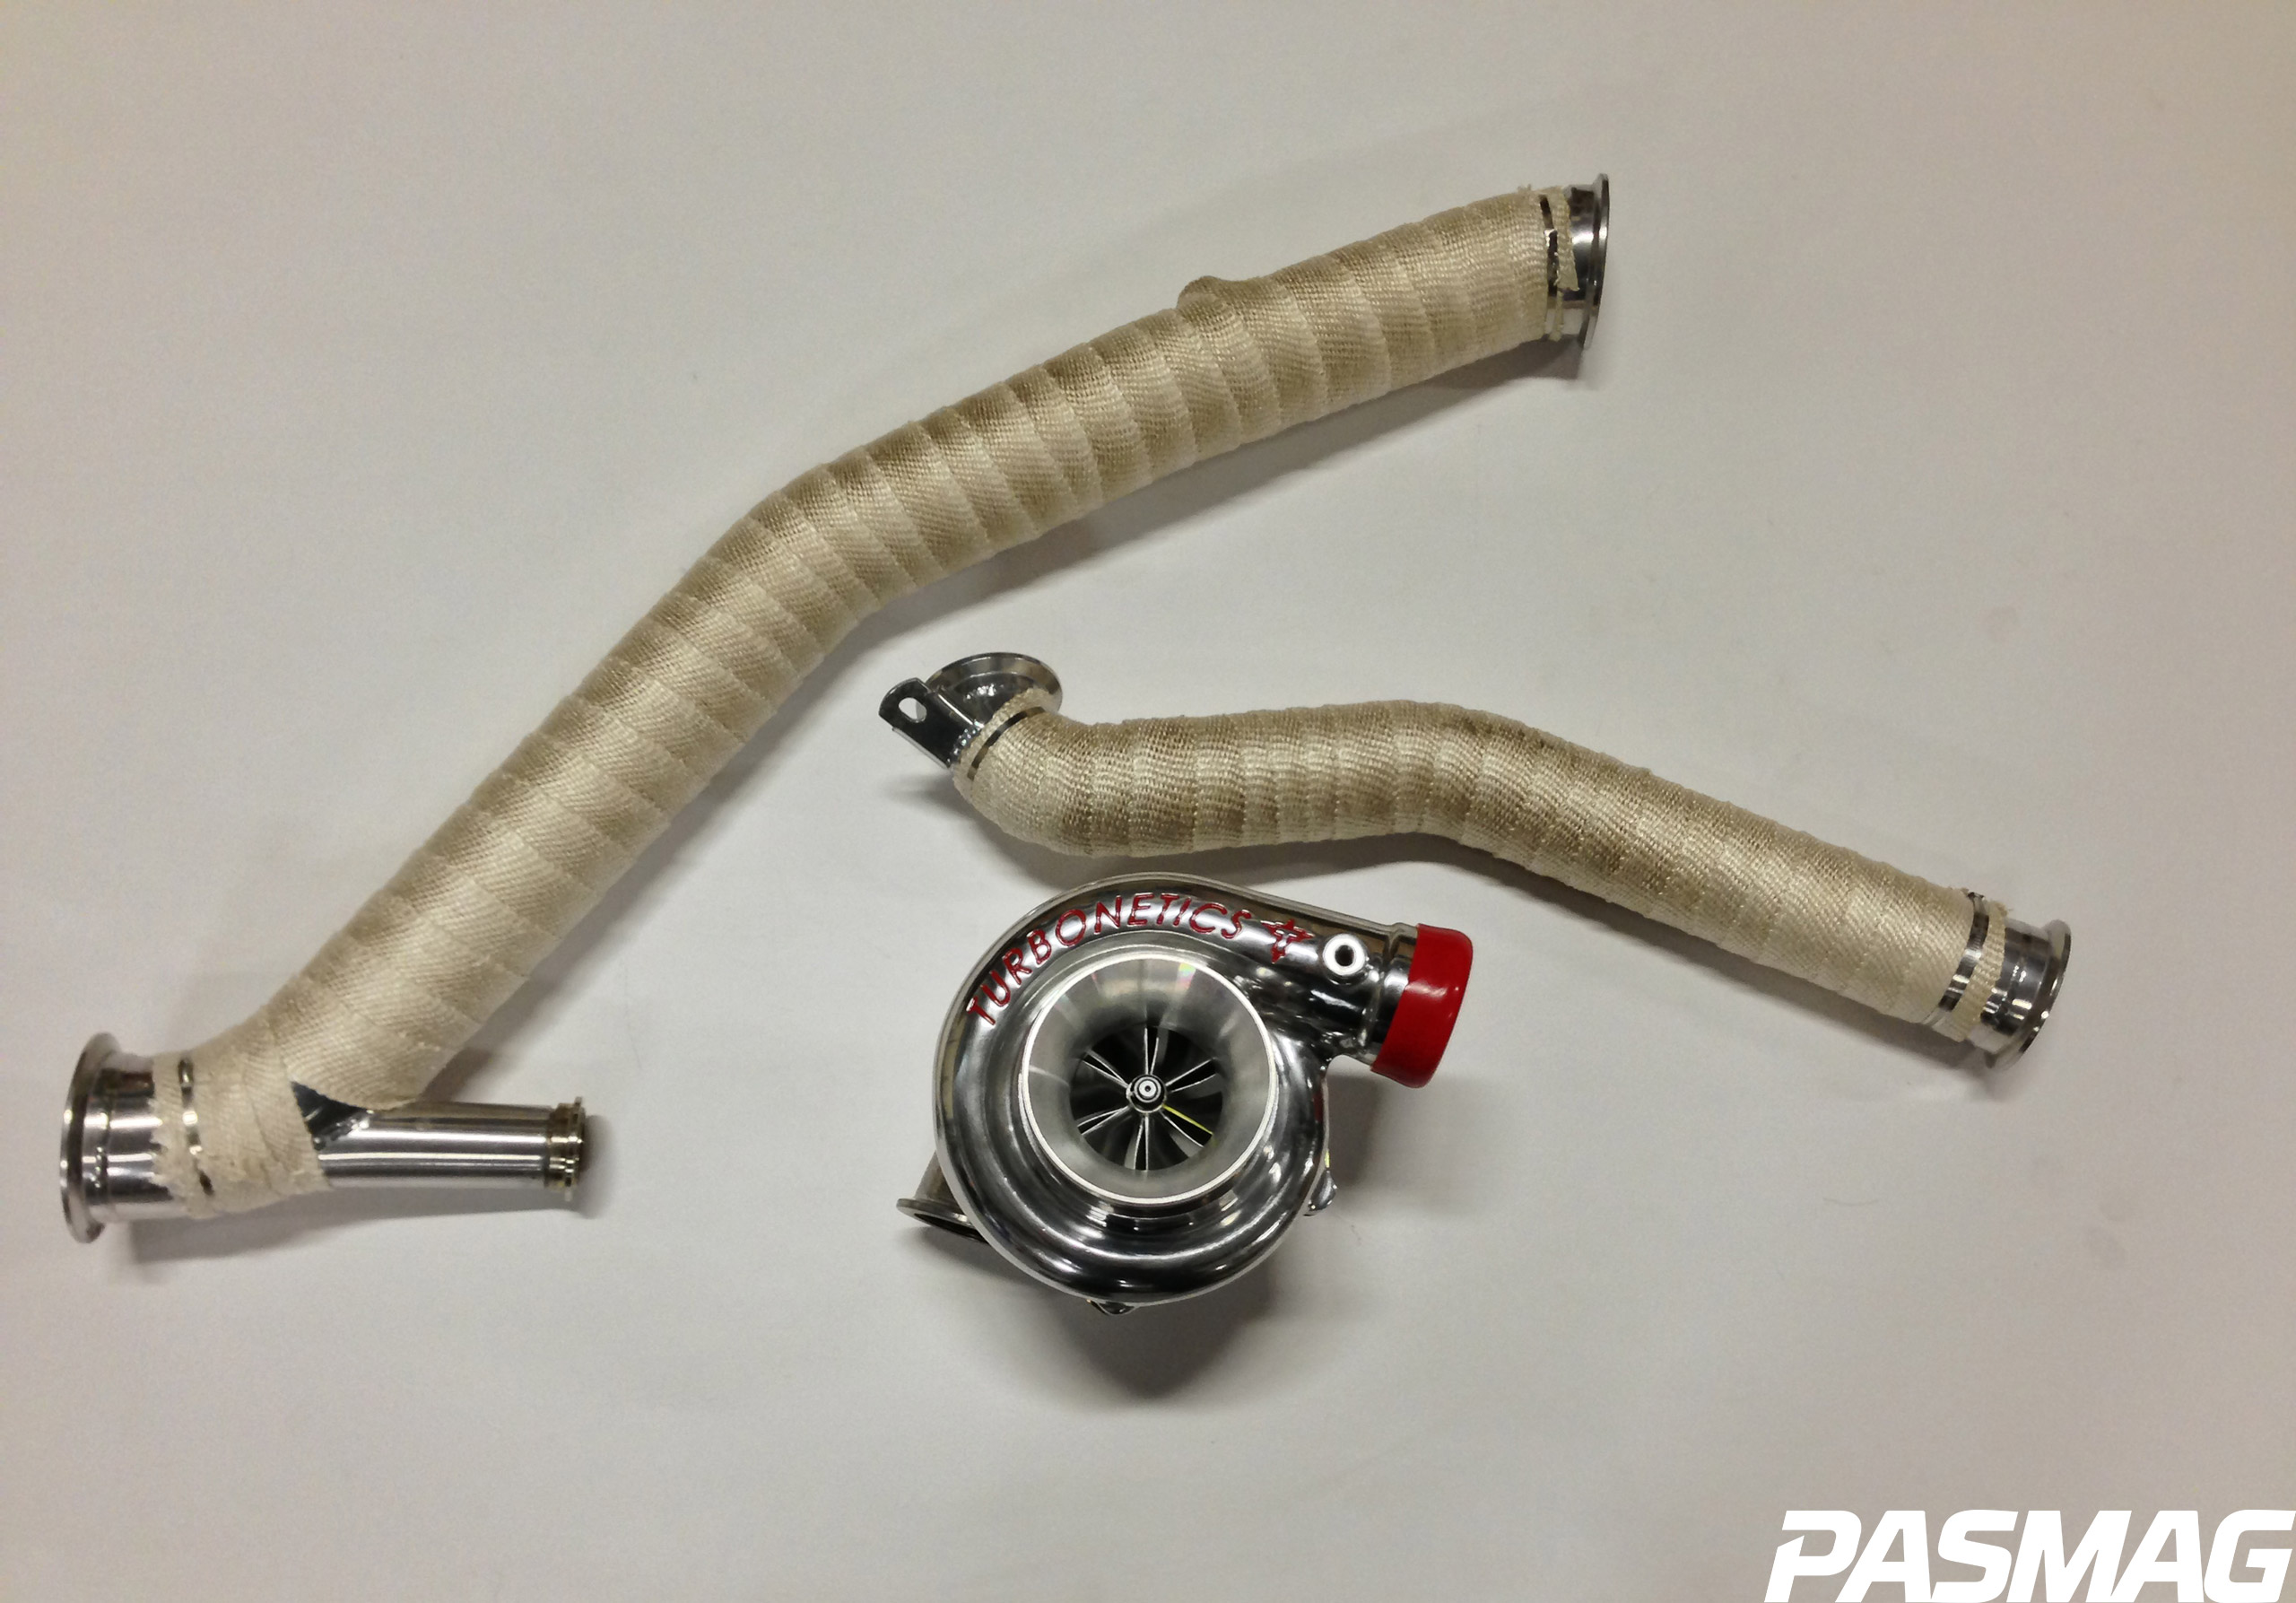
Wrap the downpipe with exhaust wrap and install it from the bottom up, loosely clamping it in position as well. Attach the wastegate outlet pipe to the wastegate with the supplied clamp, then slip the wastegate into the downpipe dump tube and tighten. 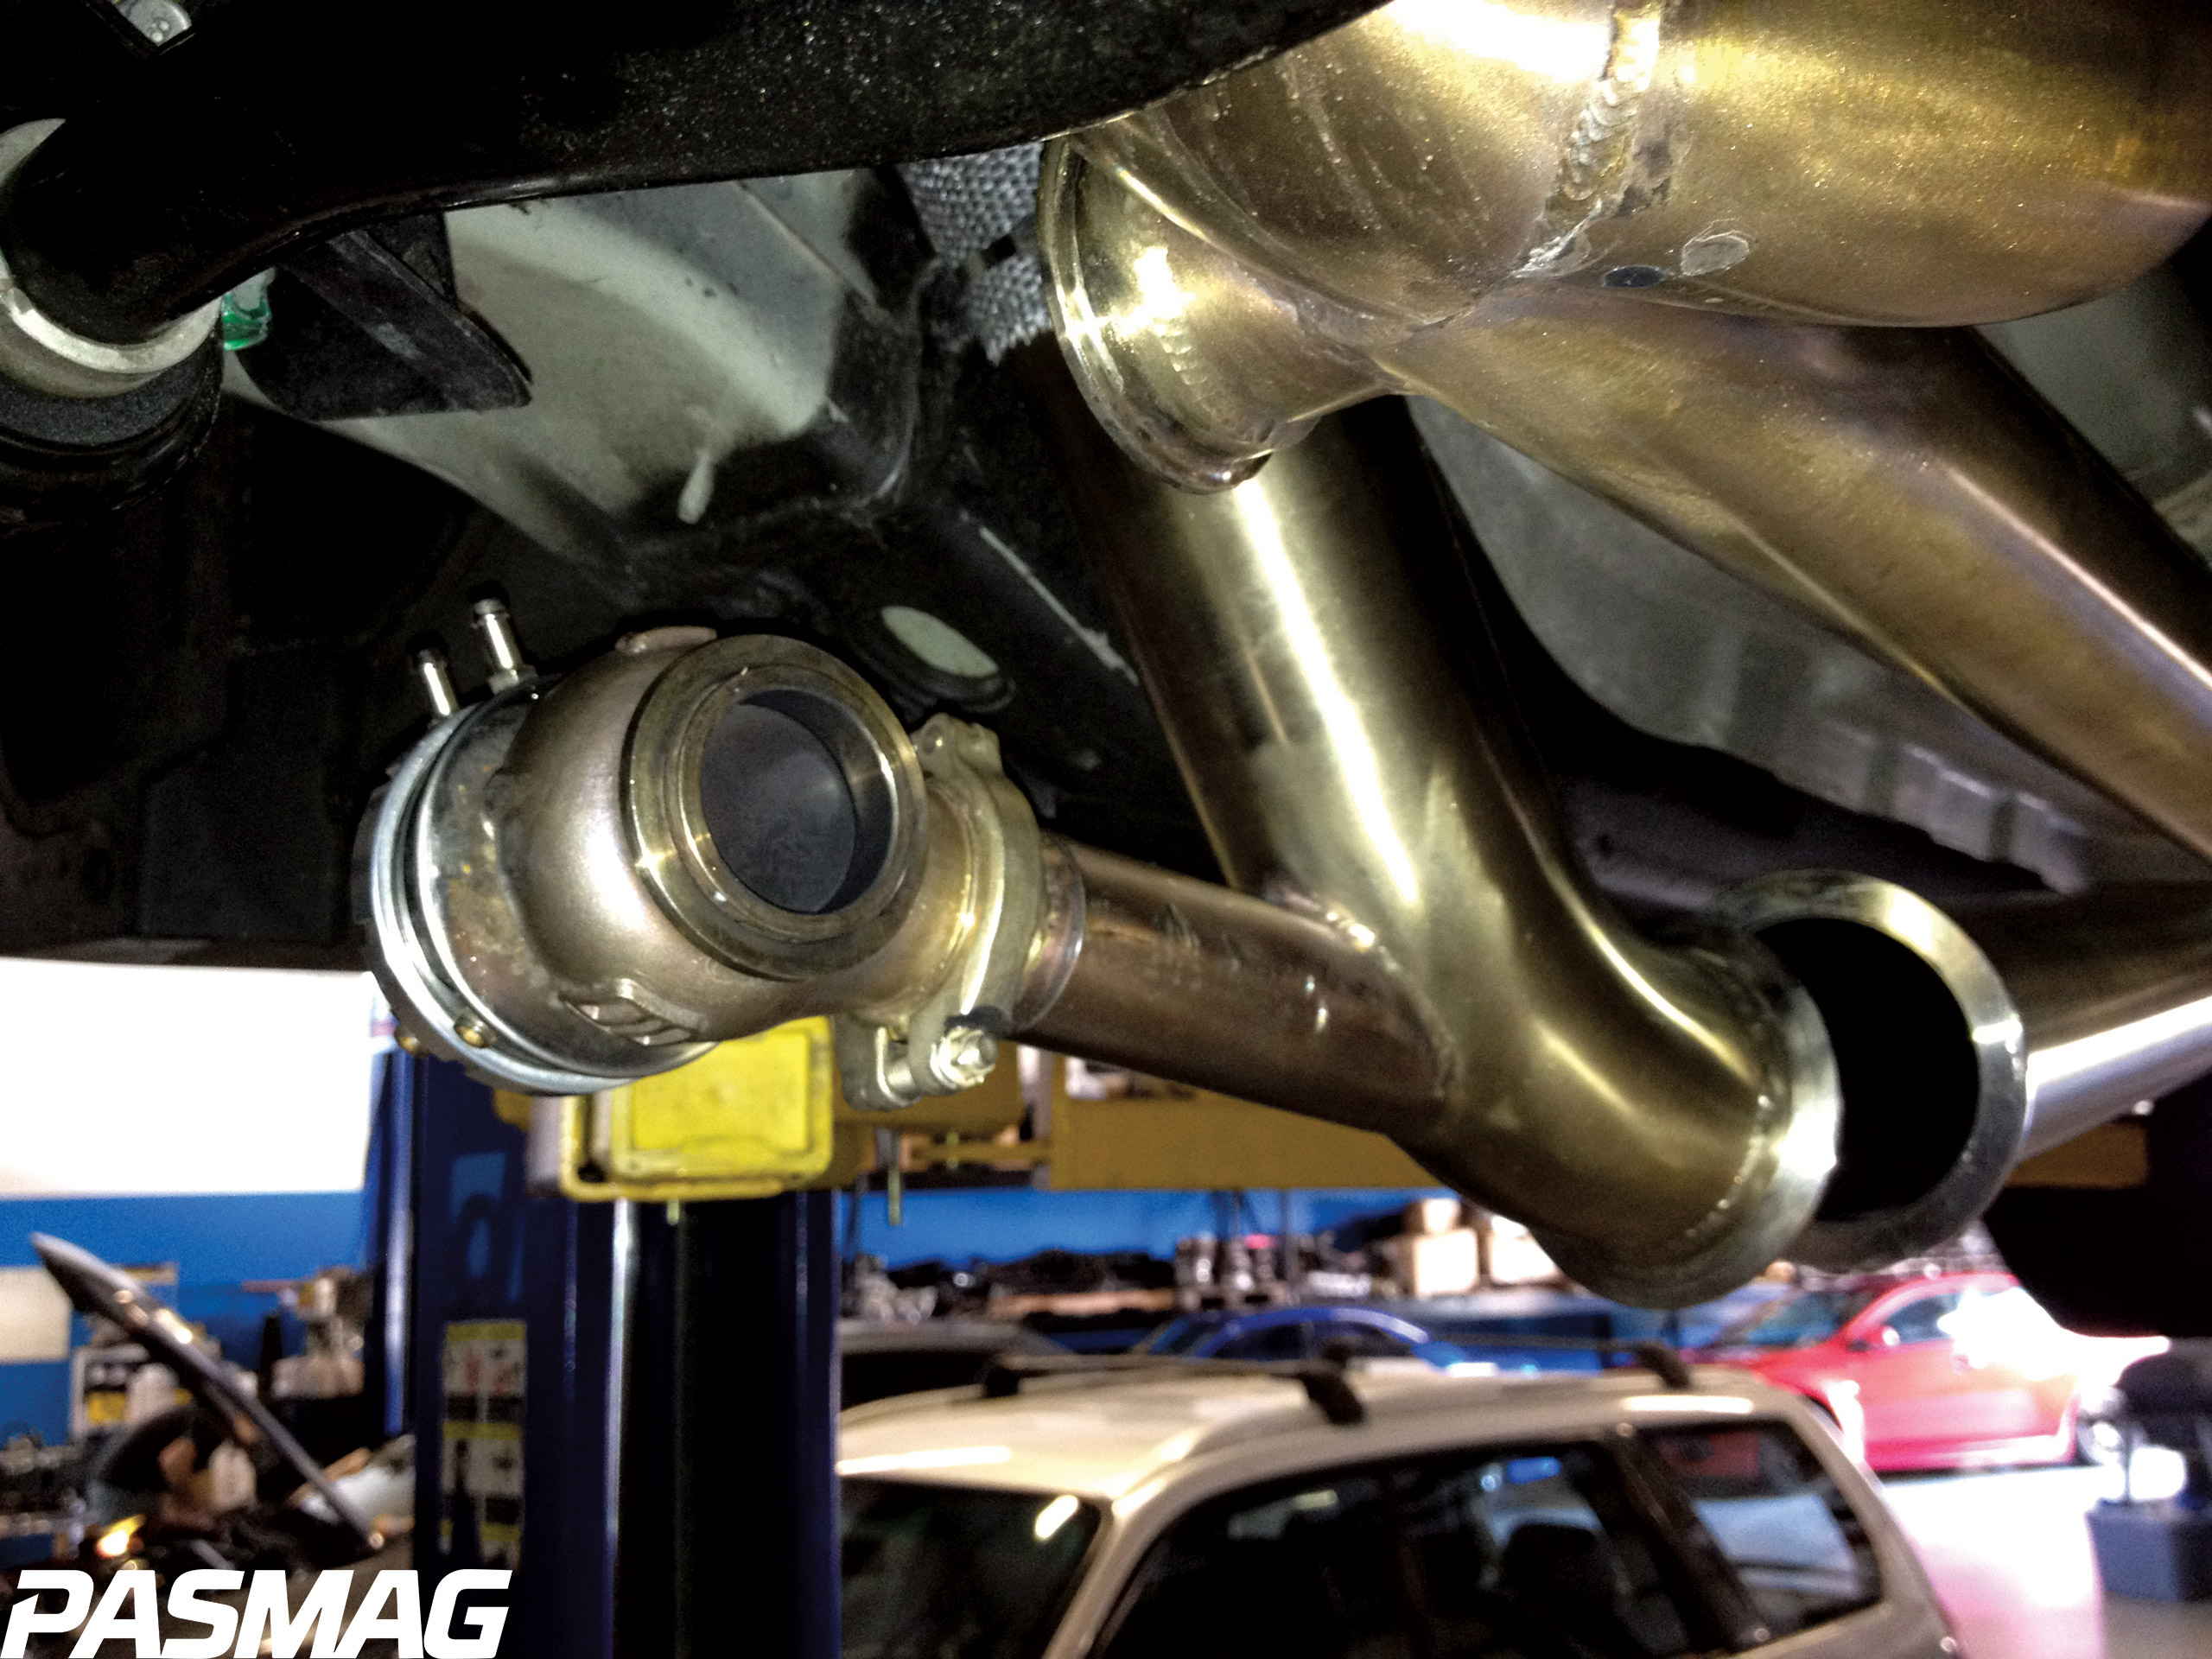
Next, install the pre-prepped turbocharger onto the up-pipe and leave loose. Finally install the y-pipe and gaskets onto the cat-back exhaust and leave loose. Tighten the v-band clamps using the sequence in the installation manual that came with the kit. Finish by re-installing the factory 02 sensors and supplied brackets to the new exhaust piping.
 |
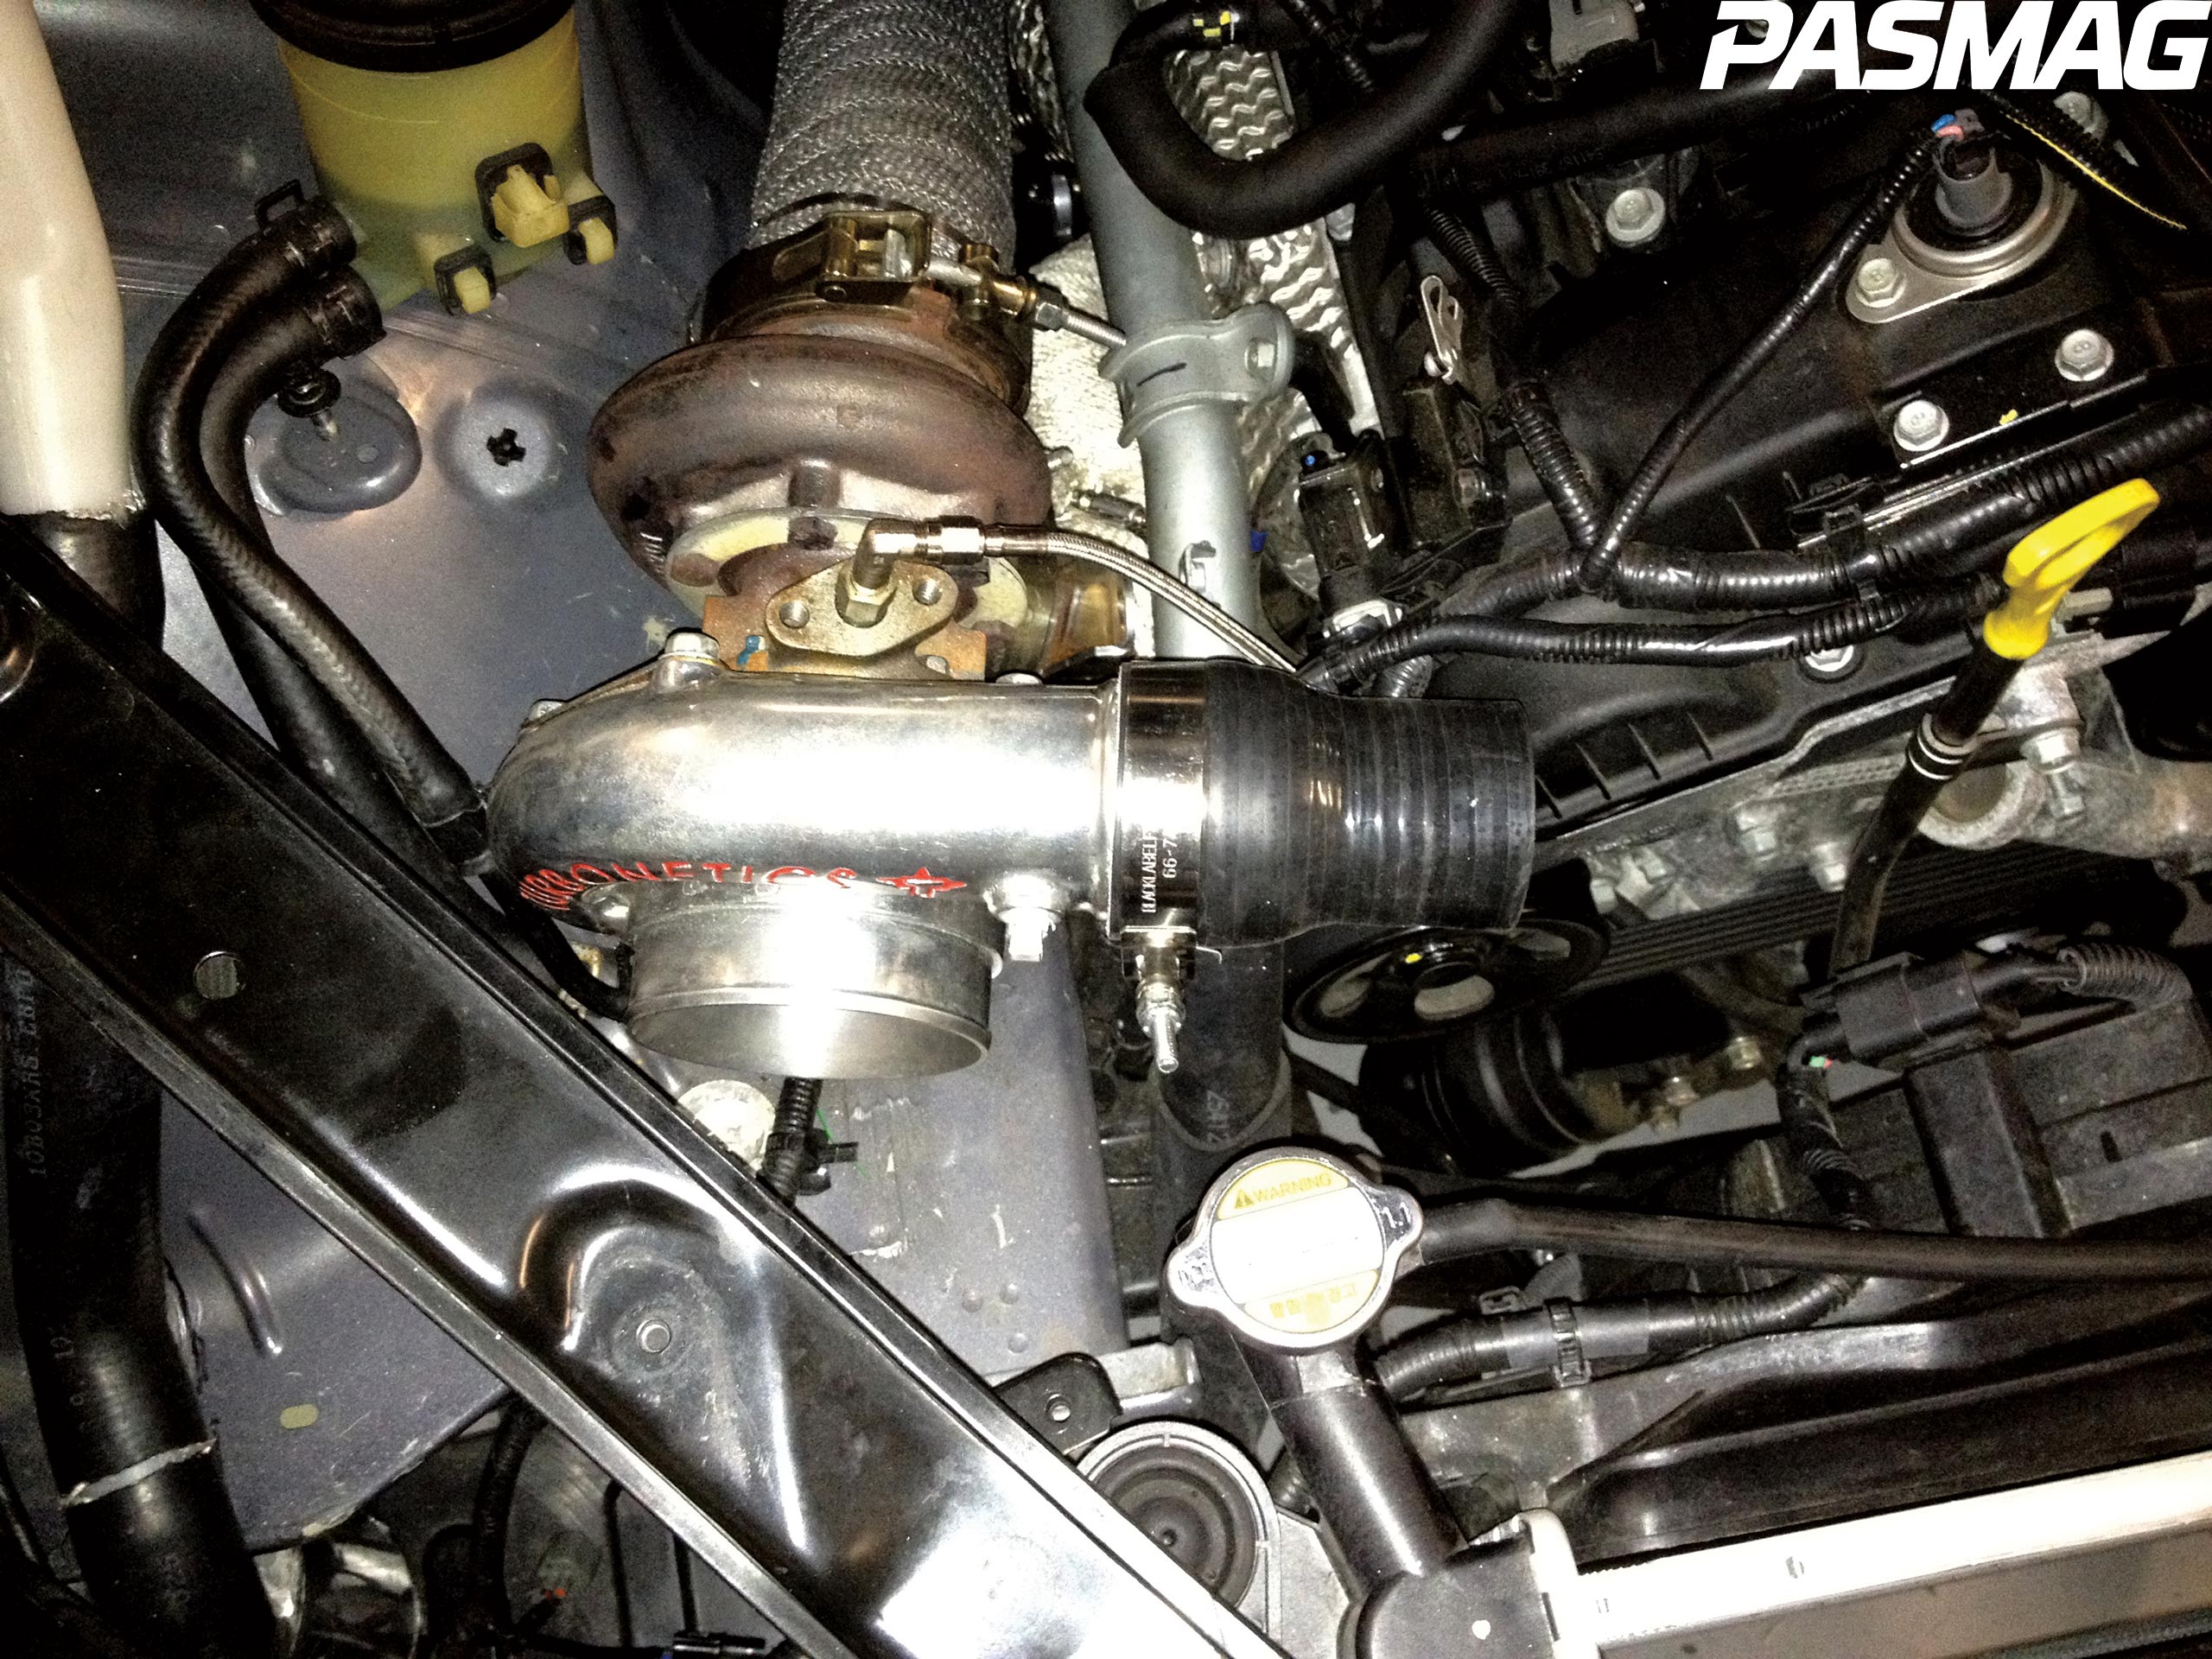 |
Now we’re ready to move on to the intercooler and associated piping. Start by attaching the supplied Forge blow-off valve to the appropriate charge pipe using the coupler and clamps provided with the kit. Next, install the 2-2.5-inch coupler and T-bolt clamps to the turbocharger compressor outlet and install the charge pipe with blow-off valve.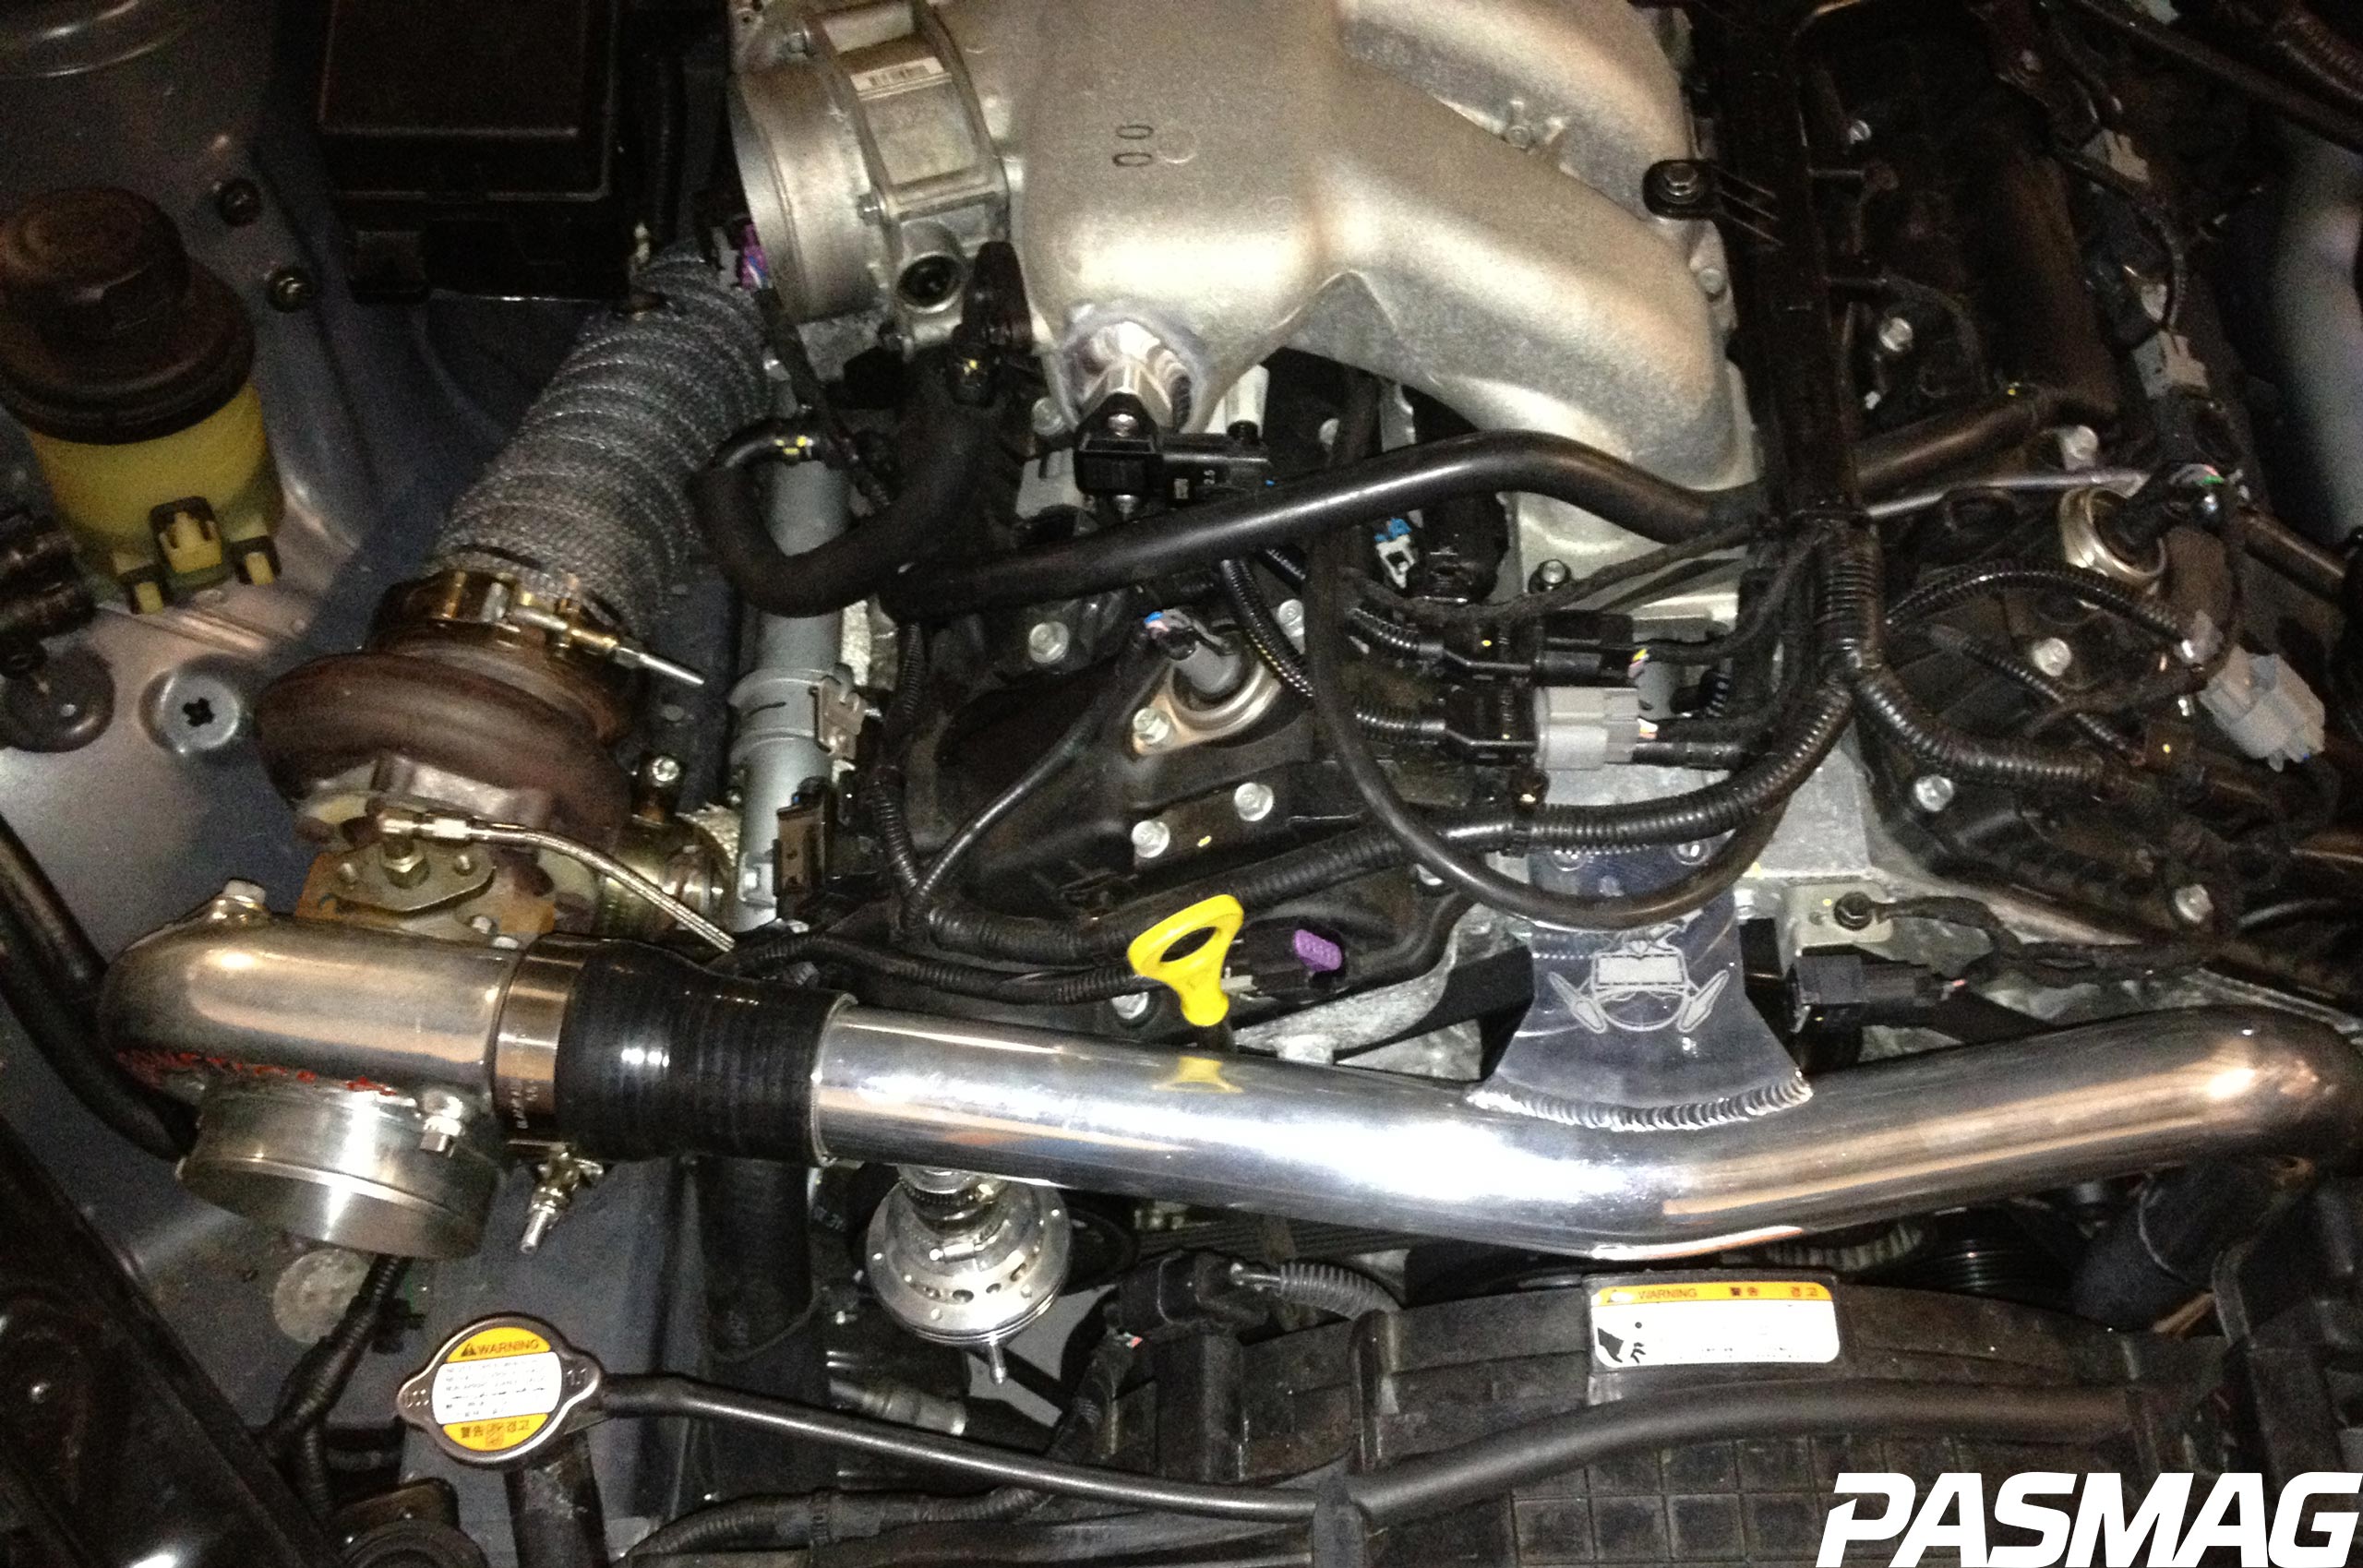
Next, use a milk crate or something else to support the intercooler and hold it in position to be mounted to the factory bumper beam. Using the measurement specs in the supplied installation manual, drill your mounting holes in the factory bumper beam for the intercooler support brackets. Once drilled, mount the intercooler to the bumper beam leaving a little loose for final adjustments later on.
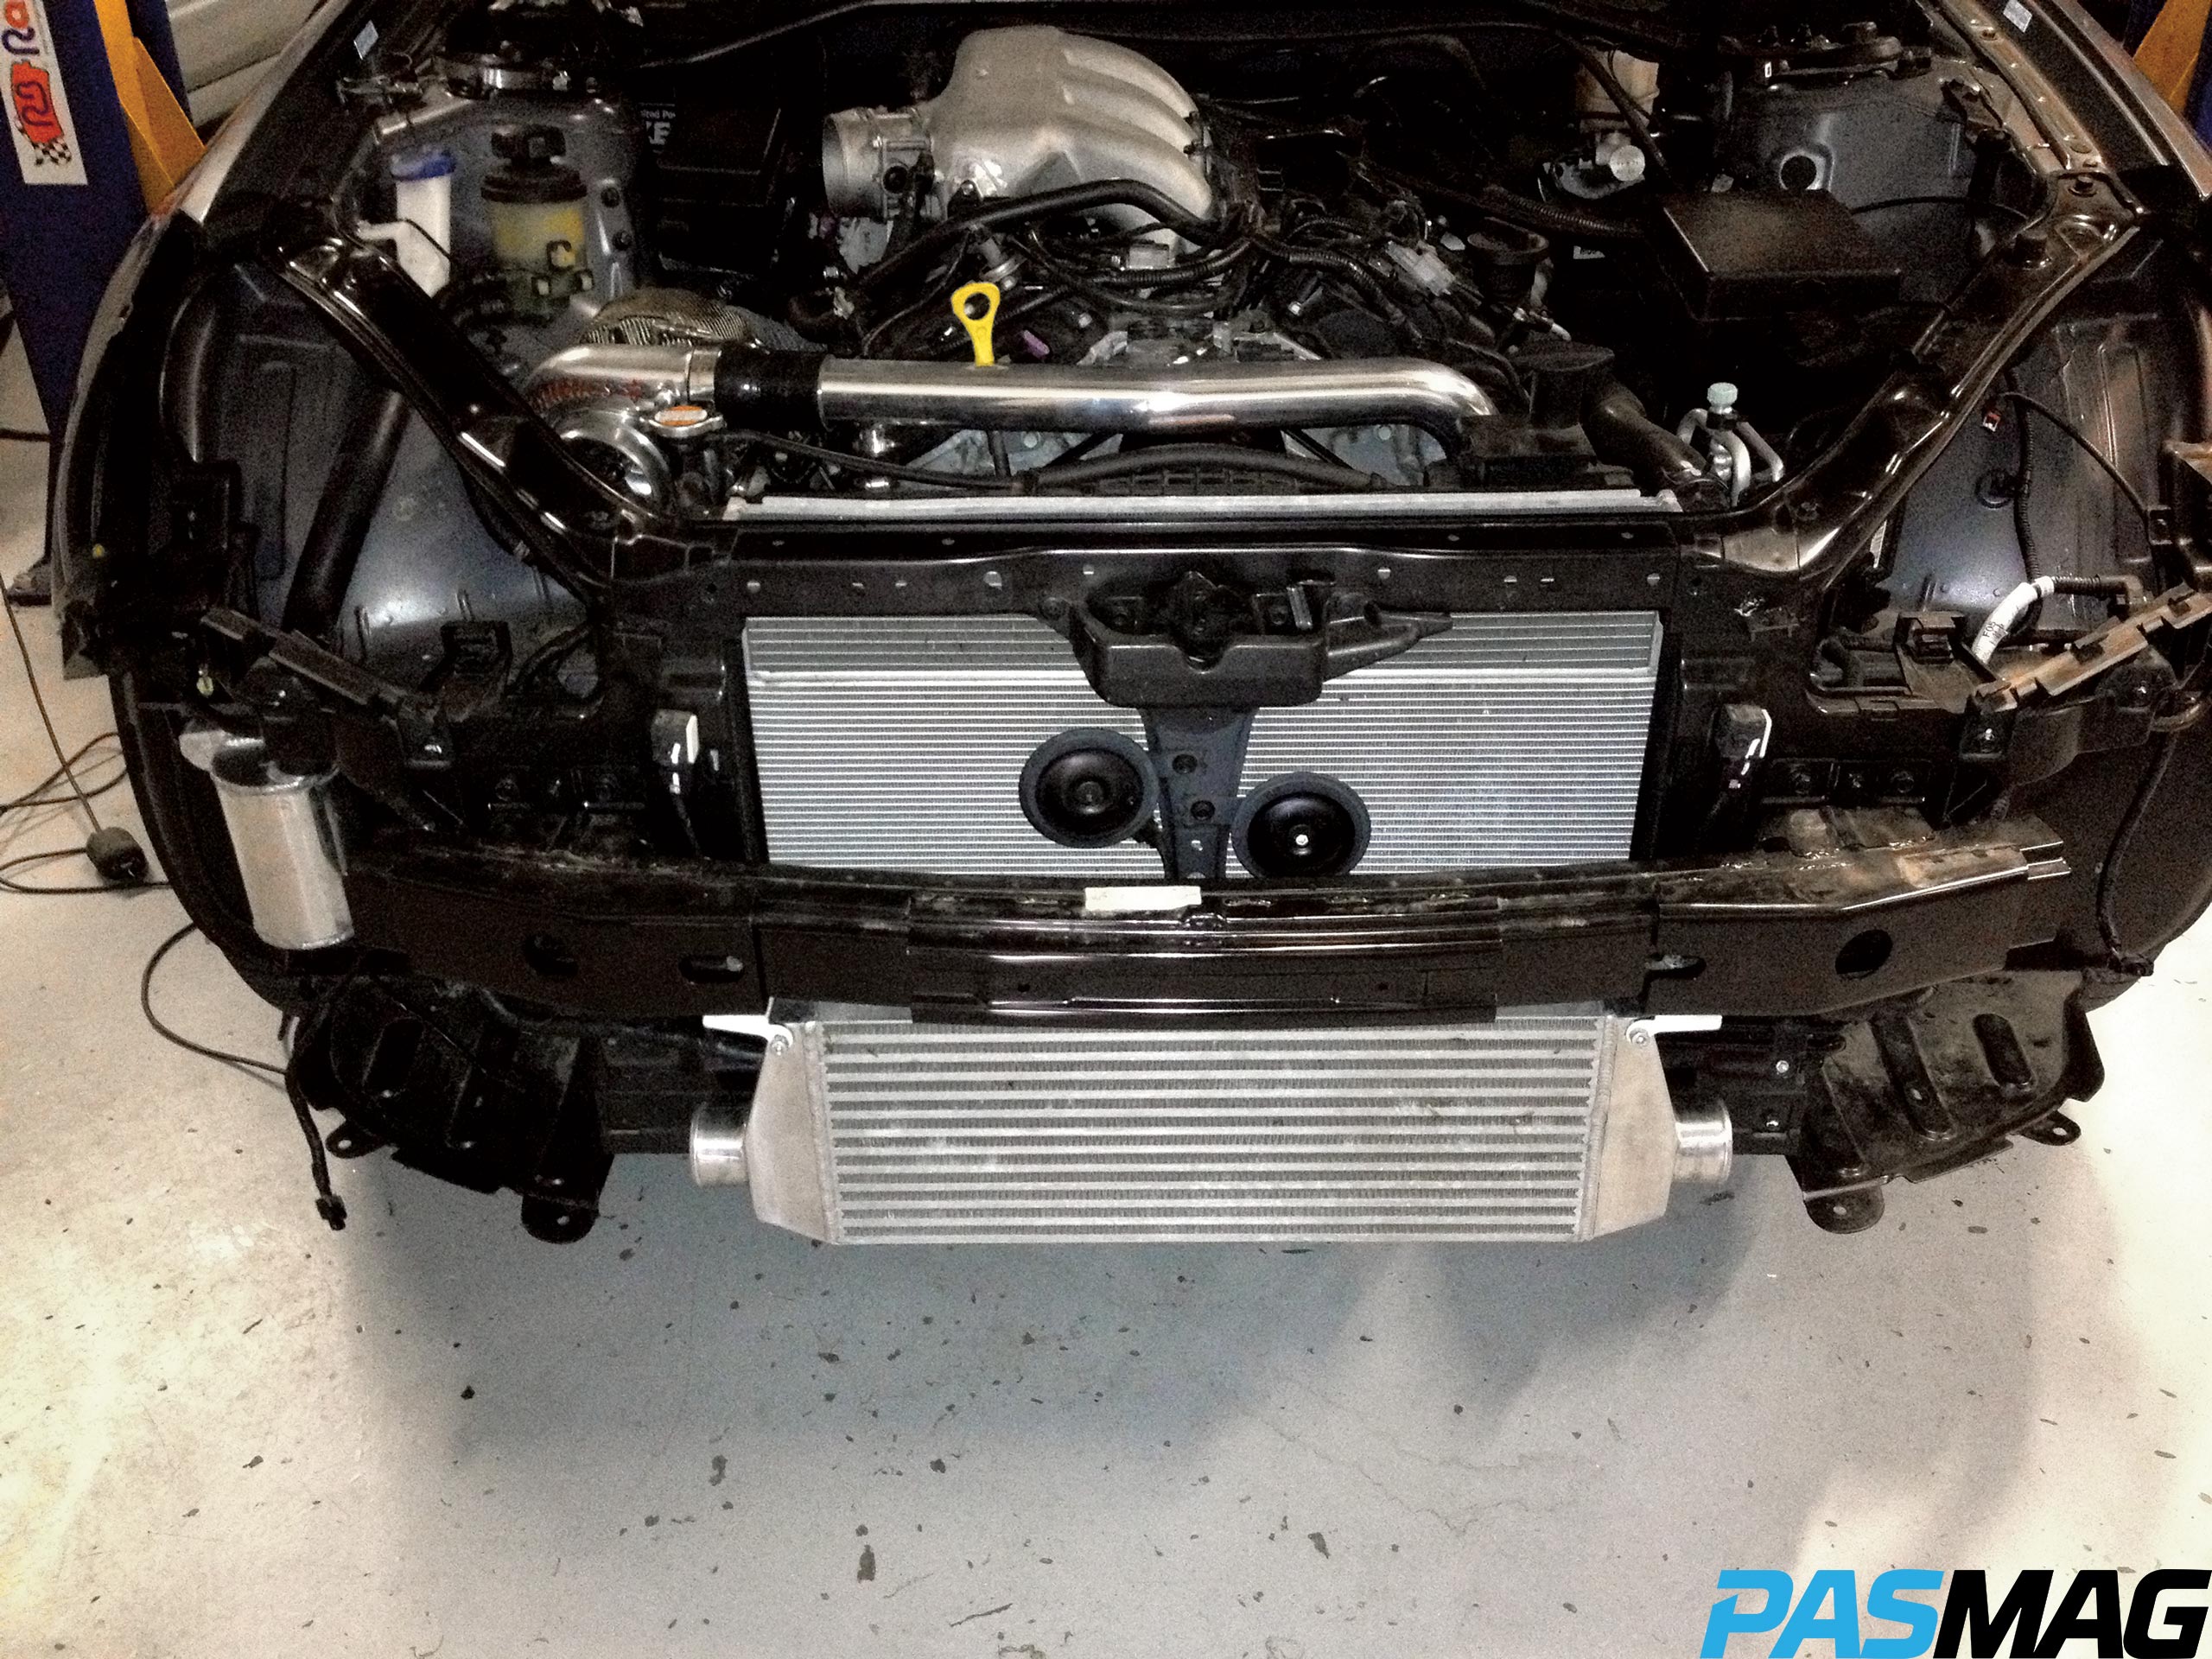
Install the remaining intercooler piping using the supplied couplers and t-bolt clamps leaving all connections hand-tight.
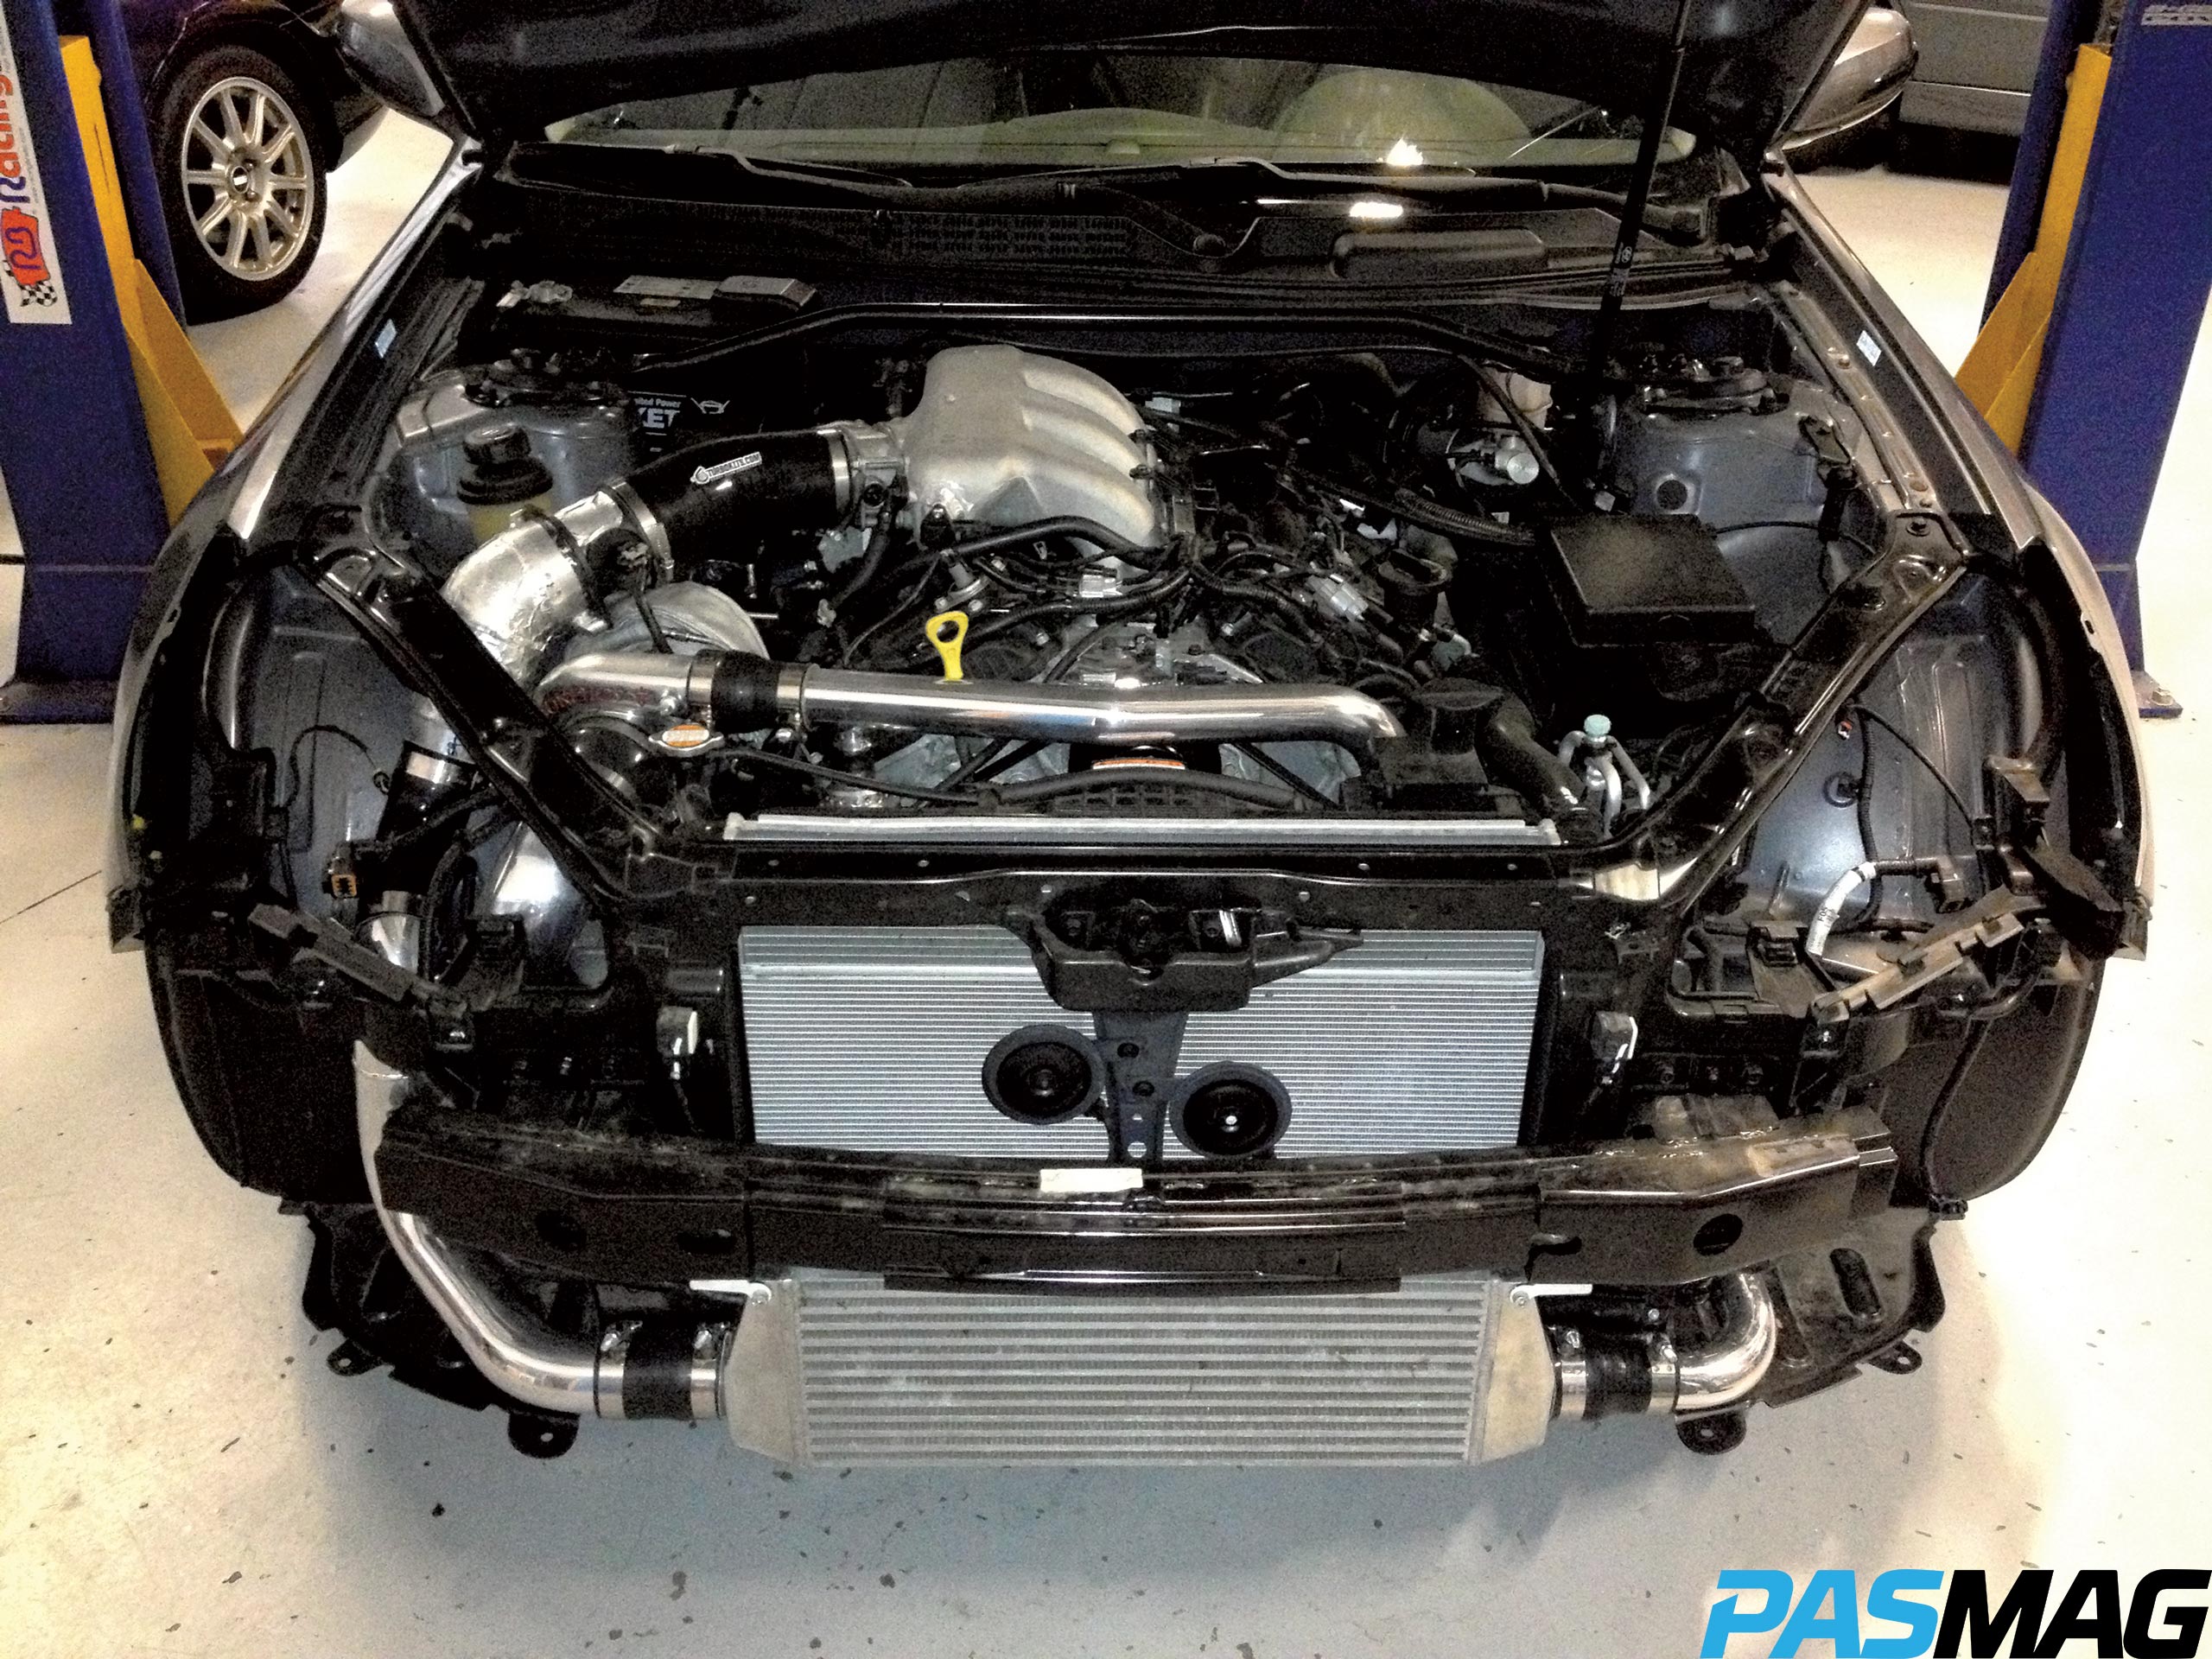
From there, install the intake pipe and supplied 3.5-4-inch coupler and clamps onto the turbocharger compressor. On the other end of the intake pipe, attach the supplied air filter. Remove the factory MAF sensor from the factory intake removed at the beginning of the project and install it along with the supplied adapters onto the new intake pipe. Install the throttle body coupler and tighten all intercooler piping using the sequence outlined in the installation manual. Finally, install the oil dipstick retention spring.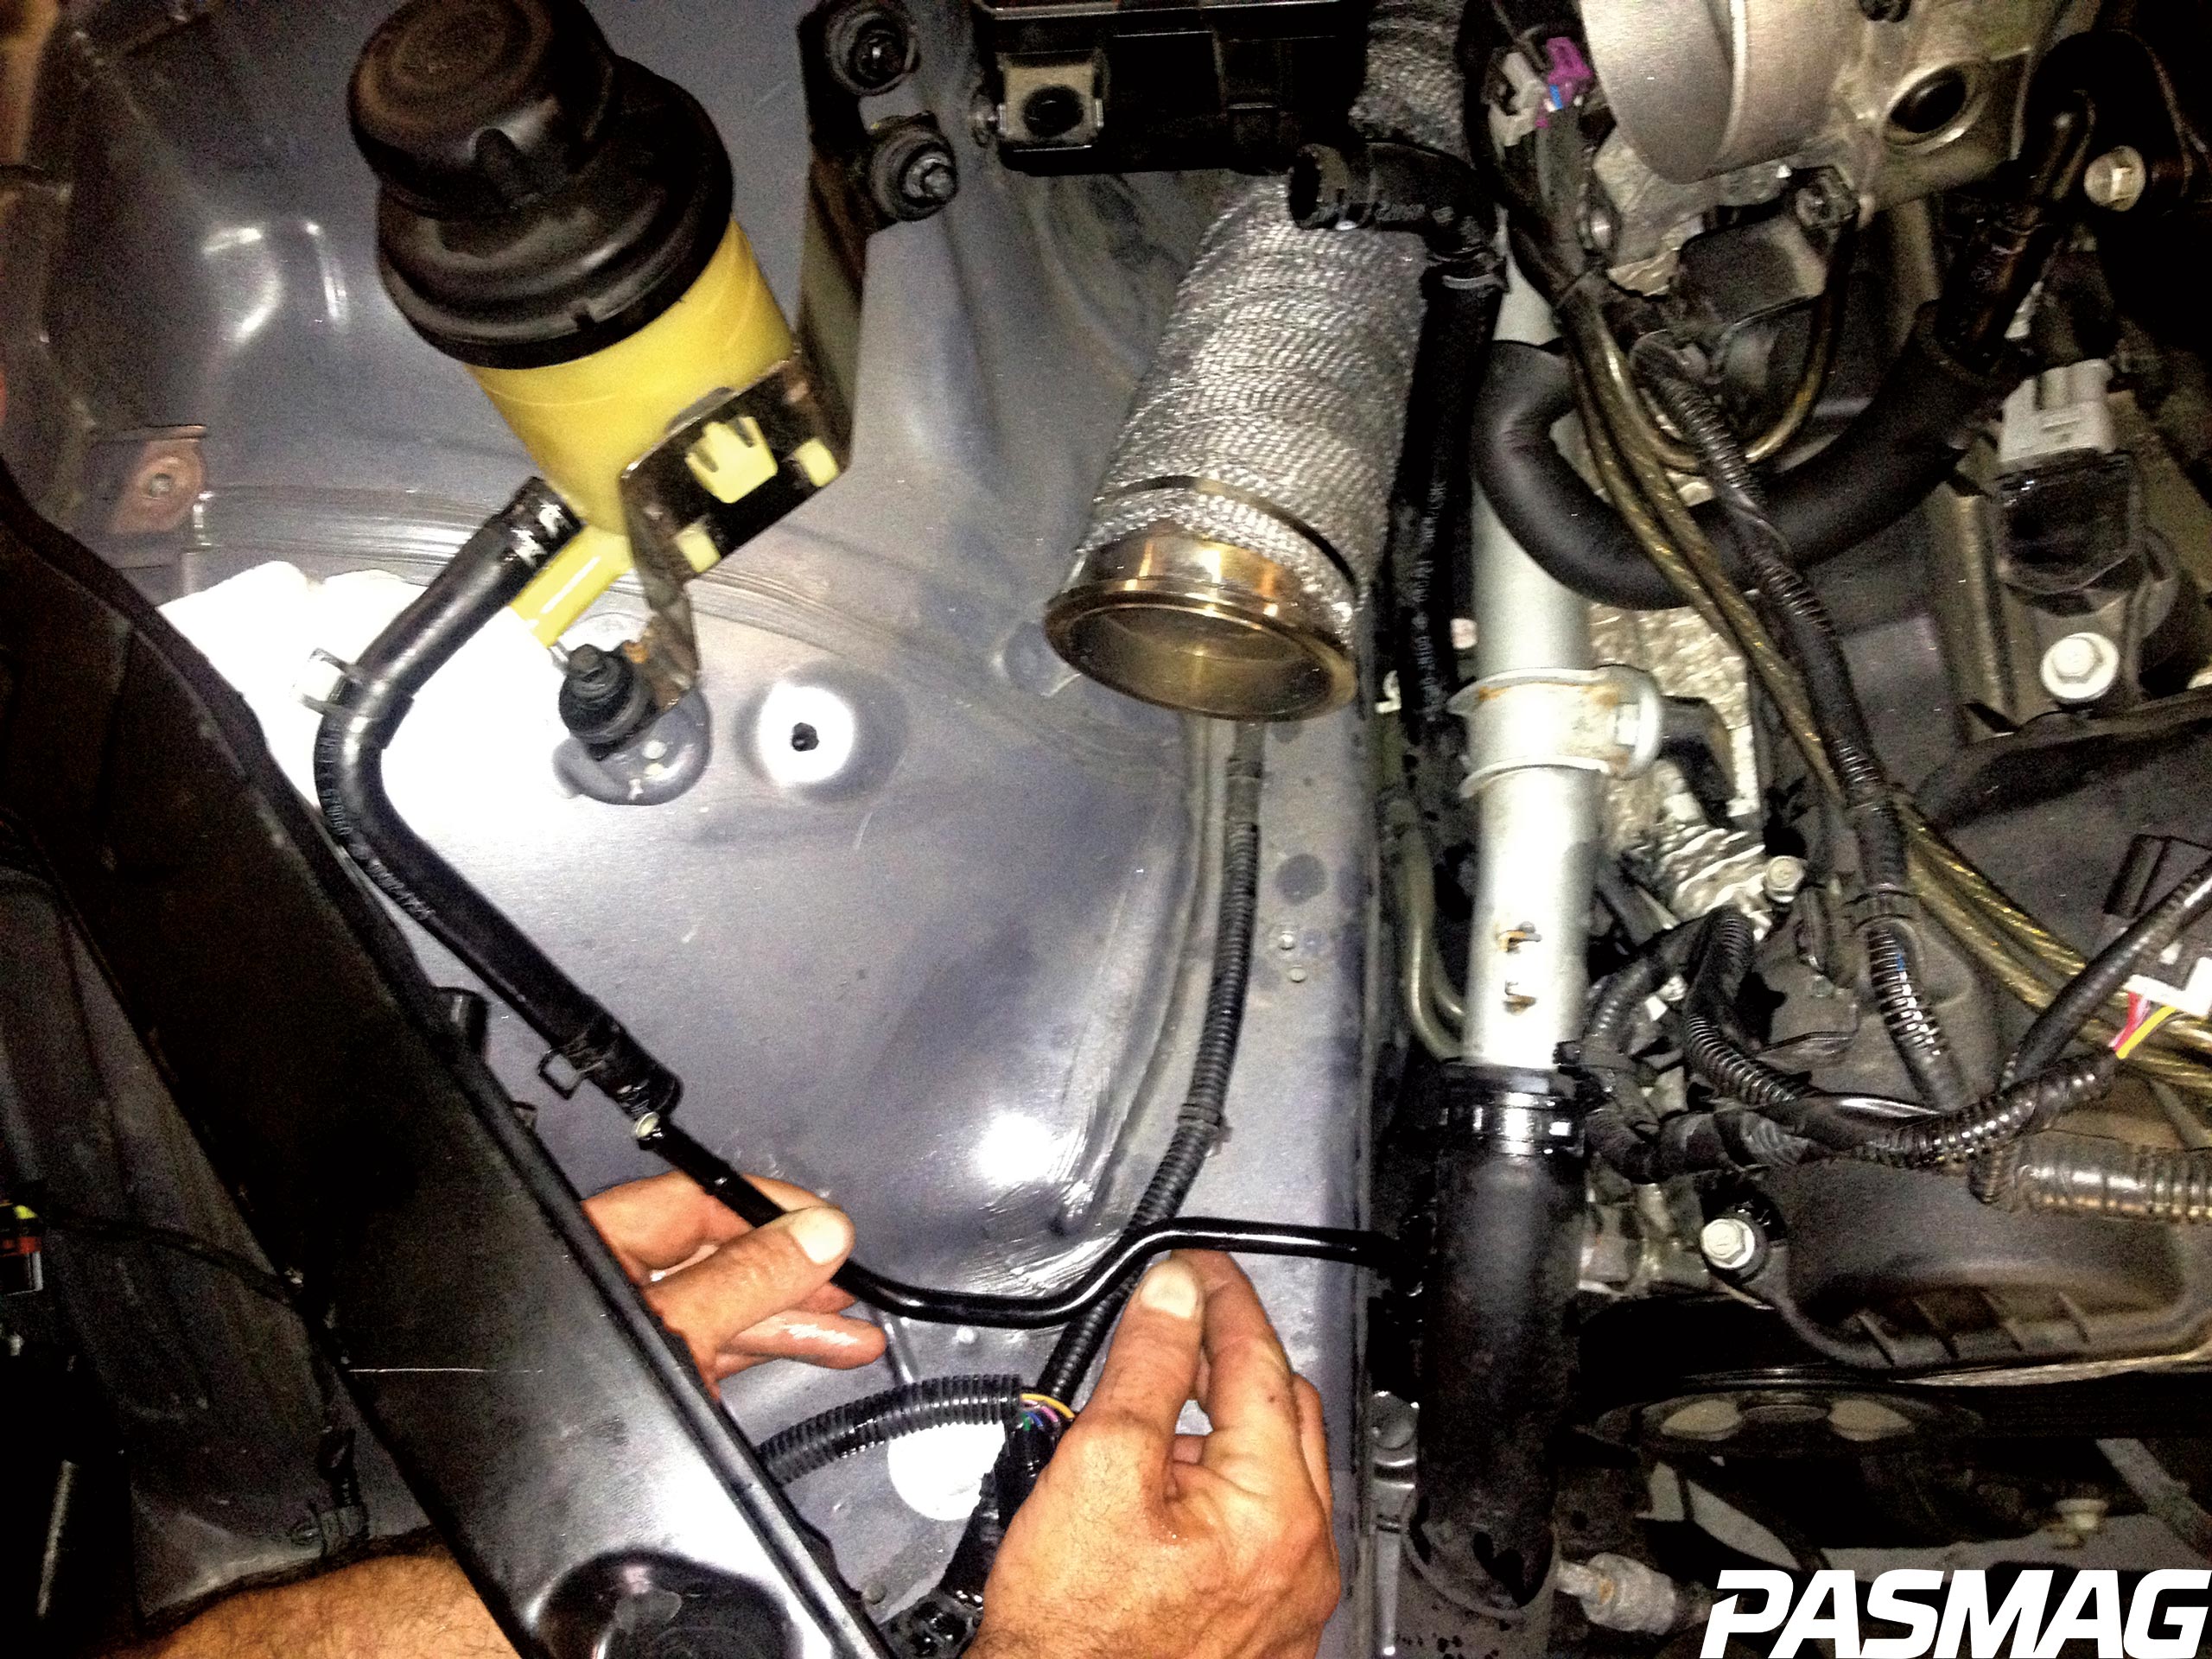
Now we’re beginning to button everything up! From here, install the oil filter adapter, oil feed fitting, and oil feed line. Attach the adapter to the engine block, and then attach the fitting and line to the adapter leaving the other end unattached for a future step. Next locate the turbo oil drain line and attach it to the turbocharger oil drain fitting, then to the oil pan fitting installed earlier.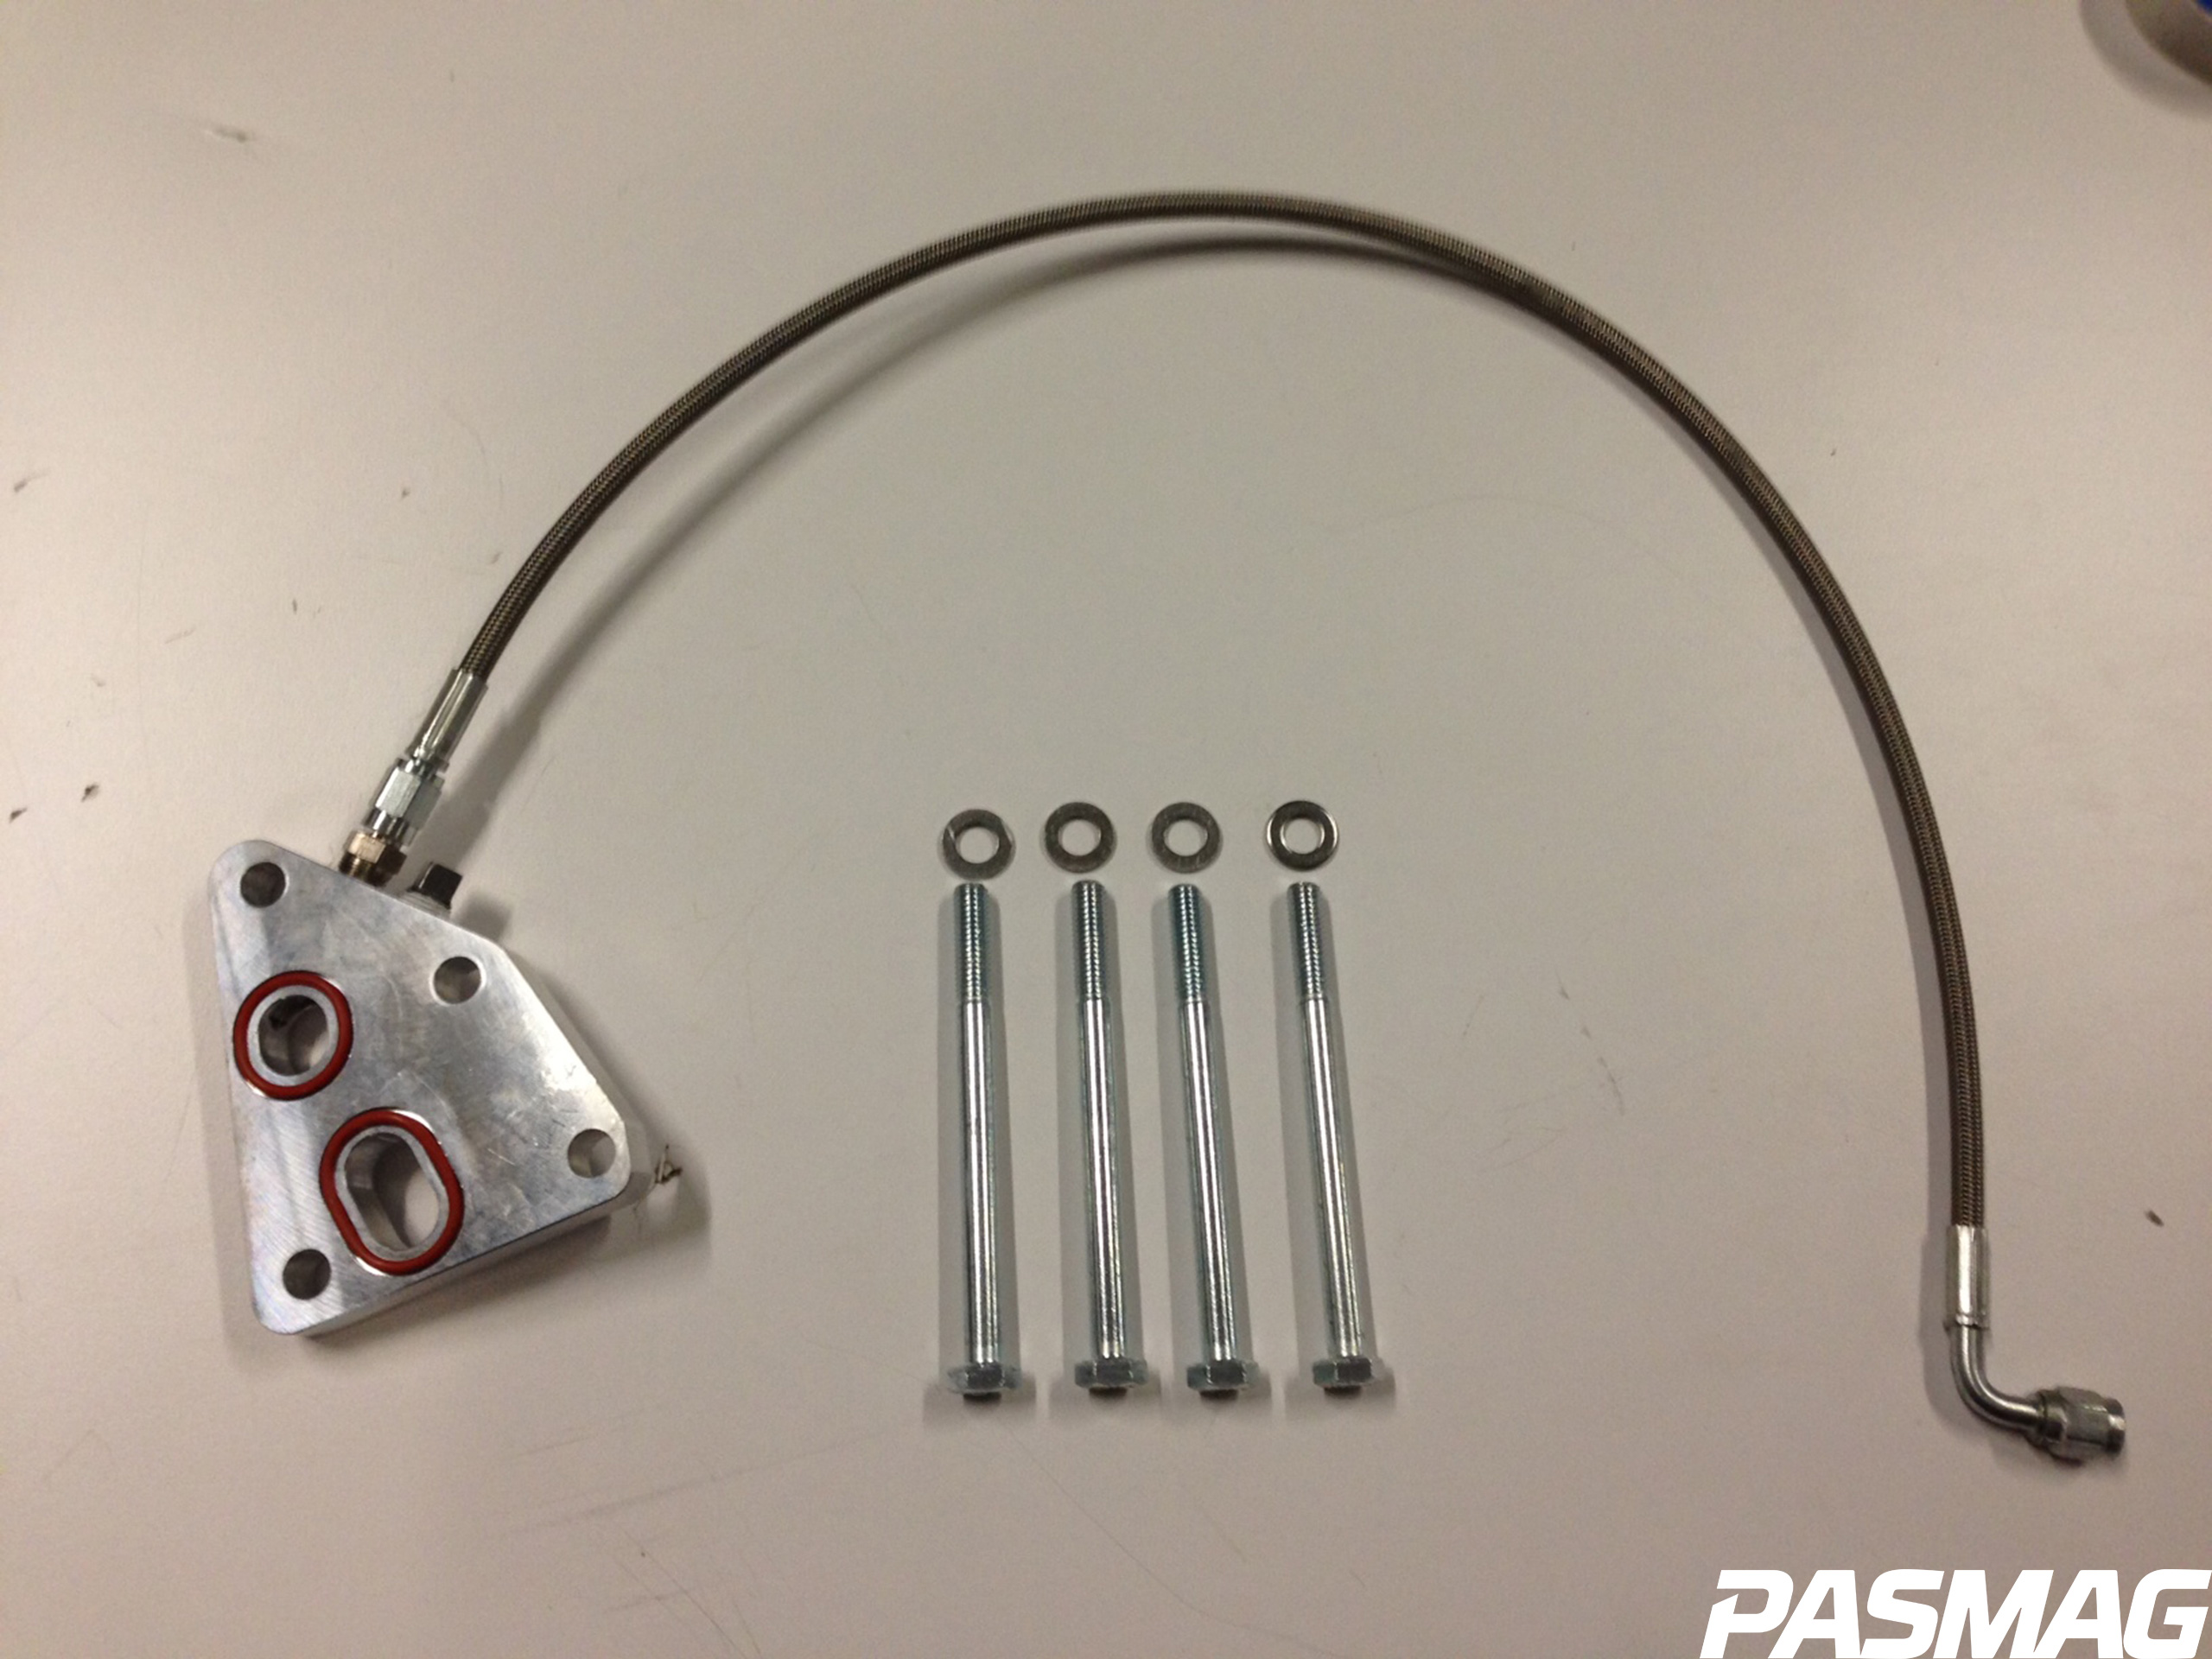
Next, install the supplied vacuum lines from the intake plenum to the wastegate using the outlined steps provided in the installation manual that came with the kit.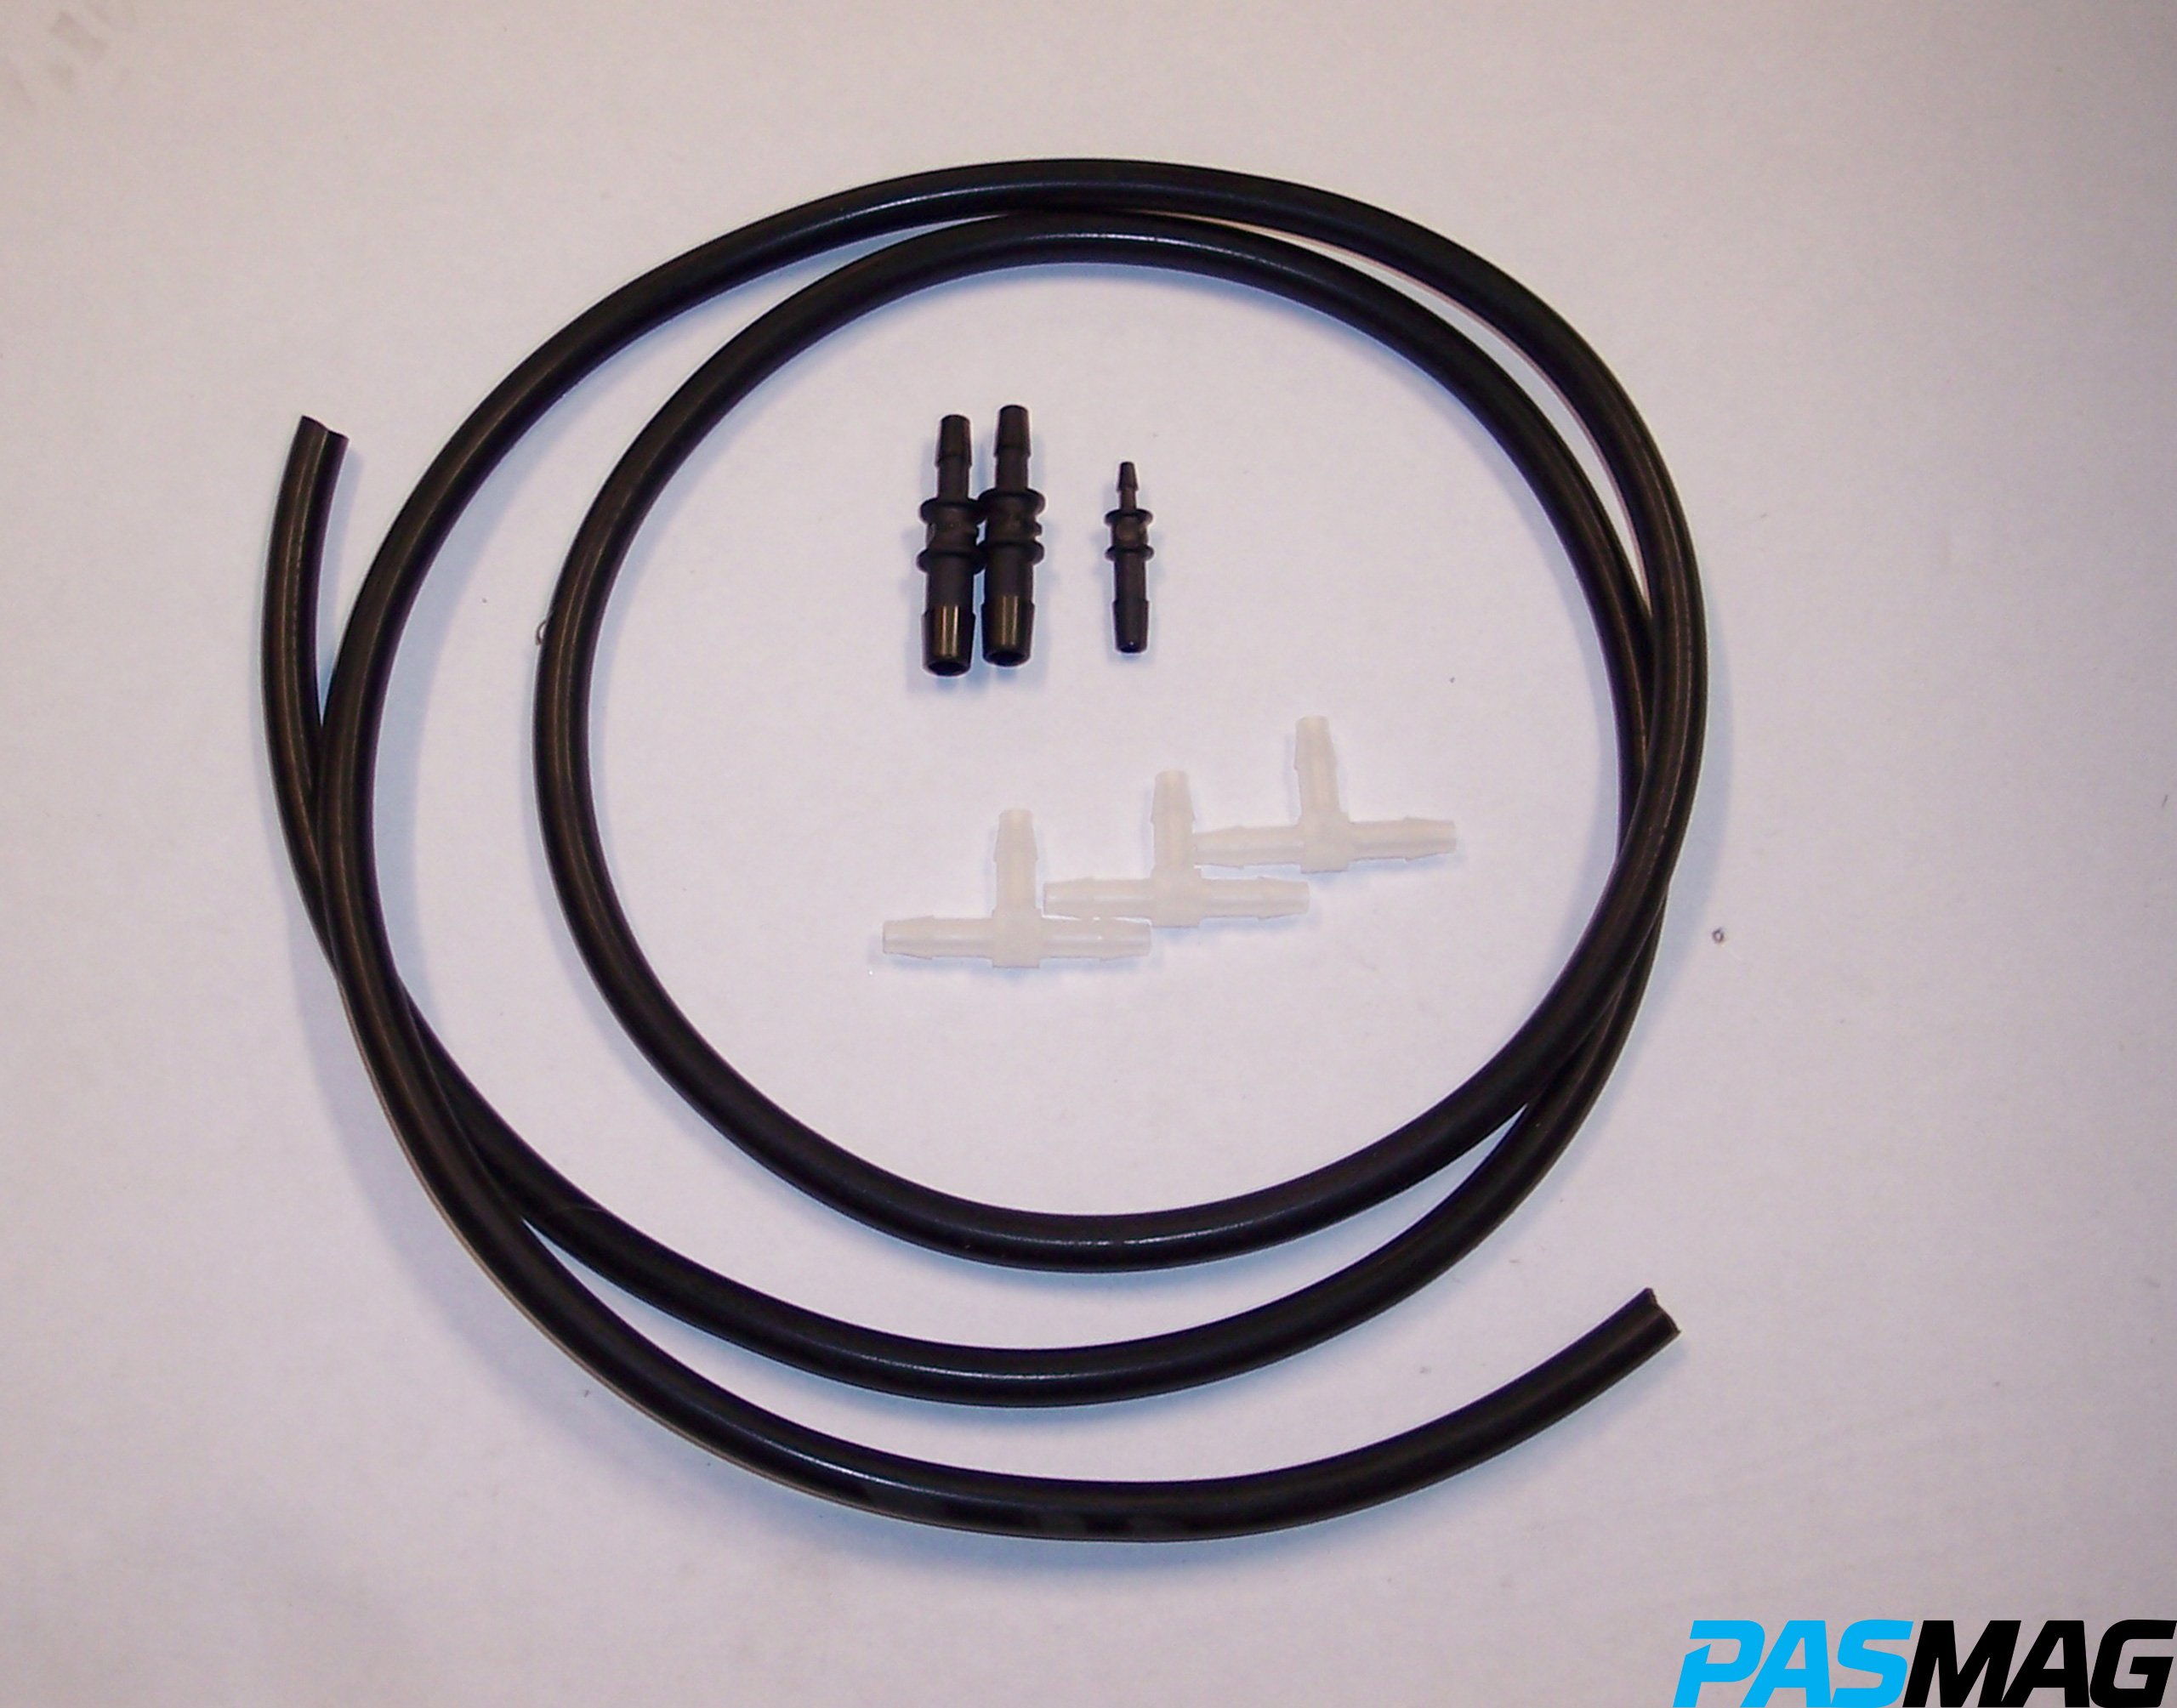
Locate the factory washer fluid reservoir removed earlier and cut the filler neck 3.5 inches from the mounting tab. Insert the factory filler neck into the supplied rubber filler hose. Remove the OEM pump and level sensor from the factory reservoir and install them into the supplied reservoir. Re-install the new washer fluid reservoir and filler hose into the factory location and re-connect all of the sensors. You may re-fill the reservoir with new washer fluid at this time.

*Note: If your Genesis Coupe features a six-speed automatic transmission, please refer to the supplied installation manual for transmission line relocation instructions.
We’re nearing the end! It’s time to install the injectors, and prime the turbocharger. Start by filling the engine with new motor oil. Next, reconnect all ECU and electrical connections to the factory MAF and other sensors that were unplugged. Now refer to the factory manual for instructions on removing the fuel injectors. With the injectors removed, remove the coil packs and re-connect the negative terminal on the battery. Crank the motor until oil comes out of the disconnected turbo oil feed line. Pump through enough oil to make sure the line is full and clean of any debris. Attach the line to the turbo and crank the motor a few more times. 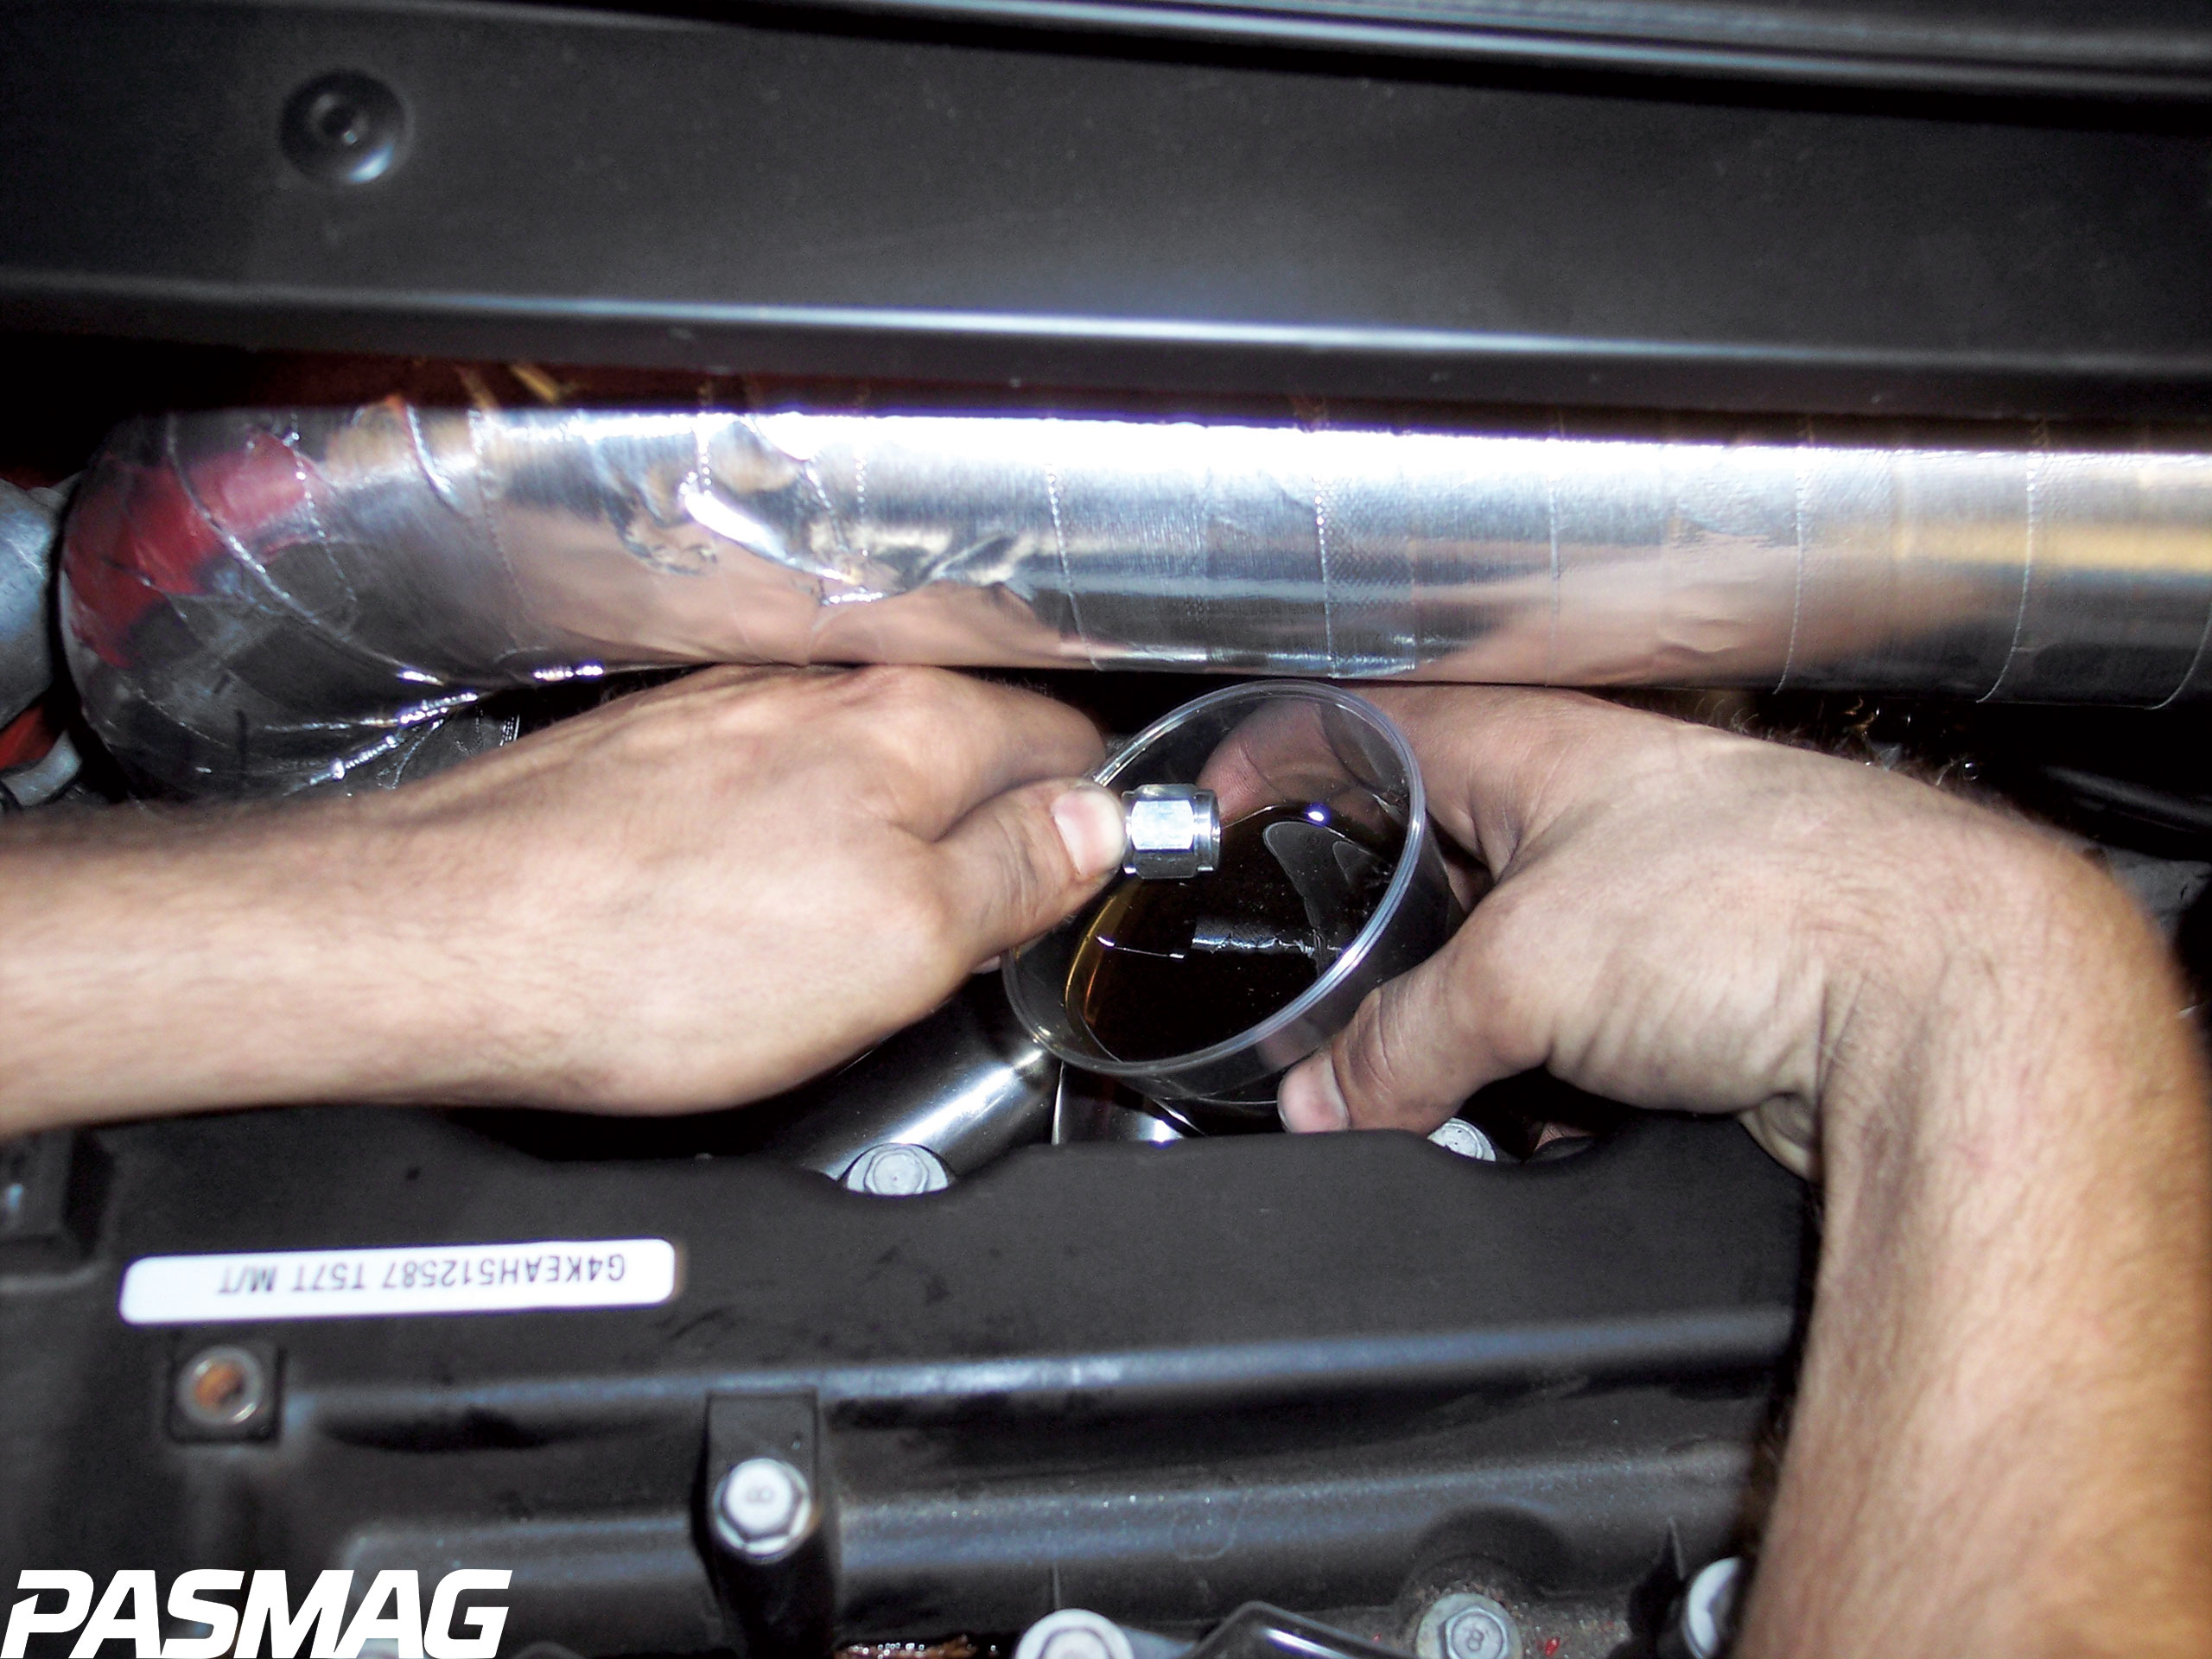
Re-install the factory coil packs and supplied 600 cc fuel injectors reversing the steps provided in the factory manual.
With everything buttoned up and connected double check your work. Once you’re ready, start the car and let it run for five minutes. While the car is running, check for any oil leaks, exhaust leaks, vacuum leaks, etc. Once everything checks out, let the engine cool completely and re-tighten all of the bolts on the hot side of the turbo and exhaust.
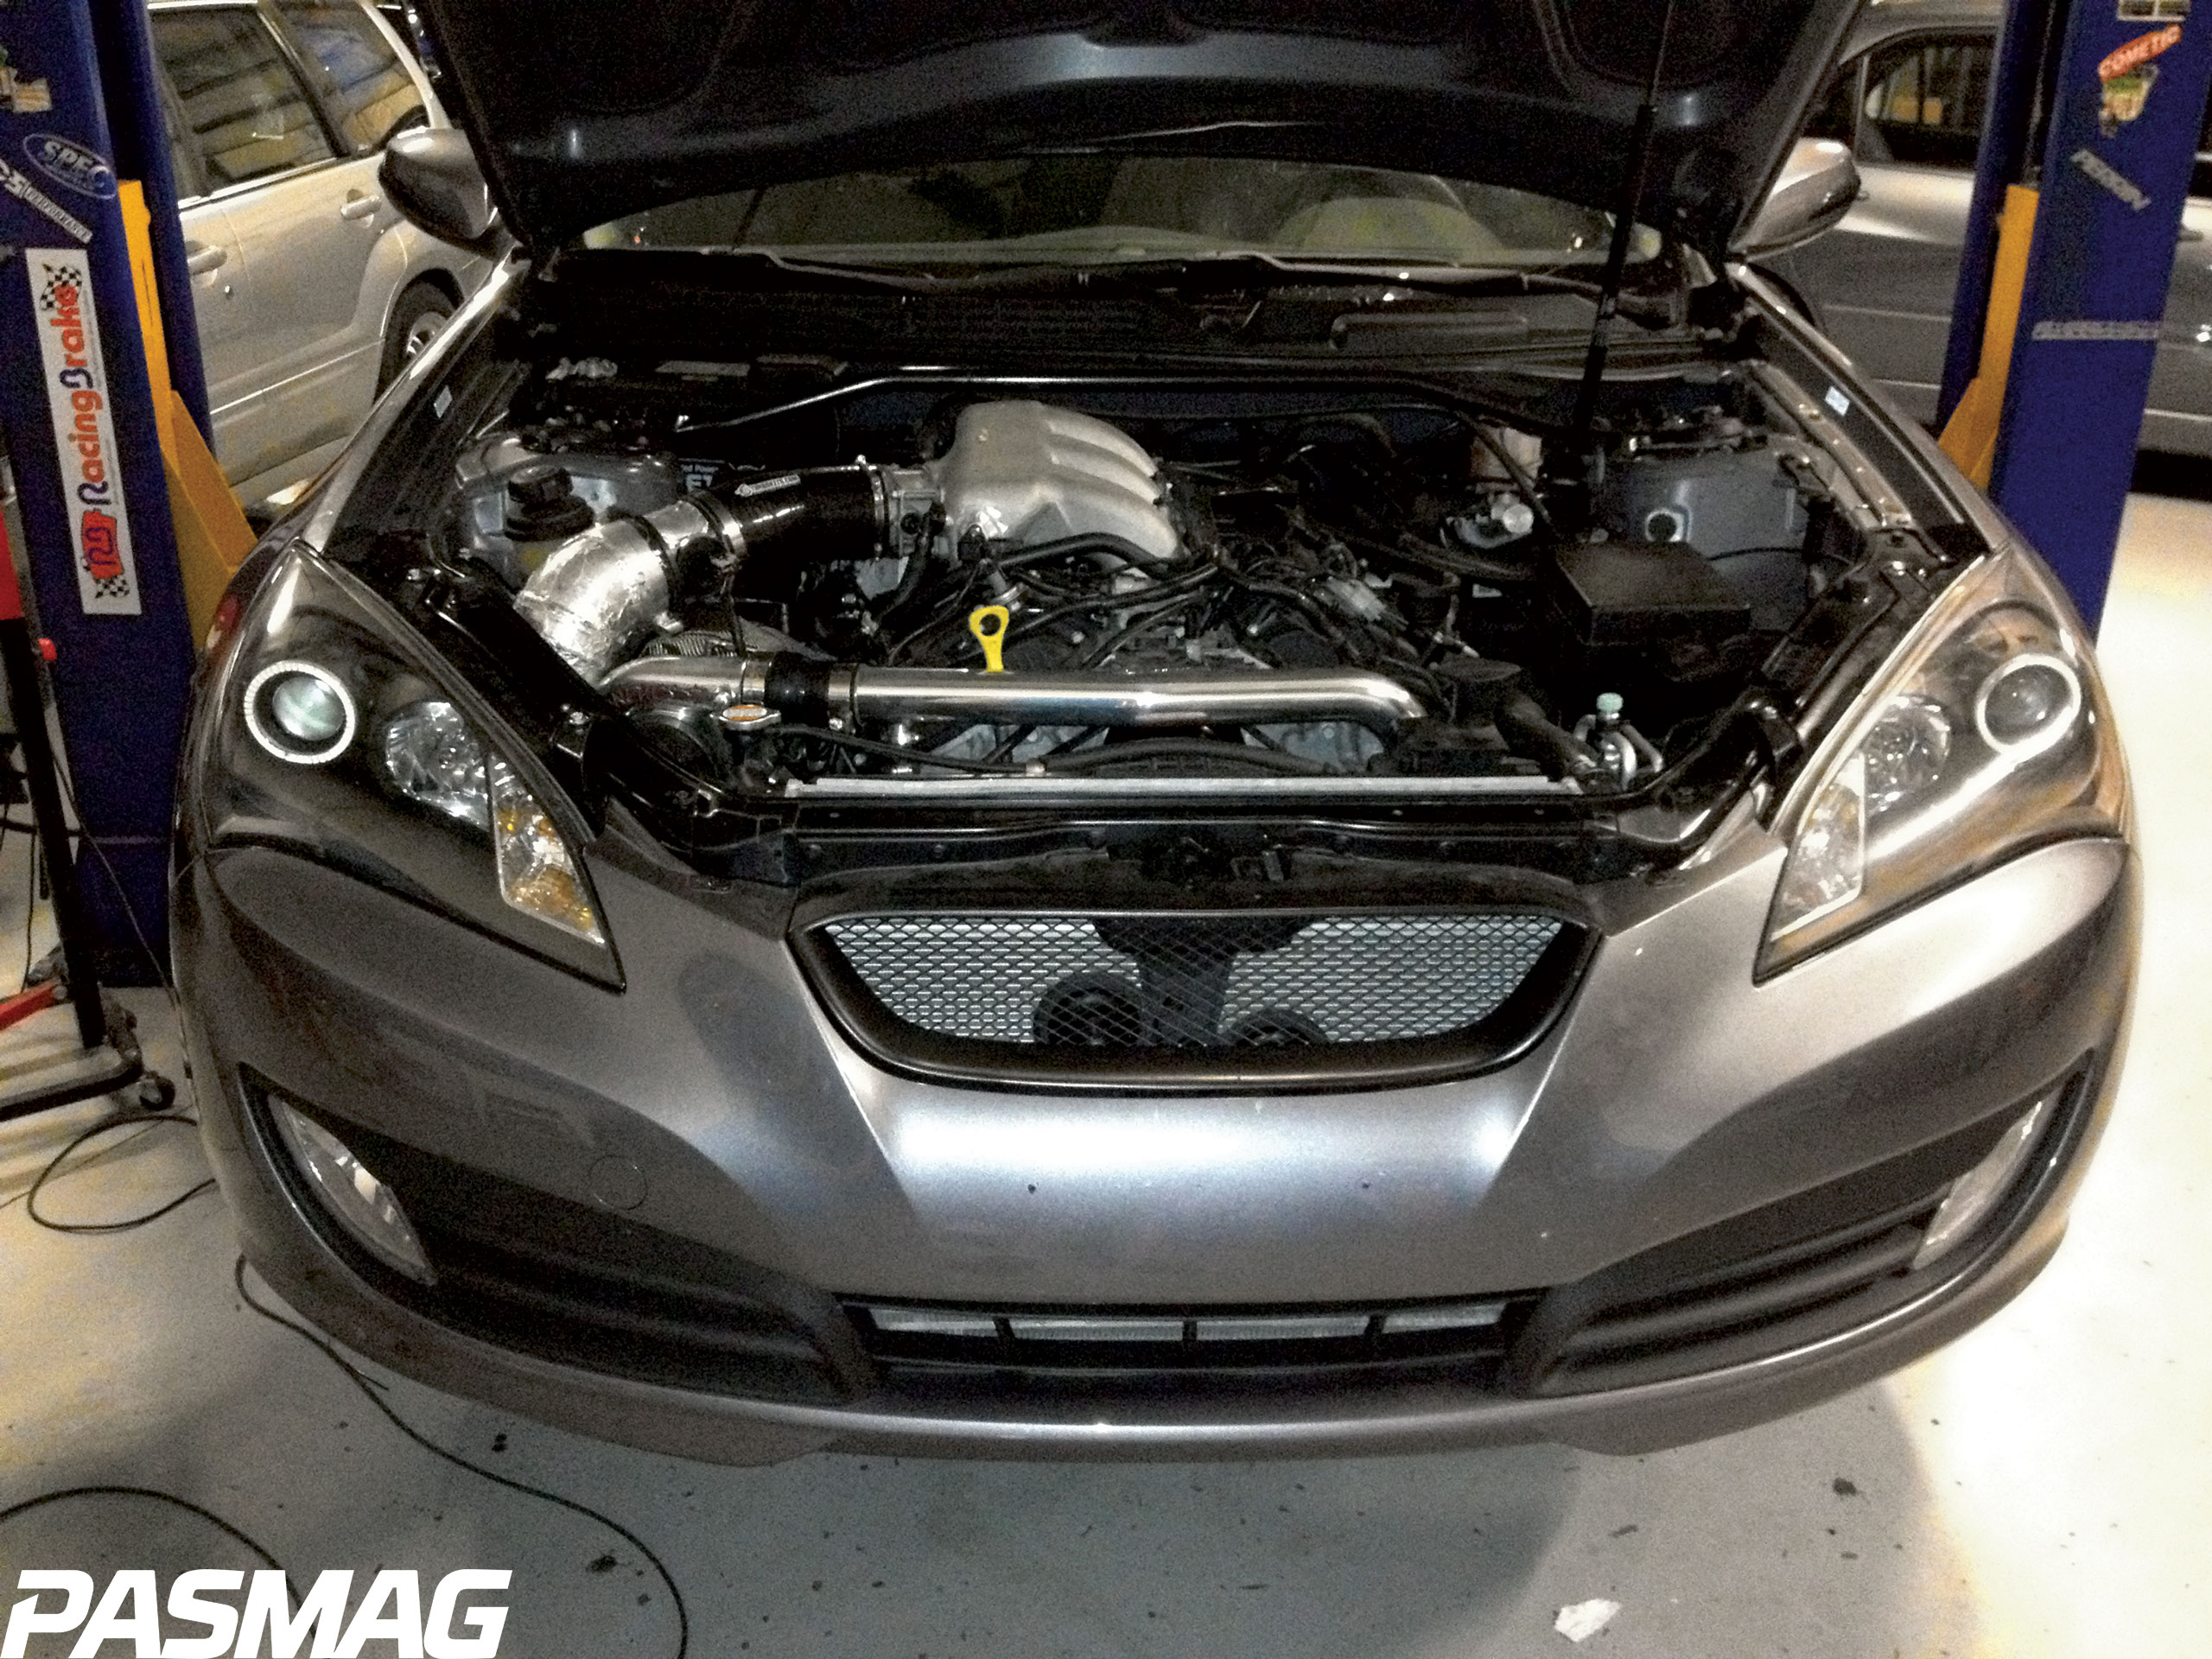
Finish the installation by re-installing the headlights, bumper cover, etc., re-flash the ECU and enjoy your new 450 horsepower Genesis Coupe!